 Save
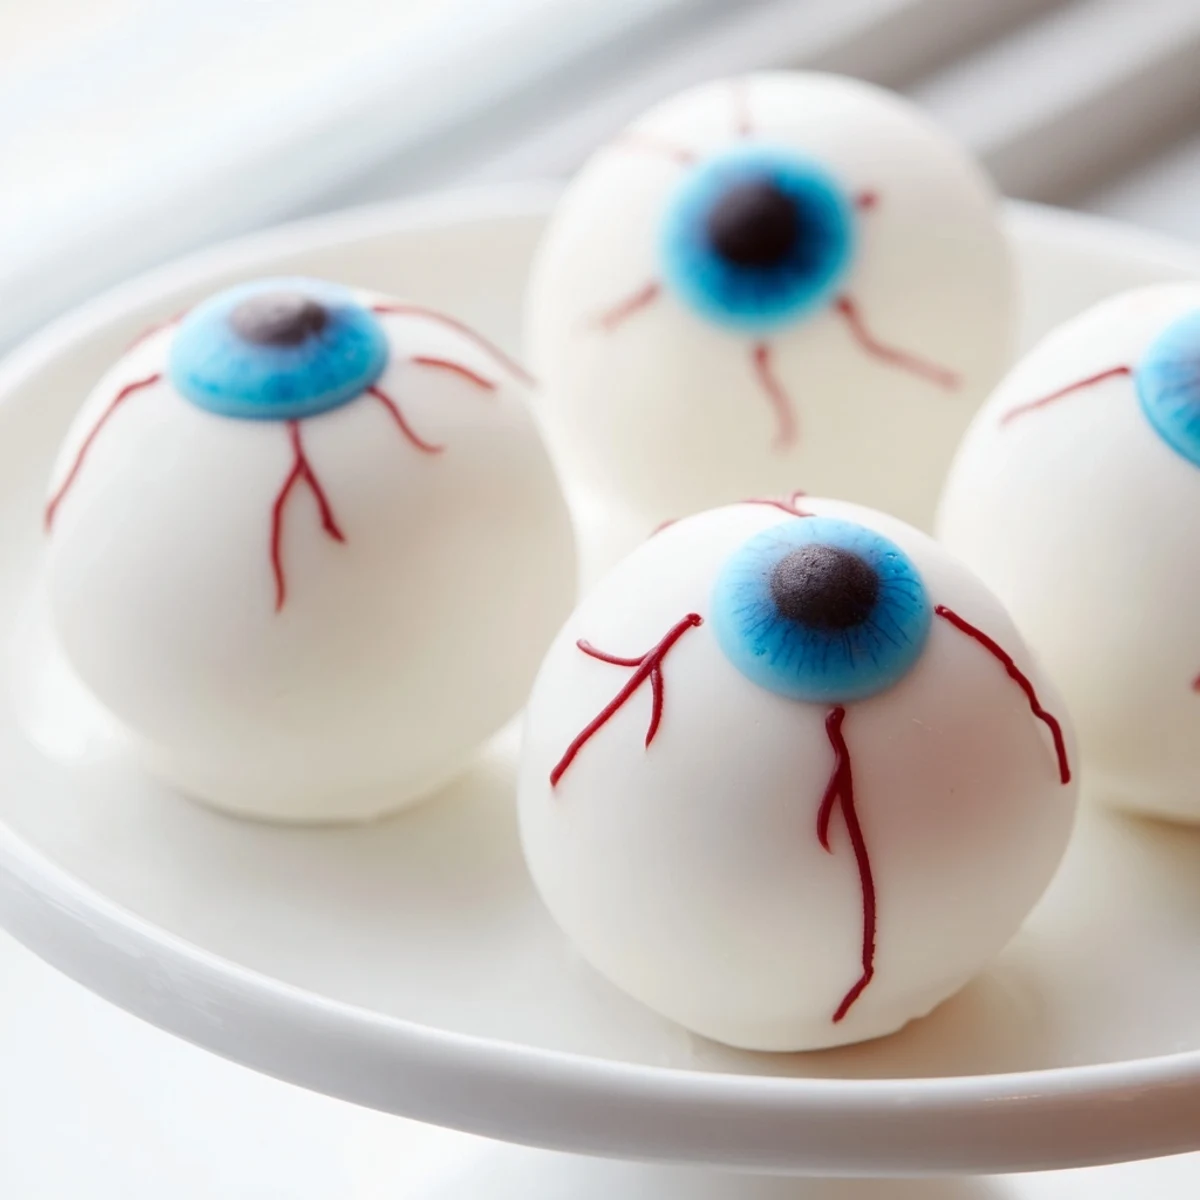
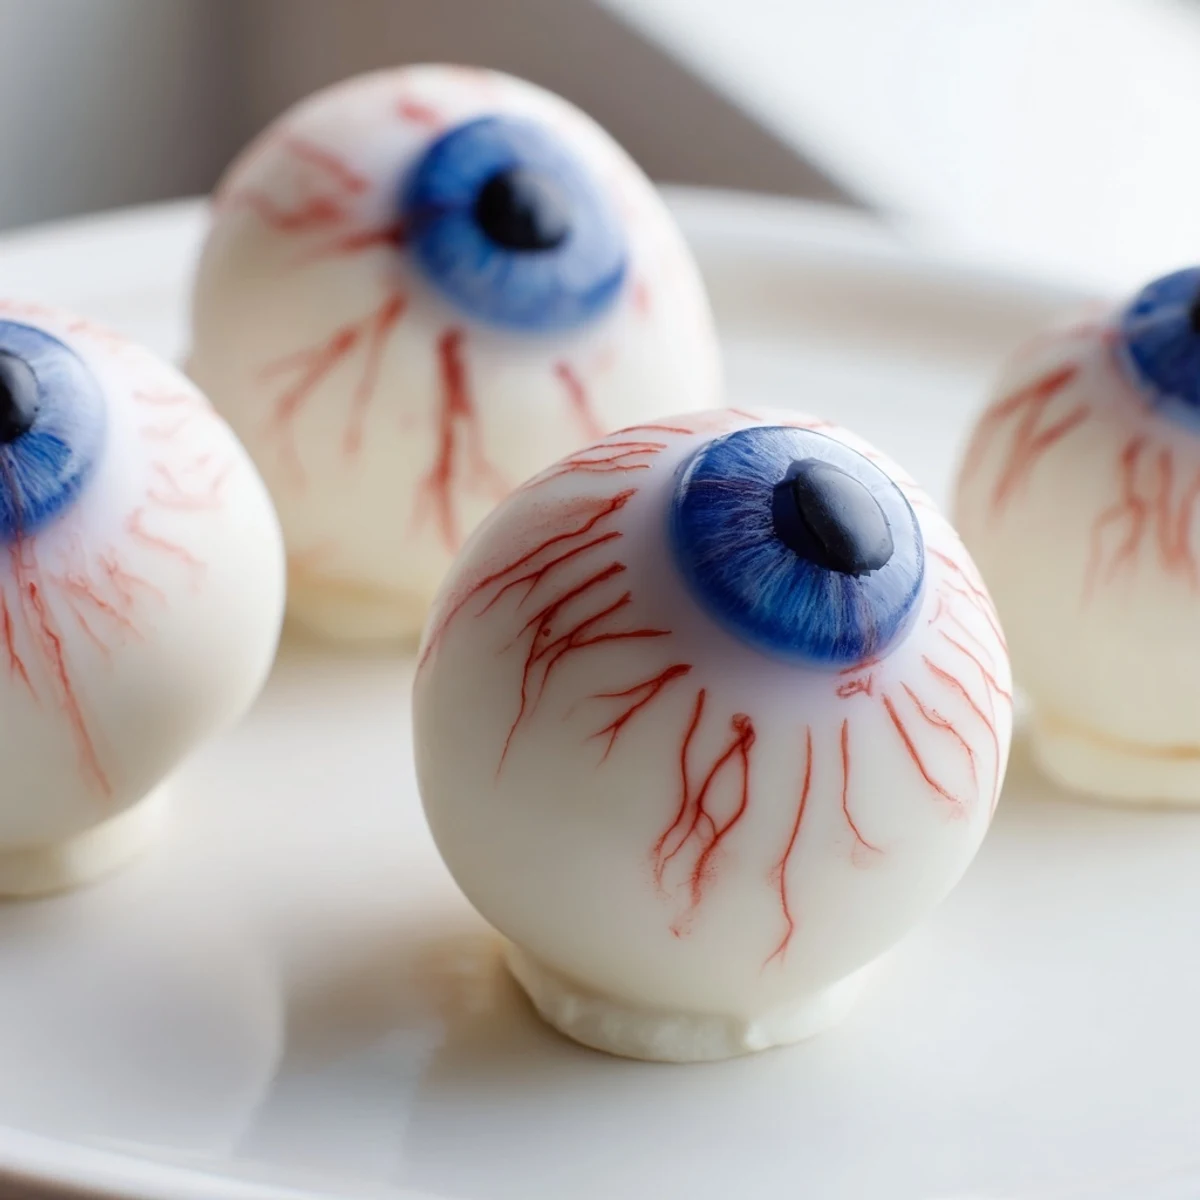
Save Create these spooky Halloween cake eyeballs that are sure to be the hit of your party. Moist vanilla cake is combined with creamy cream cheese frosting, rolled into balls, and coated in smooth white chocolate. Each eyeball gets a colorful iris and dark pupil, finished with red gel veins for an authentic creepy look. These treats are not only visually impressive but also incredibly delicious, making them perfect for Halloween gatherings, school parties, or festive celebrations.
My daughter demanded we make something that would actually scare her friends at the Halloween class party, and when I suggested these creepy cake eyeballs, she practically dragged me to the kitchen. We spent a Sunday afternoon getting chocolate everywhere while trying to make each pair look progressively more disturbing than the last. Now it is officially not Halloween in our house until a batch of these googly treats is staring back at us from the counter.
Last year I made three dozen for our neighborhood potluck and watched grown men hesitate before picking one up, then proceed to eat four in a row. There is something ridiculously satisfying about biting into something that looks like it is watching you judgmentally. My neighbor asked for the recipe before she even finished her first eyeball.
Ingredients
- 1 box vanilla cake mix: Use homemade vanilla cake if you prefer, but honestly the boxed version saves precious time and nobody can tell the difference once everything is mixed together
- 3 large eggs: Room temperature eggs incorporate better into the batter for a more even crumb
- 120 ml vegetable oil: Oil keeps the cake incredibly moist which is essential since we are rebaking it into balls
- 240 ml water: Follow the amount on your specific cake mix box as formulations vary slightly
- 100 g cream cheese: Must be fully softened or you will end up with lumpy frosting and nobody wants lumpy eyeballs
- 100 g unsalted butter: Also softened to room temperature for that silky smooth cream cheese frosting consistency
- 200 g powdered sugar: Sift it first to avoid those annoying little powder bombs that go poof all over your kitchen
- 1 tsp vanilla extract: Pure vanilla makes a noticeable difference in the final flavor profile
- 400 g white chocolate: Candy melts actually work better than real white chocolate for coating because they set up firmer
- 50 g dark chocolate: This is for those disturbingly realistic pupils that make people do double takes
- 50 g blue or green candy melts: Pick your favorite eye color or make a mix of both for variety
- Red gel food coloring: The gel works better than liquid for drawing those squiggly blood vessels
Instructions
- Bake and completely cool your cake:
- Follow the package directions for your vanilla cake mix and let it cool entirely, otherwise you will end up with mushy instead of perfectly textured cake balls
- Transform cake into fine crumbs:
- Use clean hands to break apart the cooled cake into a large bowl and keep working it until you have uniform fine crumbs throughout
- Prepare the creepy creamy filling:
- Beat together the softened cream cheese, butter, powdered sugar, and vanilla until you have a smooth, lump-free frosting that is thick enough to hold its shape
- Combine crumbs and frosting:
- Mix the frosting into the cake crumbs gradually until the mixture holds together when you press it, but do not add too much or the balls will be too soft to dip
- Form your eerie eyeballs:
- Scoop tablespoon portions and roll them into 24 smooth balls, placing them on a parchment-lined tray before freezing for exactly 20 minutes so they firm up enough for dipping
- Create the white coating:
- Melt the white chocolate or candy melts according to package directions, working in short bursts to prevent seizing or burning
- Dip and set the base:
- Carefully dip each chilled ball into the white coating, letting excess drip off before returning to the tray to set completely
- Add the colorful iris:
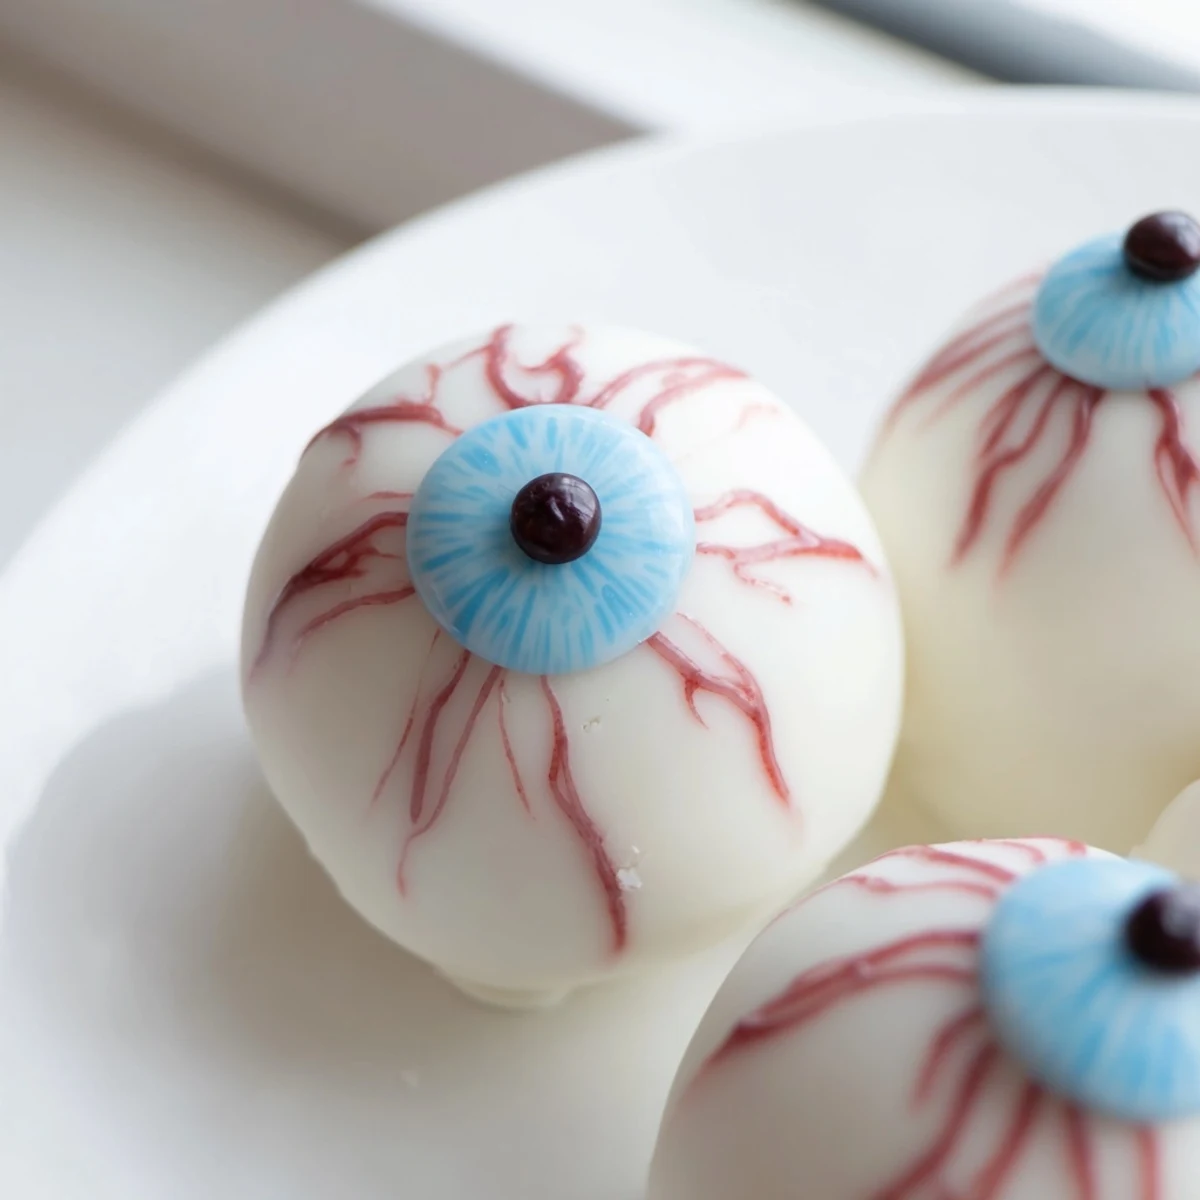
- While the white coating is still slightly tacky, place a small circle of colored candy melt in the center of each ball to create that startlingly realistic iris effect
- Finish with disturbing pupils:
- Once everything has set, add a tiny dot of dark chocolate or black candy melt in the exact center of each colored iris for those properly creepy pupils
- Draw the spooky veins:
- Use red gel food coloring to squiggle irregular blood vessel lines radiating from the colored iris toward the edge for that freshly plucked look
 Save
Save These became legendary after my daughter brought them to school and the teacher actually had to ask parents if they were too scary for the classroom. The kids thought they were absolutely hilarious and the adults were strangely fascinated by how realistic they looked.
Making Them Ahead
I have learned through multiple Halloween parties that these actually taste better after chilling overnight in the refrigerator. The flavors meld together and the coating firms up perfectly, making them easier to transport without getting those dreaded fingerprints all over the white chocolate.
Customization Ideas
Last year we experimented with making some with cat-eye pupils using vertical oval shapes instead of round ones, which was unexpectedly simple using a toothpick to shape the colored candy melt before it set. You can also make bloodshot eyes by being more generous with the red gel veins.
Serving Suggestions
These look dramatically disturbing arranged on a dark serving platter or cake stand, especially if you can find some fake cobwebs to drape around the edges. For a truly unsettling presentation, consider placing them on a bed of crumbled chocolate cake to look like dirt.
- Stick them in small shot glasses filled with colored sugar for individual serving portions
- Arrange them in concentric circles on a round platter to create a giant eyeball effect
- Keep a small bowl of warm water nearby to clean red gel off your fingers between decorating each eyeball
 Save
Save Happy haunting and may your Halloween be filled with deliciously disturbing treats that everyone is afraid to eat but cannot resist.
Recipe FAQs
- → How far in advance can I make these cake eyeballs?
-
You can prepare the cake balls and coat them with white chocolate up to 2 days in advance. Store them in an airtight container in the refrigerator. Add the final decorative details like the colored iris, pupil, and red veins on the day of serving for the freshest appearance.
- → Can I use homemade cake instead of cake mix?
-
Absolutely. You can use 400g of your favorite homemade vanilla cake or even pound cake. The key is to crumble it finely so it combines well with the frosting. Brownies work wonderfully too for a richer, darker base.
- → What other colors work for the iris?
-
While blue and green create realistic eye colors, you can get creative with Halloween themes. Purple, orange, or even bright yellow irises look fantastic and add variety to your platter. Use colored candy melts or tint white chocolate with gel food coloring.
- → My white chocolate coating is too thick, what should I do?
-
If your white chocolate is too thick for smooth dipping, add 1 teaspoon of coconut oil or vegetable shortening and stir gently. This thins the coating without affecting the taste or setting time. Avoid adding water as it will cause the chocolate to seize.
- → How do I prevent the cake balls from falling off the stick?
-
First, always chill the shaped cake balls for at least 20 minutes before coating. When using sticks, dip the tip in melted chocolate first, then insert into the ball. The chocolate acts as glue. Let it set for a few minutes before dipping the entire ball.
