 Save
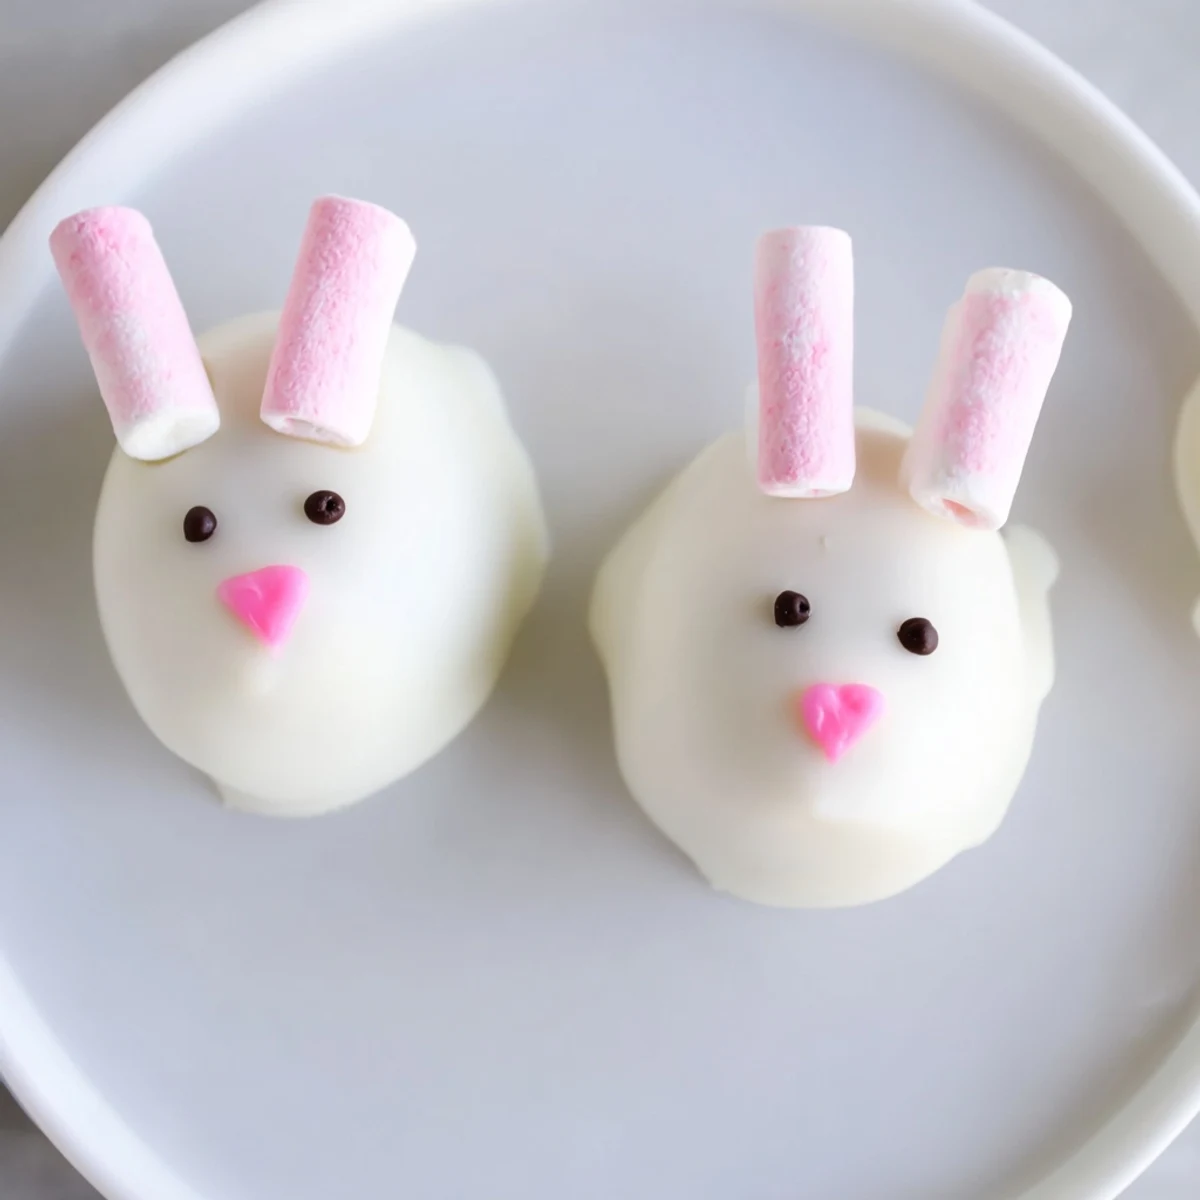
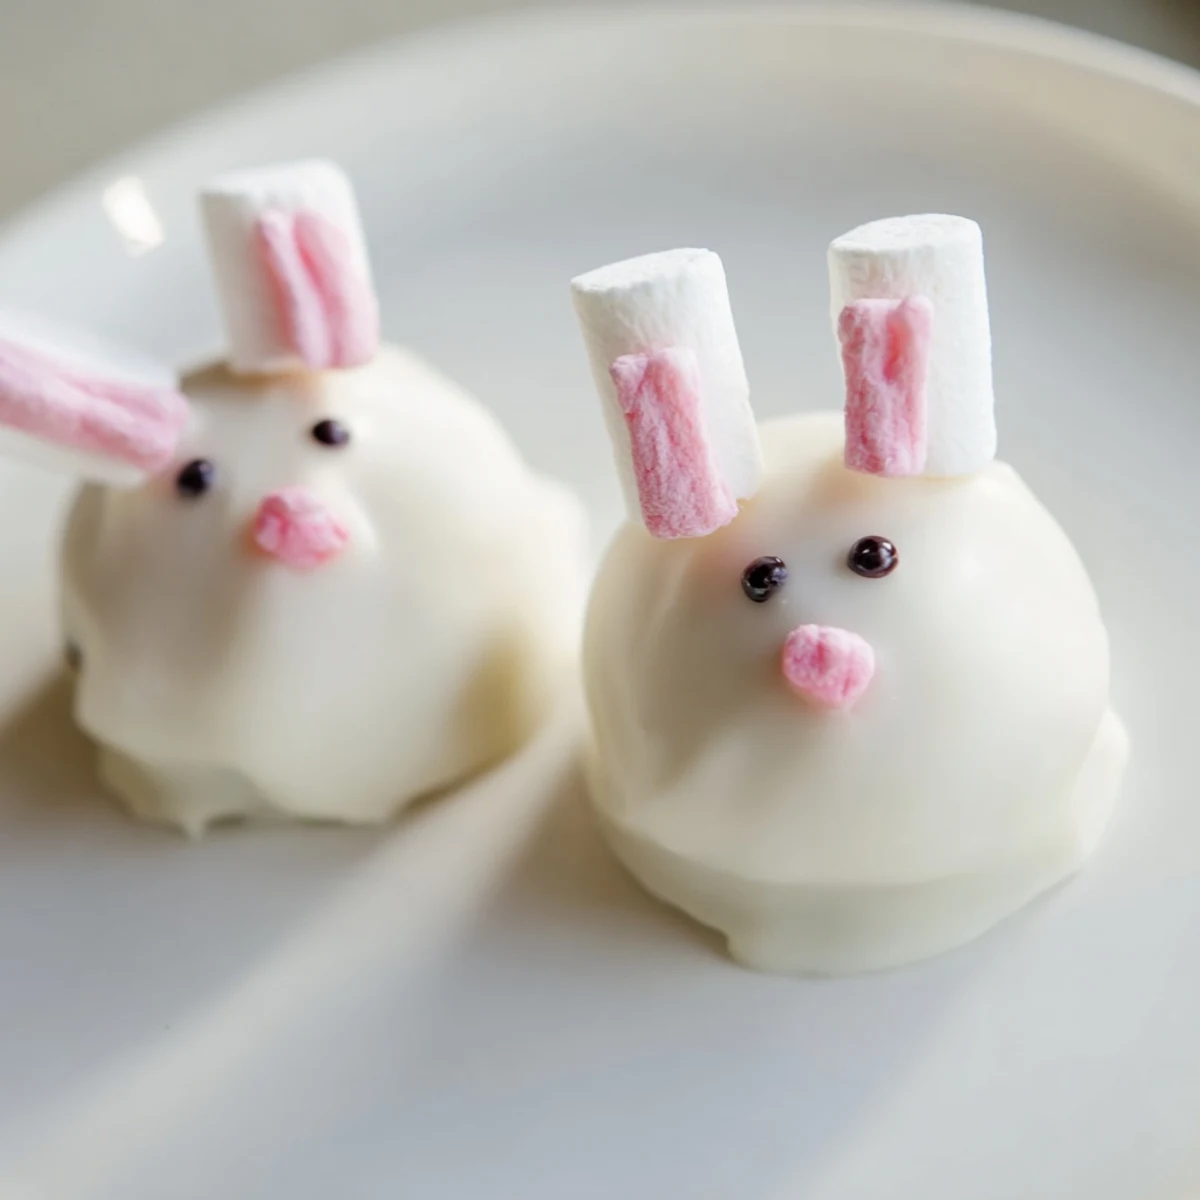
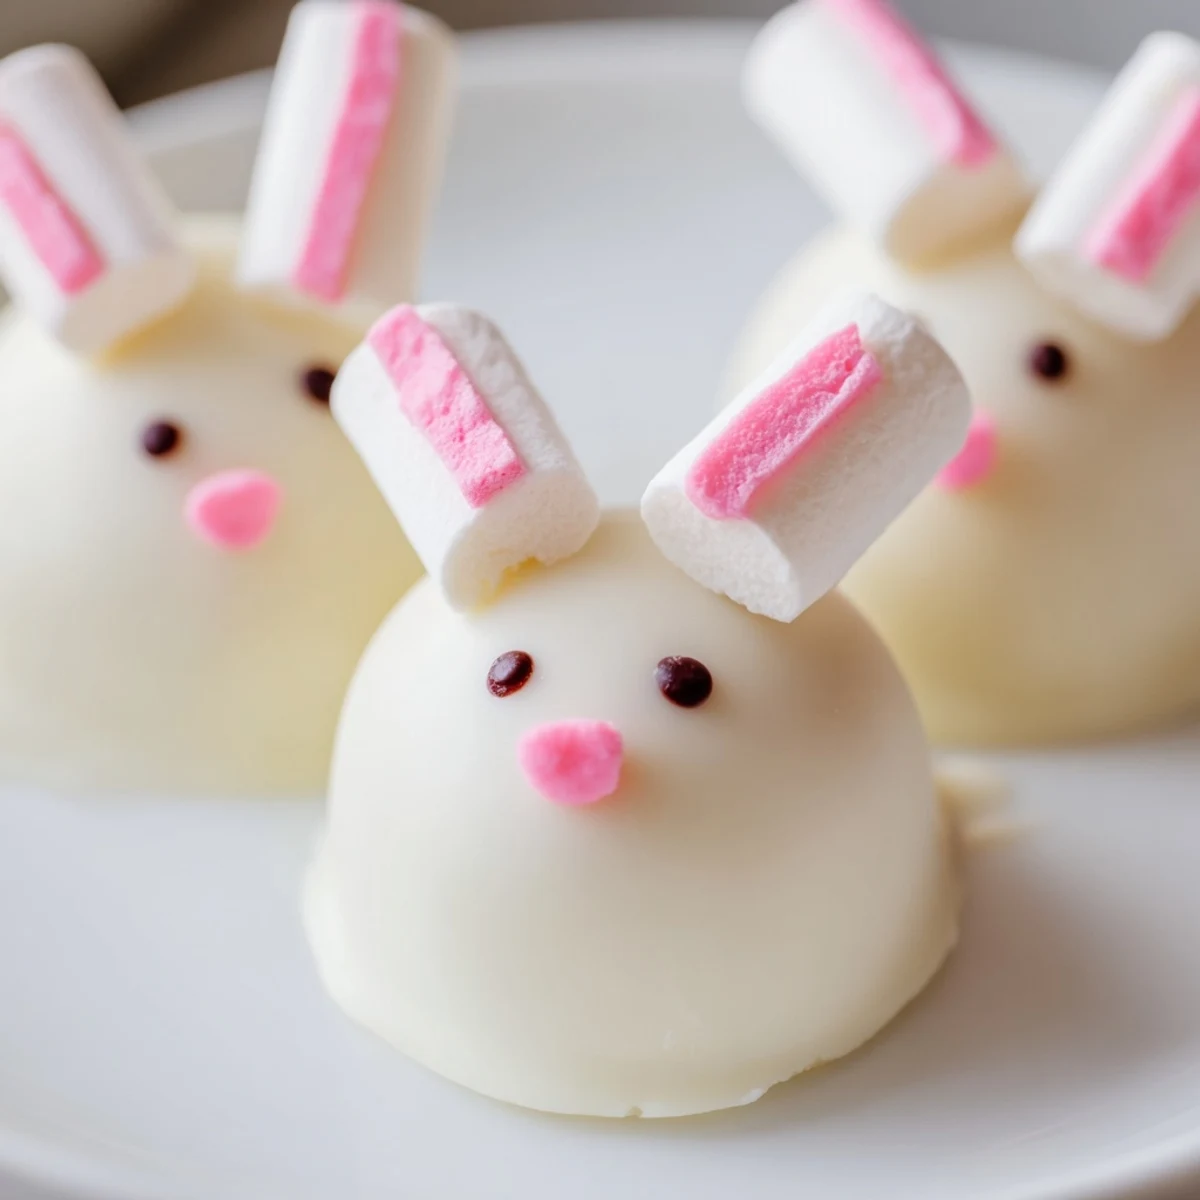
Save These charming chocolate-coated treats combine crushed Oreo cookies with cream cheese to form smooth truffles, shaped into adorable bunny heads. Each piece gets dipped in white chocolate and decorated with mini marshmallow ears, fluffy tails, pink candy melt noses, and dotted eyes.
The process involves pulsing Oreos into fine crumbs, blending with softened cream cheese until a dough forms, then rolling into balls and gently shaping into oval bunny profiles. After freezing briefly, each piece receives a complete white chocolate coating before the marshmallow details are attached while the coating remains wet.
The pink candy melts add adorable noses and inner ear details, while edible markers create the eyes. These festive treats need 30 minutes chilling time to set completely and stay fresh for up to 5 days refrigerated.
My niece has this uncanny ability to request impossibly cute desserts precisely 48 hours before any family gathering. Last Easter, she texted me a photo of those internet-famous bunny Oreo balls with 'can we make these for Sunday??' and three heart emojis. I'd never made them before, but something about those chocolate-dipped bunny faces with marshmallow tails made me say yes before I'd even checked my pantry for white chocolate.
I made my first batch on a Friday night while listening to a podcast, happily crushing Oreos in my food processor until my kitchen smelled like chocolate cookies. The dough comes together so fast that I had 24 little bunny heads shaped and chilling before I'd finished episode one. My husband walked in, saw the tray of frozen oval shapes, and asked why I was making snowmen in April.
Ingredients
- Oreo cookies: Regular Oreos work best here because Double Stuf makes the filling too soft to hold its shape
- Cream cheese: Make sure this is properly softened or you'll get lumps in your cookie mixture
- White chocolate or candy melts: Candy melts give you that smooth coating that sets up perfectly, but white chocolate tastes better
- Mini marshmallows: These get cut in clever ways to make both the fluffy tails and the ears
- Pink candy melts or food coloring: A tiny bit of pink brings the bunny faces to life instantly
- Edible black marker: Much easier than piping eyes, and you can fix mistakes with a damp paper towel
Instructions
- Make the Oreo dough:
- Pulse the Oreos in your food processor until they're completely fine crumbs, then add the softened cream cheese and blend until it comes together into a smooth, dark dough that holds its shape when you squeeze it.
- Shape the bunnies:
- Scoop about a tablespoon of mixture and roll it into a ball, then gently press and shape it into a slightly oval bunny head shape, placing them on a parchment-lined baking sheet as you work.
- Prep the marshmallow pieces:
- Cut mini marshmallows in half crosswise for the fluffy tails, then cut several marshmallows lengthwise into thin slivers for the ears, keeping everything separated on a small plate.
- Freeze the heads:
- Place the baking sheet in the freezer for at least 30 minutes because frozen balls dip much more cleanly than room-temperature ones that might slide off your fork.
- Melt the coating:
- Heat your white chocolate or candy melts in a microwave-safe bowl in 30-second intervals, stirring thoroughly between each one until completely smooth and glossy.
- Dip the bunnies:
- Drop a frozen Oreo ball into the melted chocolate, use a fork to flip it over, then lift it out and tap the fork against the bowl edge to let excess drip off before returning it to the parchment.
- Add the marshmallow parts:
- While the chocolate coating is still wet, press two marshmallow slivers into the top for ears and one half-marshmallow onto the back for a fluffy tail.
- Add the bunny details:
- Once the white chocolate has set completely, dip a toothpick into melted pink candy melts or food coloring to draw little noses and pink inner ears, then finish with two black dots for eyes.
- Chill before serving:
- Refrigerate the finished bunnies for at least 30 minutes so the coating firms up completely and they're easier to handle.
 Save
Save When I brought that first platter to Easter dinner, my niece actually squealed and immediately started grouping them into families based on ear positioning. They disappeared faster than the actual dessert, and I spent the rest of the day fielding texts from relatives demanding the recipe.
Getting That Smooth Coating
The difference between professional-looking truffles and ones with obvious streaks and bumps is all about temperature and tapping. Let your melted chocolate sit for a minute after heating so it thickens slightly, then tap your fork against the bowl for a solid ten seconds to let every bit of excess drip away before placing the dipped bunny on the parchment.
Marshmallow Prep Strategy
Cutting marshmallows can get sticky fast, so keep a small bowl of water nearby to dip your knife or kitchen shears. The wet blade cuts through marshmallows cleanly, and you'll get much more uniform ear slivers than trying to saw through sticky marshmallow with a dry knife.
Making Them Ahead
These actually taste better after chilling overnight because the flavors have time to meld. You can make and decorate them up to three days in advance, storing them in a single layer in an airtight container in the refrigerator.
- Layer the bunnies between parchment paper so they don't stick together
- Let them sit at room temperature for 10 minutes before serving for the best texture
- If the white chocolate gets soft from warm hands, pop them back in the fridge for 5 minutes
 Save
Save These little bunnies have become my go-to for any spring celebration, and I've learned that making them with kids is half the fun. They may not be the most elegant dessert I've ever made, but watching guests smile when they spot the bunny plate makes every sticky marshmallow finger worth it.
Recipe FAQs
- → How long do bunny Oreo balls stay fresh?
-
Store these chocolate-dipped treats in an airtight container in the refrigerator for up to 5 days. The cold temperature keeps the white chocolate coating firm and prevents the cream cheese filling from softening.
- → Can I make these bunny treats ahead of time?
-
Yes, prepare the Oreo mixture and shape into bunny heads up to 2 days before dipping. Freeze the shaped balls on a parchment-lined baking sheet, then coat with chocolate and decorate 24 hours before your event for optimal freshness.
- → What type of chocolate works best for coating?
-
White candy melts produce the smoothest, most stable coating for these bunny treats. White chocolate chips work too but may require adding a teaspoon of coconut oil to achieve proper dipping consistency without seizing.
- → How do I prevent the marshmallow details from falling off?
-
Attach marshmallow ears and tails immediately after dipping while the white chocolate remains wet and tacky. Hold each piece gently for 10-15 seconds to let the chocolate set slightly around the marshmallow pieces before placing on the parchment.
- → Can I substitute regular Oreos with other cookie varieties?
-
Golden Oreos create a lighter-colored filling that contrasts beautifully with white chocolate. Avoid Double Stuf varieties as the excess filling makes the dough too soft to shape properly. Chocolate sandwich cookies with colored cream work well for seasonal variations.
- → What's the best way to melt white chocolate for dipping?
-
Melt white chocolate or candy melts in 30-second intervals at 50% power, stirring thoroughly between each interval. This gradual heating prevents scorching and seizing. The mixture should be fluid but not runny for optimal coating coverage.
