
 Save
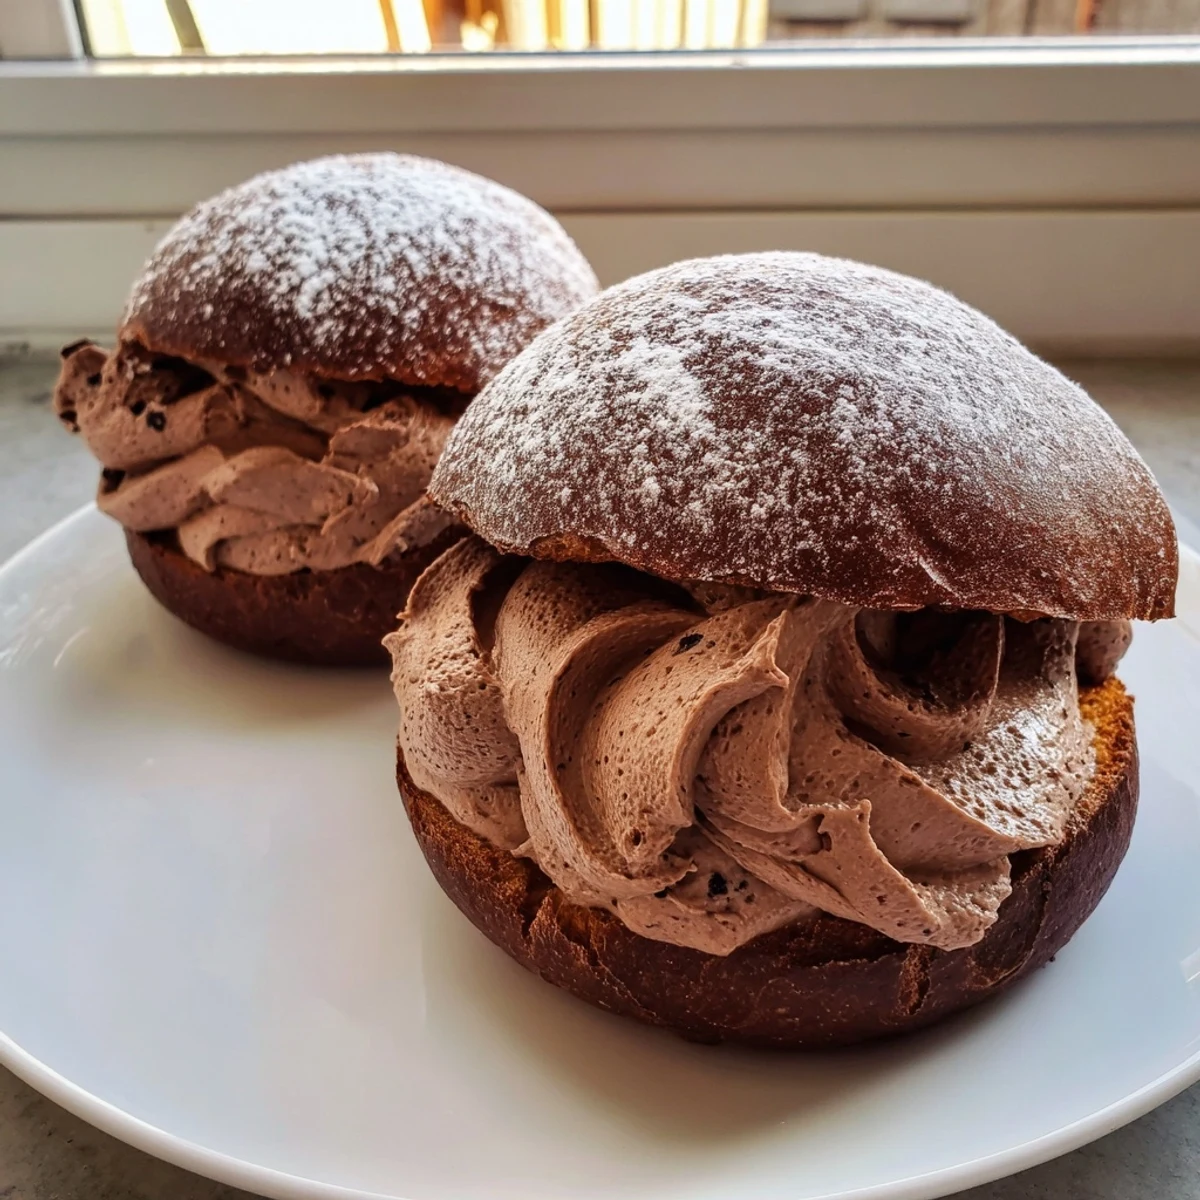
Save Maritozzi are beloved Roman sweet buns, traditionally enjoyed at breakfast with espresso. This chocolate version takes the classic to new heights by enriching the dough with cocoa powder and chunks of dark chocolate.
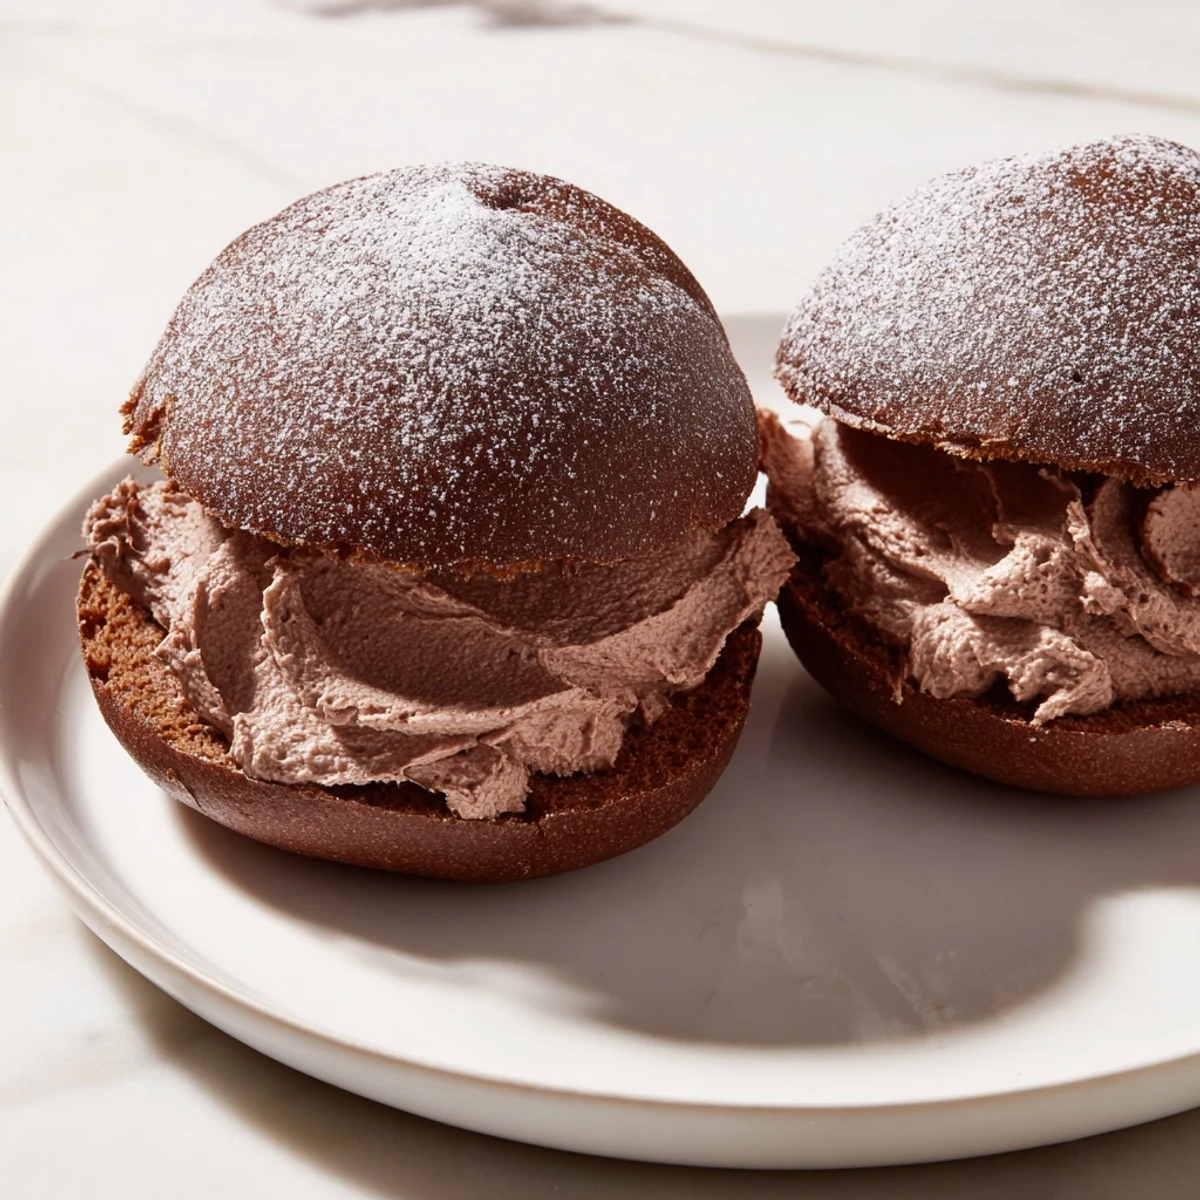
Each pillowy bun is split and generously filled with a luscious chocolate whipped cream made from heavy cream folded with melted dark chocolate. The result is a deeply satisfying pastry that balances a soft, slightly chewy exterior with a cloud-like, creamy center.
While they require some patience for the dough to rise, the process is straightforward and well worth the wait. Serve them fresh for the ultimate Roman breakfast experience.
The smell of yeast blooming in warm milk mixed with cocoa powder is one of those kitchen scents that stops you in your tracks, pulling you closer to the bowl before you even realize your feet have moved. I stumbled upon chocolate maritozzi during a late night recipe rabbit hole and decided to make them the very next morning, despite having never attempted enriched dough before. They turned out slightly lopsided and honestly too big, but that first bite of warm chocolate studded bread with cold cream spilling out was enough to make me a devoted baker from that day on.
I brought a tray of these to a friends Sunday brunch and watched three grown adults forget entirely about conversation, each one hunched over their plate in focused, cream smudged silence. One friend looked up mid bite and simply said these are dangerous, which I took as the highest possible compliment. That morning taught me that the best pastries are the ones that make people stop performing and just eat.
Ingredients
Dough:
- 350 g all purpose flour: Regular flour works beautifully here, and you do not need anything fancy because the cocoa and butter carry the richness.
- 40 g unsweetened cocoa powder: This is what gives the buns their deep color and a subtle bitterness that balances the sweet filling perfectly.
- 120 ml whole milk, lukewarm: Warm to the touch but not hot, around body temperature, because scalding milk will kill your yeast instantly.
- 60 g granulated sugar: Just enough sweetness in the dough without making it cloying, since the filling brings plenty more.
- 7 g active dry yeast: One standard packet, and always check the expiration date because old yeast has broken my heart more than once.
- 1 large egg: Adds richness and helps bind the dough together into that tender crumb.
- 40 g unsalted butter, softened: Room temperature butter incorporates smoothly, so pull it out an hour before you start.
- 1/2 tsp vanilla extract: A quiet background note that rounds out the chocolate flavor.
- 1/2 tsp salt: Never skip this, because saltless chocolate bread tastes flat and oddly hollow.
- 60 g dark chocolate, chopped: Rough chunks melt into little pockets throughout the dough, creating tiny surprises in every bite.
Filling:
- 300 ml heavy whipping cream: Cold cream whips faster and holds its shape better, so keep it in the fridge until the exact moment you need it.
- 70 g dark chocolate, melted and cooled: Let the melted chocolate come close to room temperature before folding it in, or it will seize when it hits the cold cream.
- 30 g powdered sugar: Dissolves seamlessly into the whipped cream without any grainy texture.
- 1 tsp vanilla extract: Enhances the chocolate flavor in the filling and adds warmth.
For Brushing:
- 1 egg yolk mixed with 2 tbsp milk: This simple egg wash gives the buns a glossy, bakery style finish that makes them look professional.
Instructions
- Wake up the yeast:
- Stir the yeast and one tablespoon of sugar into the lukewarm milk and let it sit undisturbed for about ten minutes until the surface looks frothy and alive. If nothing happens, your yeast is dead and you need to start over, which is frustrating but better than wasting all the other ingredients.
- Build the dry mixture:
- In a large bowl, whisk together the flour, cocoa powder, remaining sugar, and salt until the color is uniform and there are no cocoa clumps hiding in corners.
- Bring it all together:
- Make a well in the center of your dry ingredients and drop in the egg, vanilla, softened butter, and the foamy yeast mixture. Stir with a wooden spoon until you have a shaggy, sticky dough that roughly holds together.
- Knead with patience:
- Turn the dough onto a lightly floured surface and knead for eight to ten minutes by hand, or use a mixer with a dough hook on medium speed. The dough should become smooth, slightly tacky, and spring back when you press it gently with your finger. Add the chopped chocolate during the last two minutes of kneading so the pieces stay as intact chunks rather than melting into the dough.
- First rise:
- Place the dough in a clean, lightly oiled bowl, cover it with a damp towel or plastic wrap, and leave it somewhere warm for one to two hours until it has puffed up to roughly double its original size. I usually tuck mine into the oven with just the light turned on, which creates a cozy little proofing chamber.
- Shape the buns:
- Gently punch down the risen dough and divide it into eight equal pieces using a bench scraper or knife. Roll each piece into a plump oval, tapering the ends slightly, and arrange them on a parchment lined baking tray with space between them for spreading.
- Second rise:
- Cover the shaped buns loosely and let them rest for about forty minutes until they look visibly puffy and have relaxed into soft little pillows.
- Preheat and glaze:
- Heat your oven to 180 degrees Celsius, or 355 degrees Fahrenheit. Whisk the egg yolk with two tablespoons of milk and brush the mixture gently over each bun, being careful not to press down and deflate them.
- Bake:
- Slide the tray into the center of the oven and bake for fifteen to eighteen minutes until the buns feel just set when you tap the top and the kitchen smells absolutely incredible. Transfer them to a wire rack and let them cool completely, because warm buns will melt your filling into a puddle.
- Make the chocolate cream:
- Whip the cold heavy cream with powdered sugar and vanilla until it reaches firm peaks that hold their shape when you lift the beaters. Gently fold in the melted and cooled dark chocolate using a spatula, working in slow strokes to keep the cream light and airy rather than knocking all the air out.
- Fill and serve:
- Using a serrated knife, slice each cooled bun lengthwise almost all the way through, leaving a hinge on one side so it opens like a book. Pipe or spoon a generous amount of chocolate cream into each bun, close them gently, and dust with extra powdered sugar if you want that classic bakery look.
 Save
Save The real magic of maritozzi hit me on a rainy Tuesday when I made a batch just for myself, eating one standing at the kitchen counter with espresso dripping into a tiny cup beside me. There was no occasion, no guests, no photograph to take, just the quiet satisfaction of having made something this wonderful with my own hands.
Getting the Dough Texture Right
Enriched dough with cocoa behaves differently than plain bread dough, and the first few times I made these I kept adding flour because the dough felt sticky. Resist that urge, because too much flour produces buns that are dense and dry rather than soft and pillowy. The dough should cling to your hands a bit during kneading but eventually become smooth and elastic after eight to ten minutes of persistent work. Trust the process and let the kneading do the work instead of reaching for more flour.
Choosing the Right Chocolate
The chocolate you select matters enormously here because there are so few ingredients and each one carries real weight. For the dough chunks, a good quality dark chocolate around sixty to seventy percent cacao gives you those beautiful bitter sweet pockets that contrast with the soft bread. For the filling, I have tested everything from grocery store baking chocolate to expensive single origin bars, and honestly anything above fifty percent cacao that you would enjoy eating on its own will work beautifully. If you want a sweeter, more crowd pleasing result, swap the dark chocolate in the filling for milk chocolate.
Serving and Storing
These buns are at their absolute peak within the first few hours of being filled, when the cream is still cold and the bread has that slight resistance against your teeth. Once filled, they need to be eaten the same day because the cream will gradually soften the bread and things get soggy overnight. You can bake the plain buns a day ahead and store them in an airtight container, then fill them right before serving for the best texture and contrast. For a truly Roman experience, serve them with a sharp espresso or a frothy cappuccino and pretend you are sitting at a marble counter watching the morning unfold.
- Freeze unfilled buns for up to one month and thaw at room temperature before filling.
- Sprinkle extra chocolate chips inside each bun before adding cream for a double chocolate punch.
- Always serve filled maritozzi immediately for the best texture contrast.
 Save
Save Every time I make these, I think about how a simple enriched bun filled with cream can feel so extravagantly special. That is the quiet genius of Italian baking, turning humble ingredients into something that makes you close your eyes and grin.
Recipe FAQs
- → Can I make the dough ahead of time?
-
Yes, you can prepare the dough through the first rise, then refrigerate it overnight. The cold slows fermentation and actually develops deeper flavor. Let the dough come to room temperature before shaping and proceeding with the second rise.
- → Why did my maritozzi turn out dense instead of pillowy?
-
Dense buns usually mean the yeast wasn't active enough or the dough didn't rise sufficiently. Ensure your milk is lukewarm (not hot, which kills yeast) and that the yeast mixture becomes foamy before using. Also, give the dough full rising time — patience is key to achieving that signature soft texture.
- → Can I use milk chocolate instead of dark chocolate?
-
Absolutely. Milk chocolate will give the filling and dough a sweeter, milder chocolate flavor. You can also use semi-sweet chocolate for a balanced middle ground. Adjust the sugar slightly if switching to milk chocolate, as it's already sweeter.
- → How should I store leftover maritozzi?
-
Store filled maritozzi in the refrigerator for up to 2 days, loosely covered. The cream filling requires refrigeration. For best results, consider storing the unfilled buns at room temperature and filling them just before serving to keep the texture optimal.
- → What's the best way to get a clean slice for filling?
-
Use a sharp serrated knife and slice while the buns are completely cool. Cut lengthwise, leaving one side attached as a hinge — this keeps the cream contained when you open the bun. A gentle sawing motion prevents compressing the soft crumb.
- → Can I freeze unfilled maritozzi buns?
-
Yes, baked unfilled buns freeze well for up to 3 months. Wrap each individually in plastic wrap, then place in a freezer bag. Thaw at room temperature and warm briefly in a low oven before filling with freshly made chocolate cream.