 Save
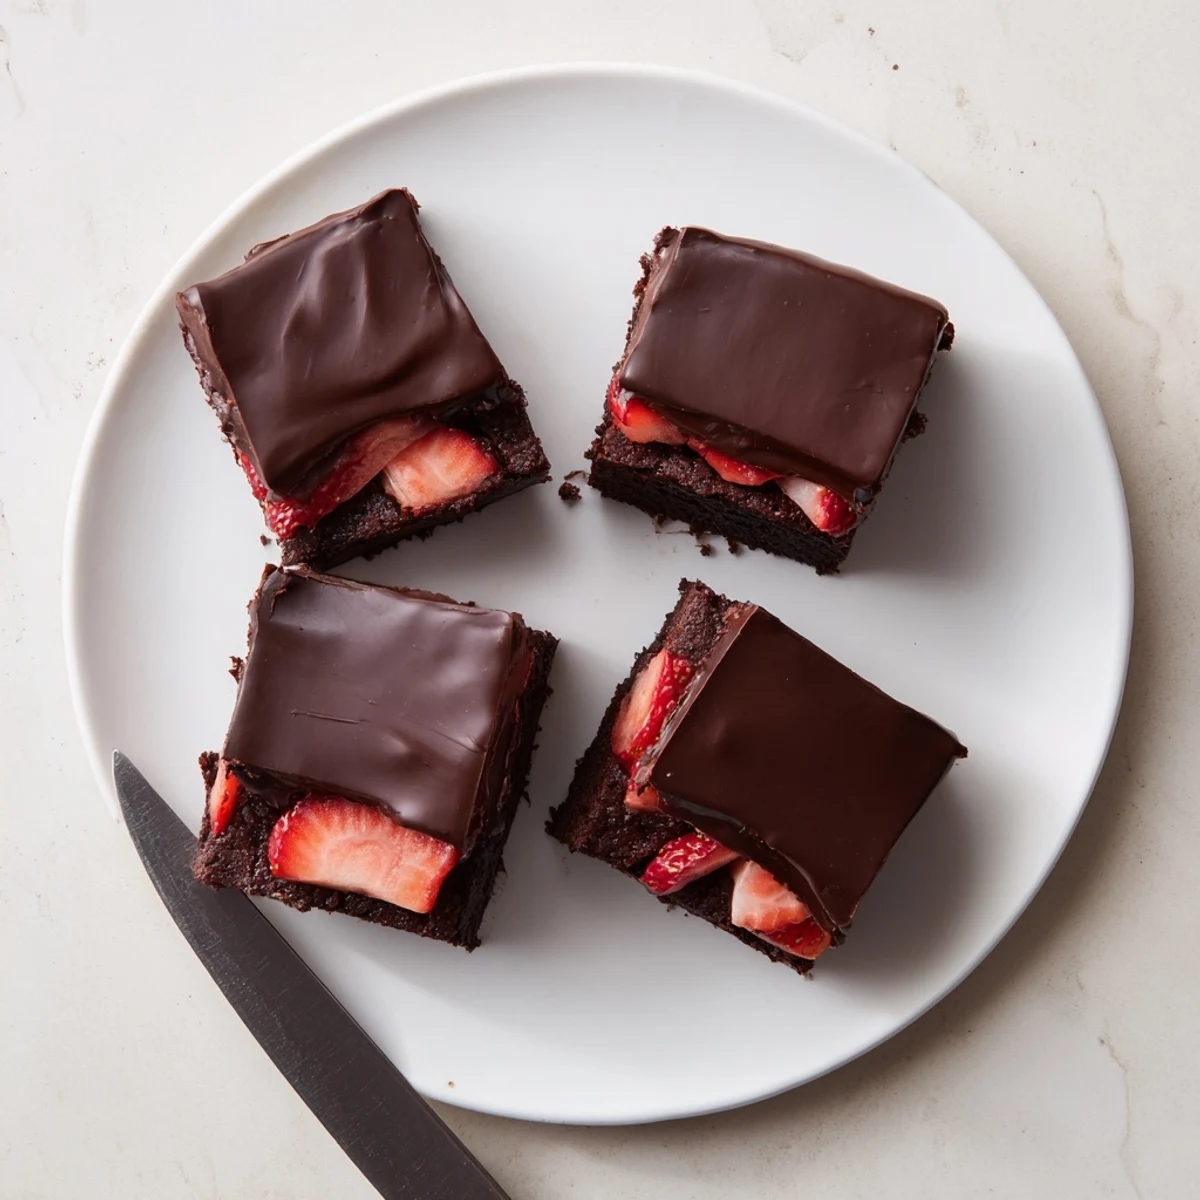
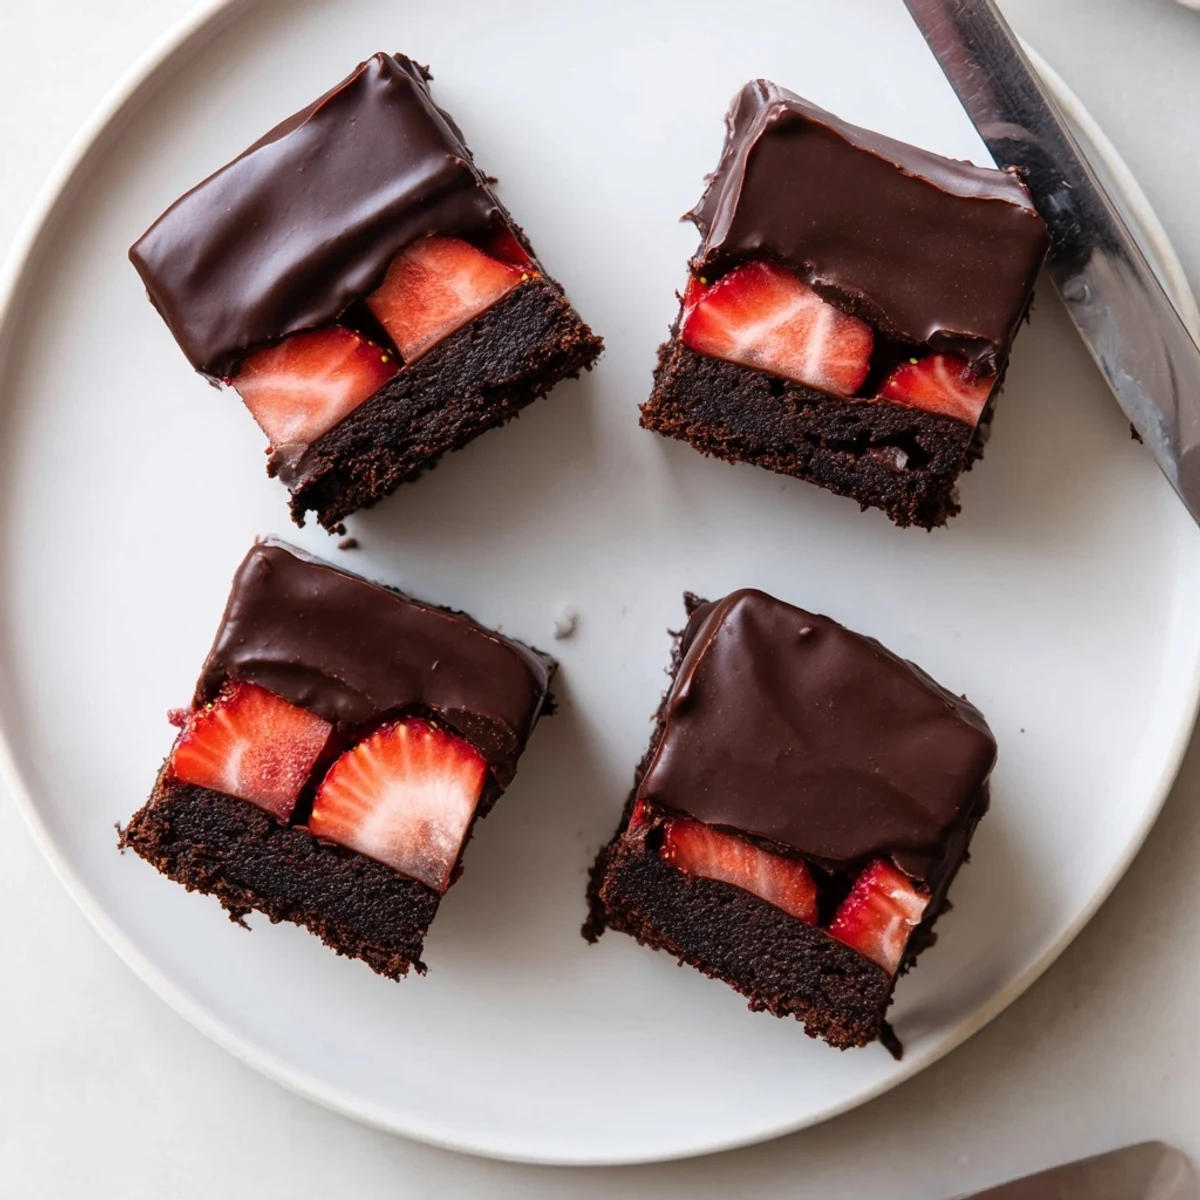
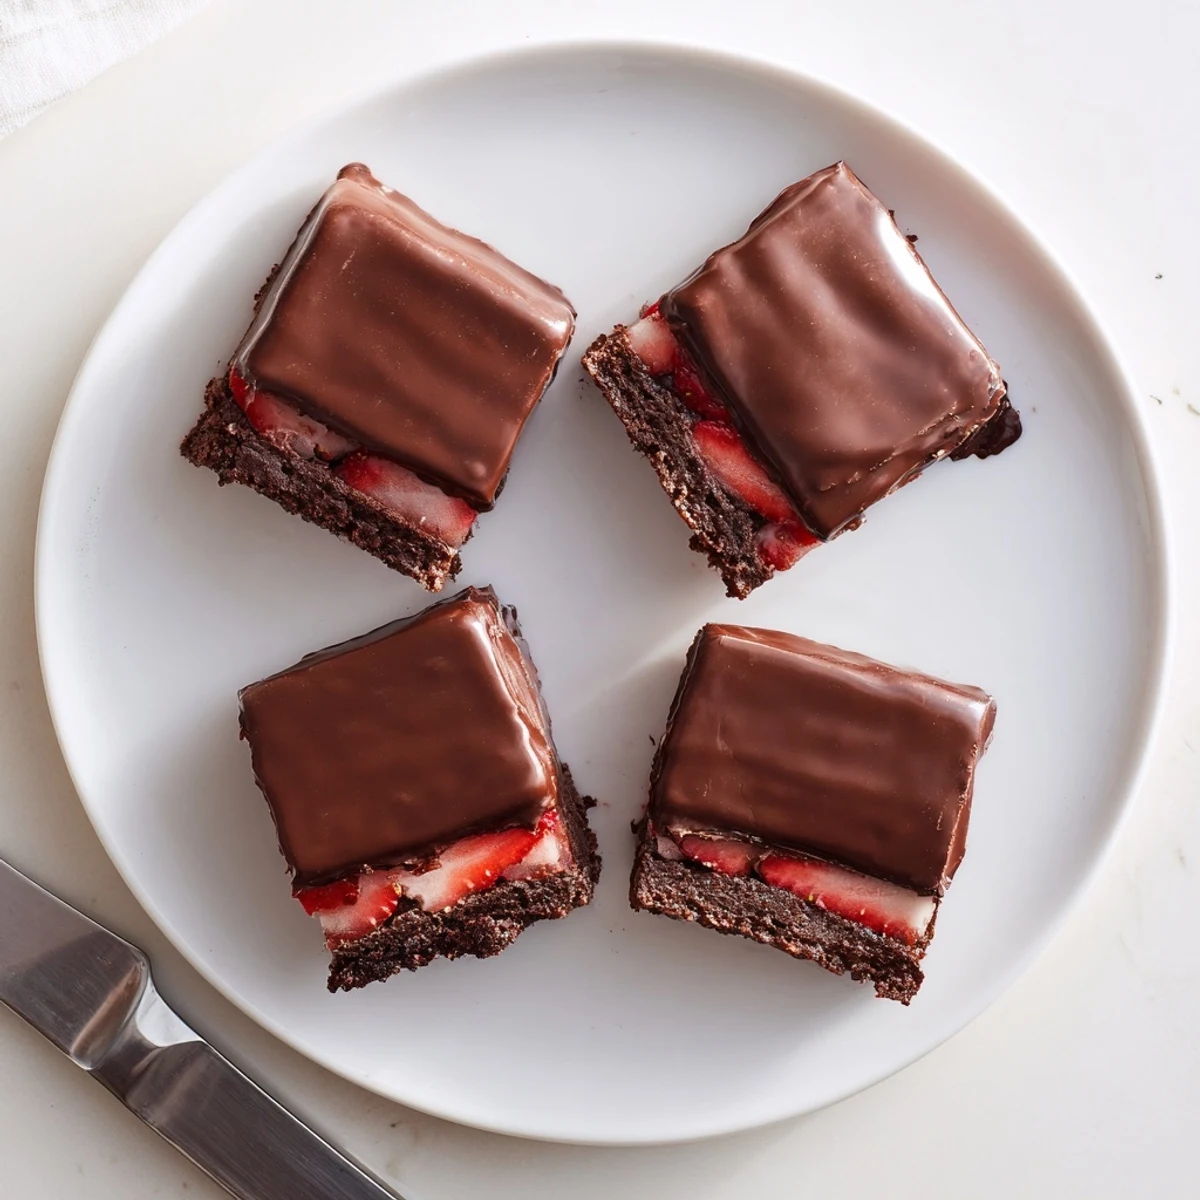
Save These chocolate covered strawberry brownies combine a dense, fudgy brownie base with a layer of fresh sliced strawberries, all sealed under a glossy chocolate coating. The brownie batter comes together by melting dark chocolate and butter, then whisking in sugar, eggs, and vanilla before folding in flour and salt.
Once baked and cooled, arrange thinly sliced strawberries over the top and pour on a smooth mixture of melted semisweet chocolate and coconut oil. After chilling for at least an hour, the chocolate sets into a snappy shell that pairs beautifully with the juicy berries and rich brownie underneath.
Best served chilled or at room temperature, these keep for one to two days refrigerated thanks to the fresh fruit layer. A warm, sharp knife ensures clean, bakery-worthy slices.
The rain was hammering against the kitchen window the afternoon these brownies were born, partly because I was desperate to use a punnet of strawberries that was one day from tragedy and partly because I had promised something impressive for a friends potluck that evening.
My friend Laura took one bite, closed her eyes, and refused to speak for a full ten seconds, which remains the highest compliment any recipe of mine has ever received.
Ingredients
- Unsalted butter (115 g): The backbone of a tender brownie crumb, use good quality butter because you will taste the difference.
- Dark chocolate 60 to 70% cocoa (200 g), chopped: This determines how rich your base becomes so pick a bar you would happily eat on its own.
- Granulated sugar (150 g): Balances the deep bitterness of dark chocolate and helps form that gorgeous crackly top.
- Large eggs (2): Room temperature eggs blend more smoothly into the warm batter and give better lift.
- Vanilla extract (1 tsp): A quiet layer of warmth that rounds out everything beautifully.
- All-purpose flour (75 g): Go easy when folding this in since overworking the flour is the fastest route to cakey rather than fudgy.
- Salt (half tsp): Never skip this, it is what makes the chocolate taste like chocolate and not just sweet.
- Fresh strawberries (250 g), hulled and thinly sliced: Seek out ripe, fragrant berries because their juiciness is half the magic of the middle layer.
- Semisweet chocolate chips or chopped chocolate (170 g): This forms the glossy shell so choose something smooth and melty.
- Coconut oil or unsalted butter (1 tbsp): A small amount that transforms the coating from dull to mirror shiny with a clean snap.
Instructions
- Set the stage:
- Preheat your oven to 175 degrees C (350 degrees F) and line a 20x20 cm baking pan with parchment, letting the paper overhang the edges like handles.
- Melt chocolate and butter together:
- Set a heatproof bowl over a saucepan of barely simmering water and stir the butter and dark chocolate until they become a silky dark pool. Take it off the heat before it gets too hot.
- Build the batter:
- Whisk the sugar into the warm chocolate mixture, then beat in each egg one at a time until glossy. Stir in the vanilla until it disappears into the mixture.
- Fold in the dry ingredients:
- Gently incorporate the flour and salt with a spatula using soft folding motions, stopping the moment you no longer see dry streaks.
- Bake until barely done:
- Pour the batter into your prepared pan, spread it evenly, and bake for 25 to 30 minutes until a toothpick comes out with moist crumbs clinging to it. The center should wobble ever so slightly.
- Cool completely:
- Let the brownies cool right there in the pan on a wire rack with absolutely no rushing, because warm brownies will melt your strawberry layer into a soggy mess.
- Create the strawberry carpet:
- Arrange the sliced strawberries in a single even layer across the entire brownie surface, slightly overlapping where needed for full juicy coverage.
- Make the chocolate coating:
- Melt the semisweet chocolate with the coconut oil or butter over simmering water, stirring until you get a glossy, pourable mixture that shines under the light.
- Seal the deal:
- Pour the melted chocolate over the strawberries and gently spread it edge to edge, making sure every berry is tucked beneath the shell.
- Chill until set:
- Refrigerate the pan for at least one hour until the chocolate coating is firm to the touch and snaps lightly when pressed.
- Cut and serve:
- Lift the whole slab out using the parchment overhang, then slice with a sharp knife warmed under hot water and dried between each cut for perfectly clean edges.
 Save
Save I brought a second batch of these to a neighbors birthday picnic last summer and watched a group of adults abandon all dignity, licking chocolate off their fingers while pretending the napkins were helping.
Choosing Your Chocolate
The chocolate you select carries this entire recipe, so taste it before you melt it and if it strikes you as bland or waxy on the tongue, try a different brand.
Working With Fresh Strawberries
Pat the sliced berries dry with a clean towel before arranging them, because even a thin layer of surface juice can prevent the chocolate coating from adhering properly.
Serving and Storing
Store these cut squares in an airtight container in the refrigerator with a sheet of parchment between layers to keep the chocolate shells pristine and unsmudged.
- Let them sit at room temperature for ten minutes before serving so the brownie layer softens into its proper fudgy texture.
- A glass of sparkling wine or a cup of black coffee turns a casual afternoon treat into something that feels genuinely celebratory.
- Always cut with a warm dry knife, never a serrated one, for the cleanest most bakery worthy edges.
 Save
Save Every time I make these, someone asks for the recipe, and honestly that quiet moment of pride never gets old.
Recipe FAQs
- → Can I use frozen strawberries instead of fresh?
-
Fresh strawberries are strongly recommended for this treat. Frozen berries release excess moisture as they thaw, which can seep into the brownie layer and prevent the chocolate coating from adhering properly. If frozen is your only option, thaw and thoroughly pat the slices dry before arranging them on the brownie base.
- → Why did my chocolate coating crack when cutting?
-
Cracking usually happens when the chocolate shell is too cold or the knife isn't warm enough. Run your sharp knife under hot water, dry it completely, then cut with gentle, downward pressure. Warming the blade between each cut keeps edges clean and prevents the hardened coating from shattering.
- → How do I know when the brownie base is properly baked?
-
Insert a toothpick into the center at the 25-minute mark. It should come out with moist crumbs attached, not wet batter. Overbaking will give you a cakey texture rather than the desired fudgy density. The brownies continue to set as they cool in the pan.
- → Can I make these ahead for a party or gathering?
-
You can bake the brownie base a day in advance and store it uncovered at room temperature. Add the strawberry layer and chocolate coating the day you plan to serve. Once assembled and chilled, they hold well in the refrigerator for up to two hours before serving without compromising texture.
- → What type of chocolate works best for the coating?
-
Semisweet chocolate chips or a chopped semisweet bar (around 50-60% cocoa) provides the best balance of sweetness and structure. Coupling it with coconut oil or butter gives the coating a smooth pour and a firm, snappy set once chilled. Avoid using white chocolate alone, as it lacks the cocoa butter content needed for a sturdy shell.
- → Are these suitable for gluten-free diets?
-
You can swap the all-purpose flour for a 1:1 gluten-free baking blend with good results. Almond flour also works but yields a slightly denser, more tender crumb. Always check your chocolate labels to confirm they are produced in gluten-free facilities if cross-contamination is a concern.
