 Save
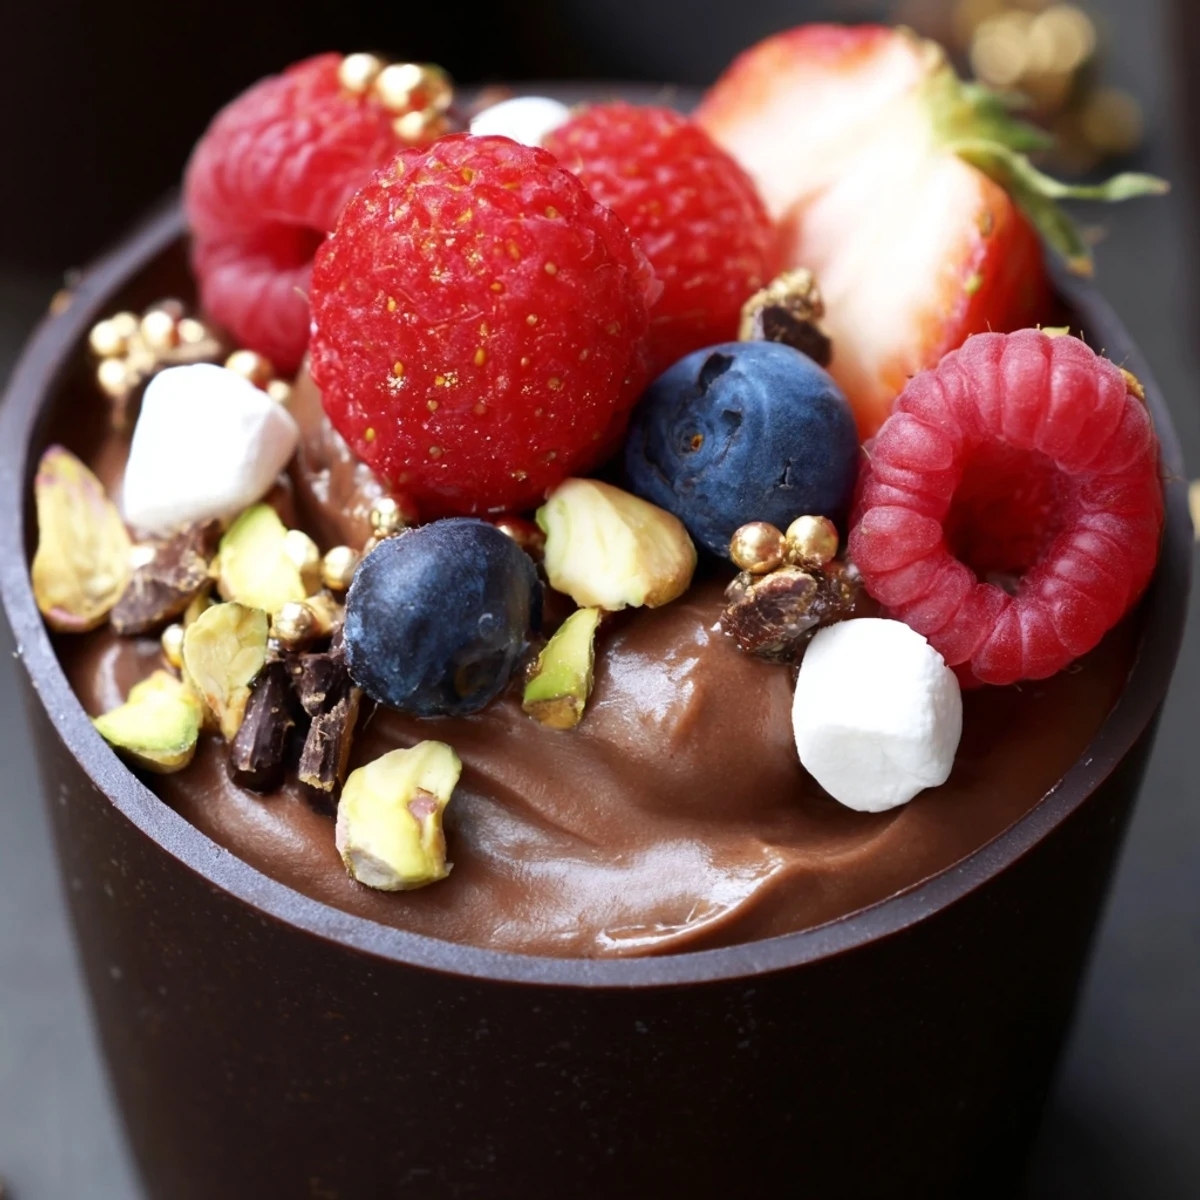
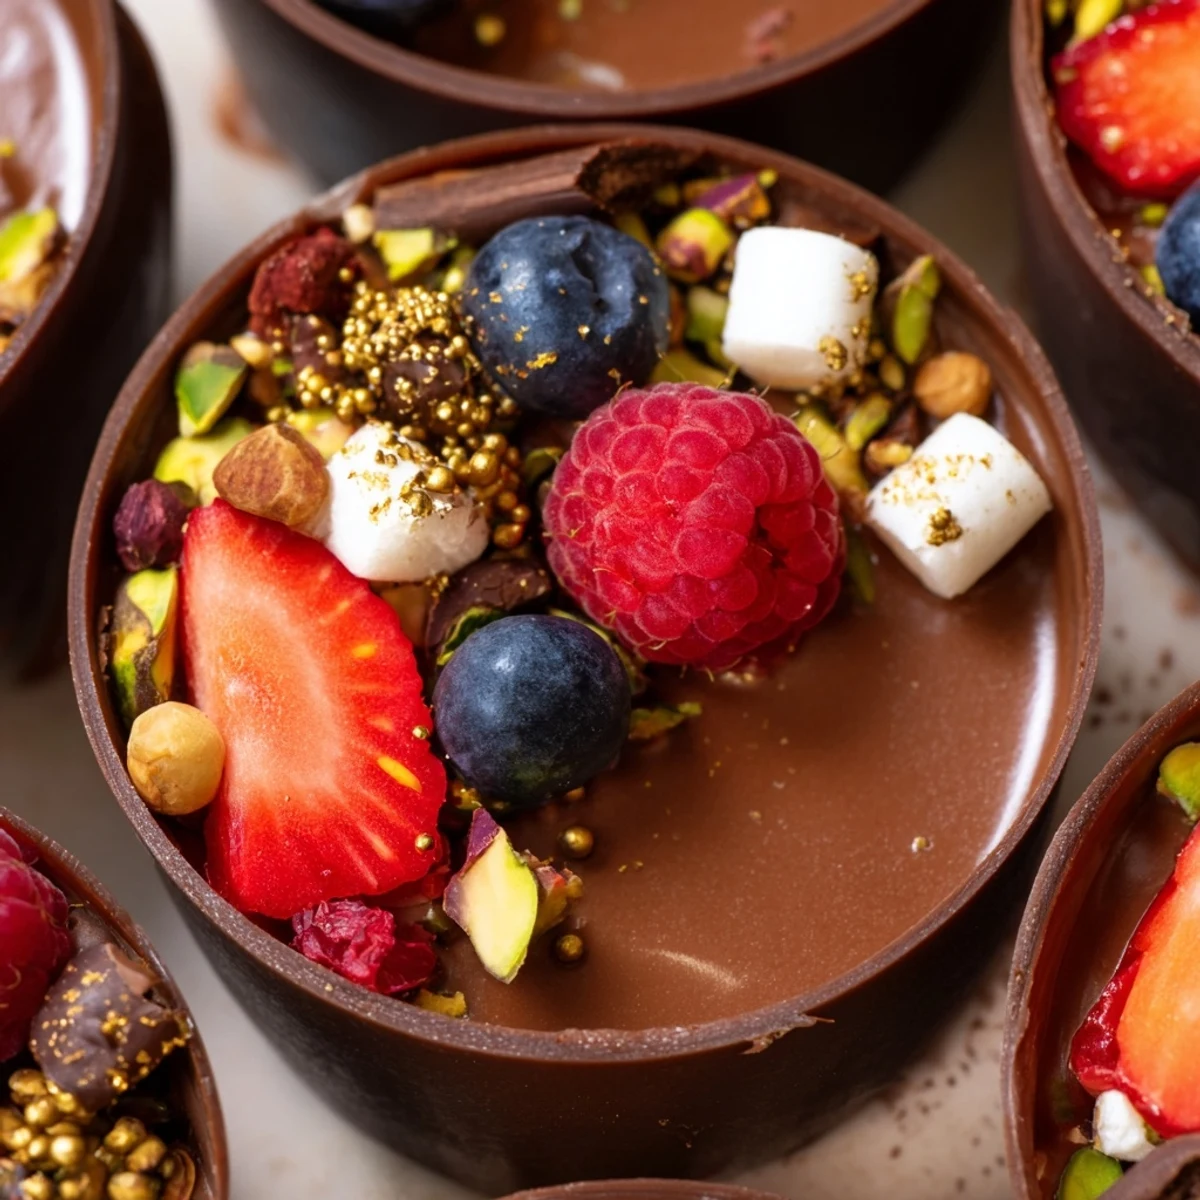
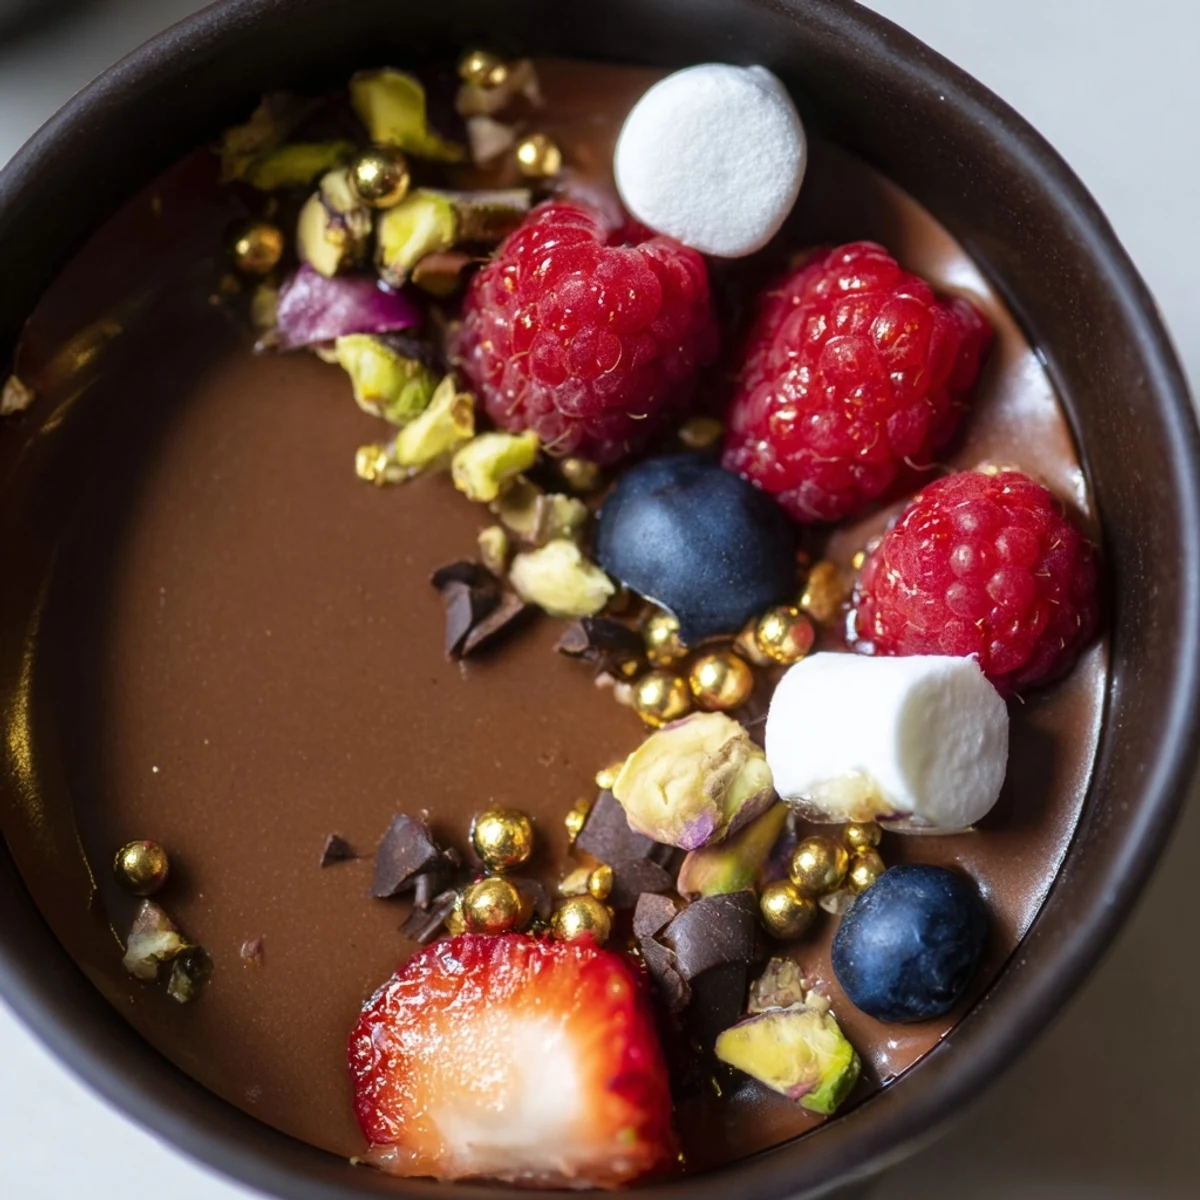
Save Create stunning chocolate grazing cups that elevate any dessert table. These elegant treats begin with handmade dark chocolate cups filled with velvety chocolate mousse, then crowned with fresh berries, chopped nuts, mini marshmallows, and decorative chocolate curls.
The preparation involves melting and molding chocolate cups, whipping a light yet indulgent mousse, and artfully arranging toppings. Each cup delivers layers of contrasting textures—smooth mousse meets juicy berries and crunchy nuts—while the edible gold leaf adds a luxurious finishing touch.
Perfect for dinner parties, weddings, or holiday gatherings, these grazing cups can be prepared ahead and chilled until serving time. Customize with white or milk chocolate variations, or add a splash of orange liqueur for an adult version. Six servings make them ideal for intimate celebrations.
The first time I made chocolate cups was supposed to be a fancy dinner party finale, but I ended up eating three of them straight from the fridge while no one was watching. Theres something endlessly satisfying about edible containers, like youre getting away with something by eating the dish itself. Now theyre my go-to when I want to impress without spending hours at the stove.
I made these for my sisters birthday last spring, and she actually gasped when I brought out the tray. The gold leaf caught the candlelight and made the whole table feel like a restaurant. We ended up lingering over dessert longer than the main course, picking through different toppings and debating which combination was best.
Ingredients
- 200 g dark chocolate (at least 60% cocoa), chopped: High quality chocolate makes all the difference here since its the star of both cups and mousse
- 200 ml heavy cream: Cold cream whips up better, so pop it in the fridge for 10 minutes before starting
- 100 g dark chocolate, chopped: Same quality as the cup chocolate for consistent flavor throughout
- 2 tbsp powdered sugar: Powdered sugar dissolves more easily than granulated in the mousse
- 1 tsp vanilla extract: Pure vanilla extract adds a warm note that balances the dark chocolate
- 1 cup fresh mixed berries: Use whatever looks best at the market, but raspberries and strawberries are classic
- 2 tbsp chopped nuts: Toast them lightly for extra flavor and crunch contrast
- 2 tbsp mini marshmallows: These add playful texture and nostalgia
- 2 tbsp chocolate curls or shavings: Use a vegetable peeler on a room temperature chocolate bar for perfect curls
- 1 tbsp edible gold leaf or pearls (optional): Purely for drama, and honestly worth every penny of the splurge
Instructions
- Melt the chocolate for cups:
- Break your chocolate into even pieces and melt in short bursts, stirring between each, until glossy and smooth. Let it cool slightly so its not scorching hot when you start working with it.
- Create the chocolate shells:
- Use a small pastry brush or the back of a spoon to coat the inside of your liners, working in thin, even layers. Chill for 20 minutes until completely firm, then carefully peel away the liners like youre unwrapping a present.
- Prepare the chocolate for mousse:
- Melt your remaining chocolate gently and set it aside to cool while you whip the cream. If the chocolate is too hot, it will deflate your whipped cream and ruin the texture.
- Whip the cream:
- Beat the cold cream with powdered sugar and vanilla until you have soft peaks that hold their shape but still look glossy. Overwhipping will make the mousse grainy, so stop when it just starts to feel thick.
- Combine mousse:
- Stir a dollop of whipped cream into the melted chocolate to lighten it, then fold everything together gently until no white streaks remain. The air you incorporated in whipping is what makes mousse light, so dont knock it out.
- Fill the cups:
- Spoon or pipe the mousse into your chocolate cups, filling them about two-thirds full to leave room for toppings. Tap the cups gently on the counter to settle the mousse evenly.
- Add the finishing touches:
- Pile on berries, nuts, marshmallows, and chocolate curls however looks beautiful to you. If using gold leaf, apply it last with tweezers or a dry brush.
- Chill before serving:
- Let the assembled cups rest in the refrigerator for at least 20 minutes so everything firms up nicely. They hold their shape better when slightly chilled and the flavors have time to marry.
 Save
Save These became a tradition in our house for New Years Eve because they feel so celebratory but leave me free to actually enjoy the party. Theres something magical about handing someone their own tiny chocolate cup filled with clouds and watching their eyes light up.
Making Ahead
The chocolate cups can be made up to three days ahead and stored carefully between layers of parchment paper. The mousse holds beautifully for 24 hours, but I recommend assembling everything just before serving for the freshest texture.
Flavor Variations
White chocolate cups with dark chocolate mousse create stunning contrast, or try milk chocolate throughout for something sweeter and more nostalgic. I once added orange zest to the mousse and it transformed the whole dessert into something reminiscent of a chocolate orange.
Presentation Ideas
Arrange these on a mirrored tray or pretty platter with fresh mint leaves tucked between the cups. Dim lighting makes the gold leaf shimmer and turns dessert into an event. Consider passing them on a silver tray for maximum drama.
- Set up a toppings bar and let guests customize their own cups
- Serve with tiny silver spoons for an elegant touch
- Keep some extra chocolate curls on hand for last-minute repairs
 Save
Save These little cups are proof that sometimes the most impressive desserts are also the most joyful to make and eat.
Recipe FAQs
- → How far in advance can chocolate grazing cups be made?
-
Prepare the chocolate cups and mousse components up to 24 hours ahead, storing separately in the refrigerator. Assemble with fresh toppings 2-4 hours before serving for optimal texture and appearance.
- → What alternative chocolates work for these cups?
-
White chocolate creates a sweeter, creamier profile while milk chocolate offers a classic nostalgic flavor. Semi-sweet provides balanced richness. Consider mixing chocolate types for visual appeal—dark cups with white mousse creates striking contrast.
- → Can chocolate cups be made without silicone liners?
-
Small balloons can serve as makeshift molds—inflate, coat with chocolate, chill, then carefully deflate and peel away. Alternatively, use small plastic cups or parchment paper molds. Silicone liners provide the most consistent results and easiest release.
- → How do I prevent chocolate cups from cracking or breaking?
-
Ensure chocolate is properly tempered by melting slowly and not overheating above 45°C. Apply thick, even layers—thin coats crack easily. Chill completely before attempting to remove liners. Handle gently and store at cool room temperature rather than refrigerating after assembly.
- → What toppings pair best with chocolate mousse?
-
Fresh berries provide tart contrast while roasted nuts add crunch. Consider candied citrus, caramelized pretzels, cookie crumbs, or fresh mint leaves. For special occasions, edible flowers, gold leaf, or spun sugar create restaurant-worthy presentations.
- → How can I make these chocolate cups vegan?
-
Use dairy-free dark chocolate and coconut cream instead of heavy whipping cream. Whip chilled coconut cream with maple syrup and vanilla for the mousse base. Ensure all toppings like marshmallows are vegan-certified, or replace with shredded coconut and crushed vegan cookies.
