 Save
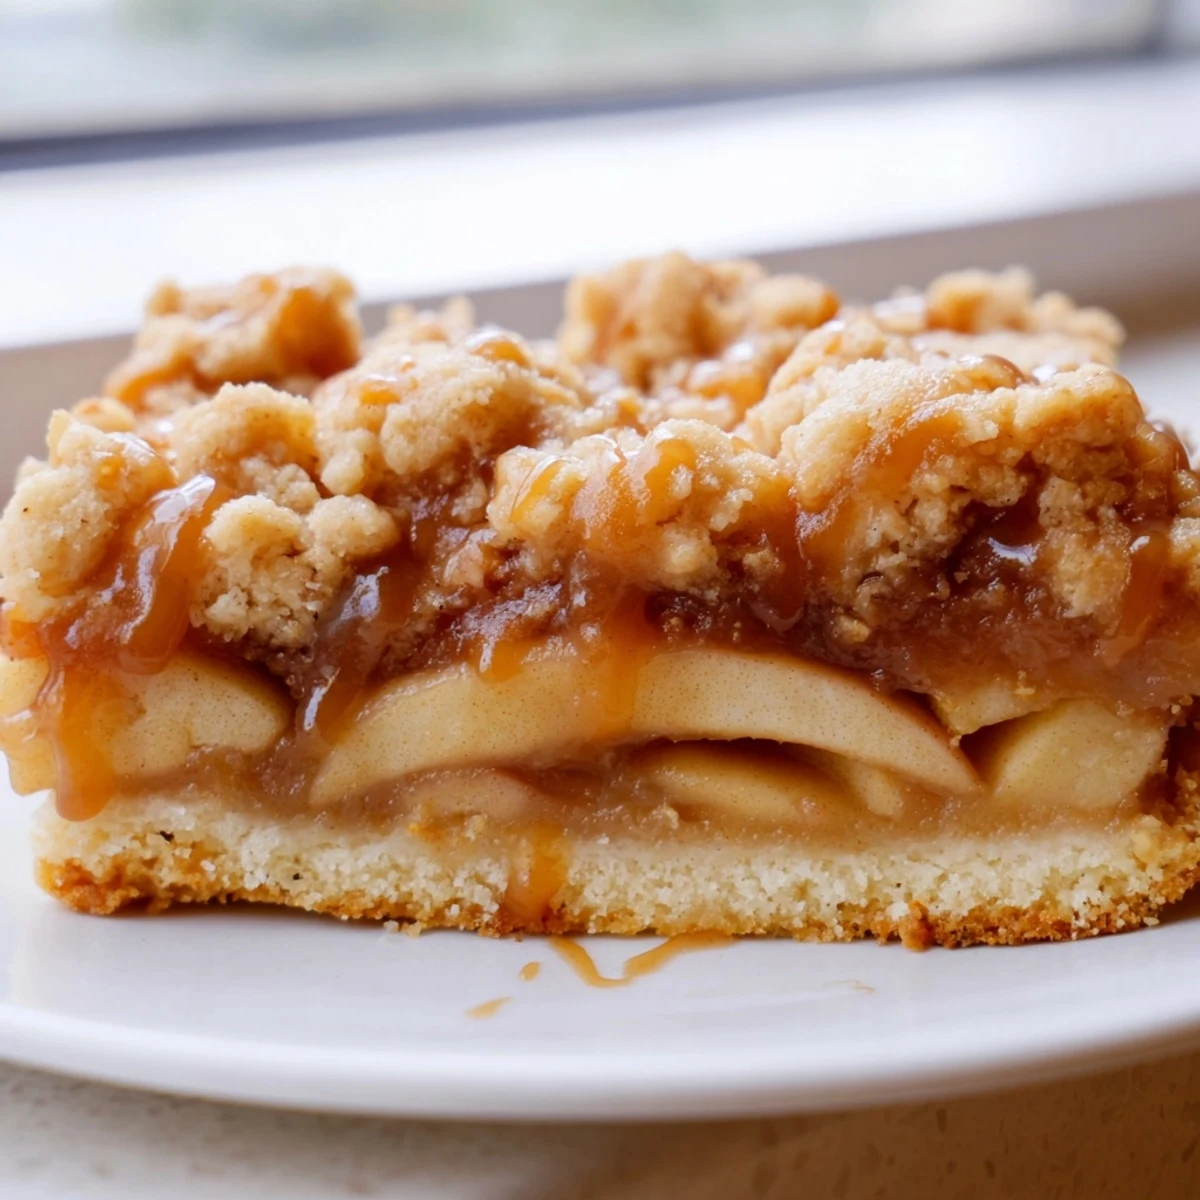
Save These caramel apple crumb bars feature a tender, buttery shortbread crust pressed into a pan and partially baked. A layer of thinly sliced apples tossed with cinnamon and lemon juice creates a fruity foundation, which gets generously drizzled with rich caramel sauce. The reserved crumb mixture sprinkled on top bakes into golden, buttery perfection. After about 40 minutes in the oven, the apples become tender while the crumble turns lightly crisp. Let these bars cool completely before slicing—the wait allows the flavors to meld and the caramel to set slightly. Store in an airtight container for up to three days, though they rarely last that long.
The first time I made these bars, my kitchen smelled like a cider mill on a crisp October afternoon. Something about caramel bubbling over tart apples just makes everything feel cozy. My roommate walked in, took a deep breath, and asked what bakery I'd secretly visited. Nothing beats that warm buttery-cinnamon fragrance wafting through the house.
I brought these to a friend's Halloween party one year, and honest to goodness, they vanished before anyone touched the store-bought cookies. People kept sneaking back to the dessert table, just one more bite they whispered. My friend's mom called me the next day demanding the recipe, which is basically the highest compliment possible.
Ingredients
- All-purpose flour: The backbone of both crust and crumb, providing structure while staying tender
- Cold unsalted butter: Keeping it cold is what creates those irresistible buttery pockets in the shortbread
- Granulated sugar: Sweetens both the crust and apple layer without overpowering the natural fruit flavors
- Salt: Just a touch balances all the sweetness and makes the caramel pop
- Vanilla extract: Rounds out the buttery notes in the crust with warm depth
- Medium apples: A mix of Granny Smith and Honeycrisp gives you perfect sweet-tart balance
- Lemon juice: Keeps apples from browning and adds brightness that cuts through the caramel
- Ground cinnamon: The classic fall spice that bridges apples and caramel perfectly
- Caramel sauce: Store-bought works beautifully, but homemade takes these to another level entirely
Instructions
- Get your oven ready:
- Preheat to 350°F and line your 9x9 pan with parchment, letting the edges hang over like little handles for easy lifting later
- Make the crumb mixture:
- Whisk flour, sugar, and salt together, then work in that cold butter with your fingers or a pastry cutter until you have a bowl full of sandy crumbs
- Save some for later:
- Scoop out about 1½ cups of the mixture and set it aside for your topping
- Build the foundation:
- Press the remaining dough firmly into the bottom of your pan, making it as even as you can manage
- Par-bake the crust:
- Slide it into the oven for 12 minutes just to set the base
- Prep the apples:
- While the crust bakes, toss your sliced apples with lemon juice, sugar, flour, and cinnamon until every piece is coated
- Layer it all up:
- Spread those spiced apples over your hot crust, then drizzle caramel sauce generously over the top like you mean it
- Add the crowning glory:
- Sprinkle your reserved crumb mixture evenly across the whole thing
- Bake until golden:
- Return to the oven for 28 to 32 minutes, watching for that light golden brown color on top
- The hardest part:
- Let these cool completely in the pan before lifting them out and cutting into squares
 Save
Save These have become my go-to when I need to bring something to a gathering but want to impress without spending all day in the kitchen. Last Thanksgiving, my grandmother actually asked if I could make them instead of pumpkin pie. That's when I knew this recipe was a keeper.
Making Your Own Caramel
Homemade caramel sauce is easier than you might think, just melt sugar with cream and butter until it turns amber. The flavor difference is remarkable, and people can always tell when you've put in that extra effort. Plus, your kitchen will smell incredible.
Apple Selection Secrets
I've learned through trial and error that apples meant for baking hold their shape better than eating varieties. Granny Smith, Jonagold, and Honeycrisp are my reliable trio. The key is slicing them uniformly so everything cooks at the same rate.
Storage and Serving
These bars keep beautifully at room temperature for up to three days, though they rarely last that long in my house. I actually prefer them on day two when the flavors have had time to become better acquainted. For serving, a quick drizzle of warm caramel takes them over the top.
- Wrap individually for lunchbox treats
- Rebrief gently in the microwave if you prefer them warm
- Serve with vanilla ice cream for an extra special dessert
 Save
Save There's something deeply satisfying about a recipe that looks impressive but comes together with such humble ingredients. Hope these bars find their way into your fall baking rotation.
Recipe FAQs
- → What type of apples work best for these bars?
-
A mix of tart and sweet apples provides the best balance. Granny Smith, Honeycrisp, or Braeburn offer great flavor and hold their texture during baking without becoming mushy.
- → Can I use homemade caramel sauce?
-
Absolutely. Homemade caramel sauce adds wonderful depth, though store-bought works perfectly well. If making your own, ensure it has cooled slightly before drizzling over the apples.
- → How do I know when the bars are done baking?
-
The crumb topping should be light golden brown and the apples tender when pierced with a fork. The edges may start to pull away slightly from the pan. The center will set further as it cools.
- → Can I make these ahead of time?
-
Yes, these bars store beautifully in an airtight container for up to 3 days at room temperature. They also freeze well—wrap individual portions tightly and freeze for up to 2 months.
- → Why should I let the bars cool completely before cutting?
-
Cooling allows the caramel to set and the layers to firm up, making clean cuts easier. Warm bars are delicious but may crumble or lose their shape. The overnight rest in the refrigerator also enhances flavors.
