 Save
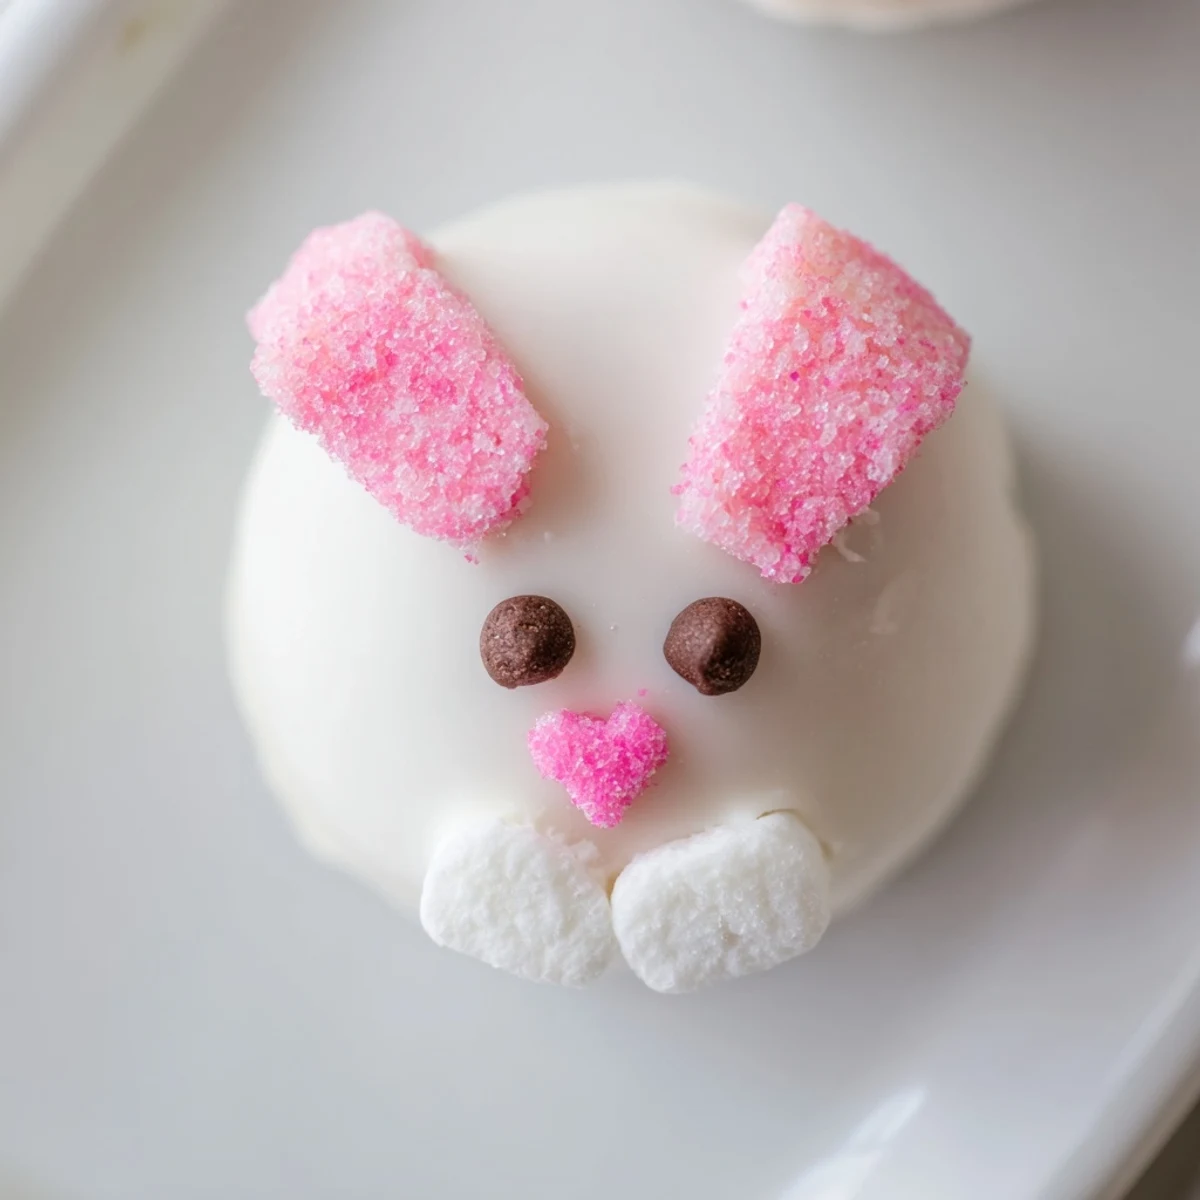
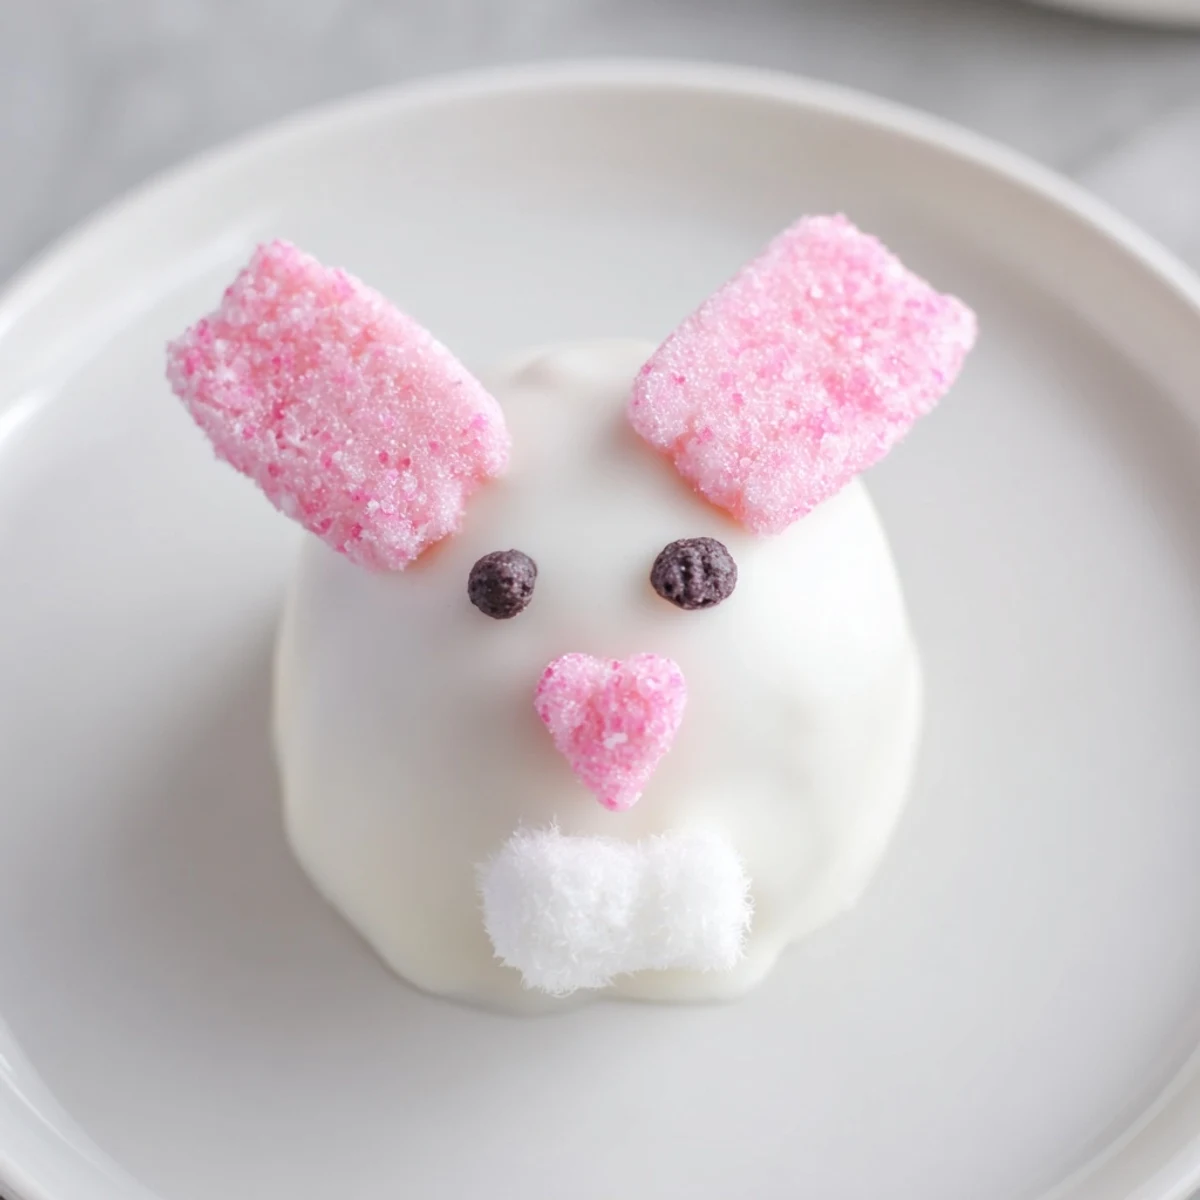
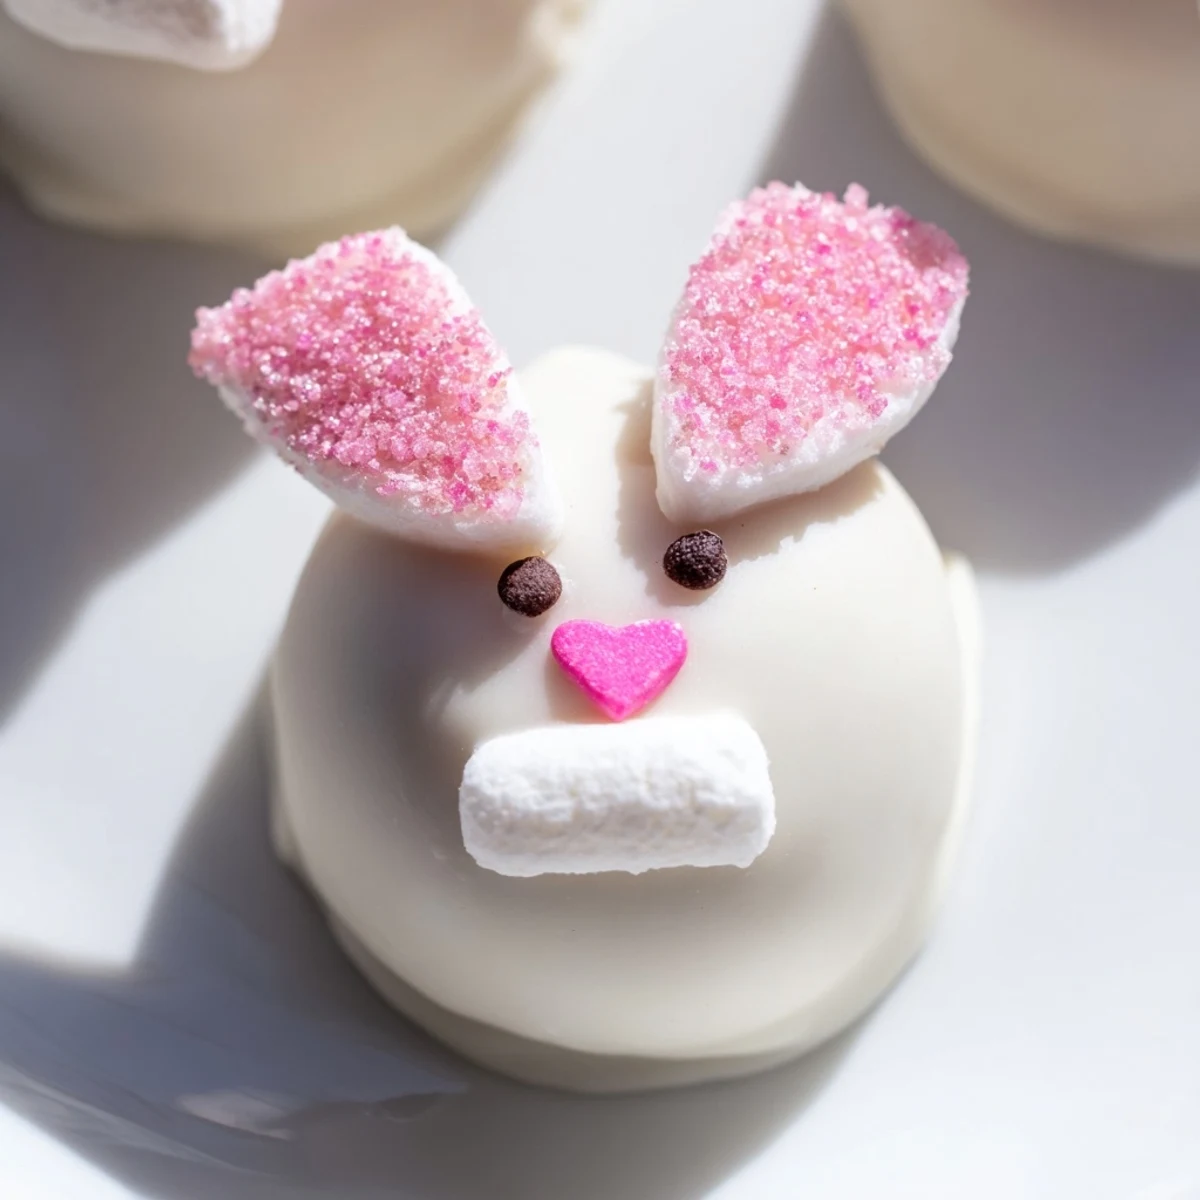
Save These delightful no-bake treats combine crushed Oreo cookies with creamy cheese, coated in smooth white chocolate and transformed into adorable bunnies. The process involves mixing cookie crumbs with softened cream cheese, chilling the mixture, then dipping in melted white chocolate.
Each ball gets decorated with marshmallow ears dipped in pink sugar, chocolate chip eyes, heart-shaped noses, and fluffy white tails. The result is an irresistible Easter or spring dessert that's as fun to make as it is to serve.
My sister called me at 7 AM last Easter morning, slightly panicked, realizing she'd promised to bring dessert to the family gathering and had absolutely nothing prepared. I told her to grab some Oreos from the corner store and come over. We ended up making these adorable bunny balls together, laughing through the messy process and getting chocolate everywhere. Now they're the most requested treat at every spring gathering.
Last year my niece insisted on making a whole batch with blue candy melts instead of white, calling them 'Easter bunnies after it rained.' The creativity didn't stop there. She decided some bunnits needed ears that stood straight up like they'd heard something surprising, while others got floppy ears. Every single bunny had its own personality, and honestly, that's what made them the hit of the party.
Ingredients
- Oreo cookies: I've tried store brands and while they work, the original chocolate sandwich cookies have that perfect balance of sweetness and bitterness that cuts through all the cream cheese
- Cream cheese: Definitely let it come to room temperature first, otherwise you'll end up with frustrating lumps that refuse to blend smooth
- White chocolate: Candy melts are easier to work with since they're designed for coating, but good quality white chocolate has a far superior taste
- Mini marshmallows: Fresh ones are crucial here. Stale marshmallows won't cut cleanly and get those cute ear shapes
- Pink sanding sugar: This gives the ears that perfect spring sparkle without making them too sweet like some glitters do
Instructions
- Crush those cookies:
- Pulse the Oreos in your food processor until they're fine and uniform, like dark sand. Taking them all the way to crumbs ensures your balls will be smooth rather than speckled with stubborn chunks.
- Make the dough:
- Add the softened cream cheese and process until it comes together into a thick, pliable dough. It should hold its shape when squeezed but still feel slightly sticky.
- Roll and chill:
- Scoop out tablespoon portions and roll them between your palms until smooth. Freeze them for at least 20 minutes because cold balls won't slide right off your fork during dipping.
- Melt the coating:
- Melt the white chocolate in 30 second intervals, stirring religiously between each one. White chocolate seizes up quickly, so patience here prevents a grainy disaster later.
- Dip and decorate:
- Drop each chilled ball into the chocolate, lift it with a fork, and tap gently against the bowl edge to let excess drip off. Work quickly while the coating is still wet to attach the marshmallow ears, candy eyes, and pink noses.
 Save
Save My friend's three-year-old took one bite, looked up with wide eyes, and whispered 'I can't eat bunnits, they're too cute.' His mom convinced him that these bunnits were made of magic and hopped right into people's tummies voluntarily. After that, he happily ate three and made sure to tell everyone about the 'magic hopping candy.' Sometimes the cuteness factor makes them taste even better.
Making These Ahead
The great news is these can be made up to two weeks in advance if stored properly. After decorating, pop them in an airtight container between layers of wax paper and keep them refrigerated. They actually seem to get better after a day or two as the flavors meld together.
Decorating Variations
Beyond the classic bunny design, try dipping just the top half in colored candy melts for a two-tone effect, or skip the faces entirely and roll them in pastel sprinkles. I've seen people make chick versions by using yellow coating and adding candy beaks and tiny wings.
Serving Suggestions
These work beautifully on a dessert table alongside cupcakes and cookies, but they're also perfect for packaging individually in clear treat bags with pretty ribbons as party favors. Set them in mini cupcake liners for easy grabbing.
- Arrange them on a bed of edible Easter grass for maximum presentation impact
- Pair with fresh berries to balance the richness with something light and tart
- Offer some without decorations for anyone who prefers the classic Oreo ball experience
 Save
Save Hope these little bunnits hop their way into your heart and onto your holiday table this spring.
Recipe FAQs
- → How far in advance can I make bunny Oreo balls?
-
You can prepare these treats up to 3 days ahead. Store them in an airtight container in the refrigerator, adding decorations just before serving for best results.
- → Can I use regular chocolate instead of white chocolate?
-
Yes, milk or dark chocolate works perfectly for coating. The contrast creates a striking appearance, though white chocolate provides that classic spring aesthetic.
- → Why do my Oreo balls fall apart when dipping?
-
This usually happens when the mixture isn't chilled sufficiently. Freeze for at least 30 minutes until firm, and work quickly when dipping to prevent the filling from softening.
- → What can I use instead of mini marshmallows for ears?
-
Sliced almonds, white chocolate shavings, or even cut-out fondant pieces make excellent alternatives. Choose based on your preferences and ingredient availability.
- → How do I store decorated bunny balls?
-
Keep them refrigerated in a single layer, separated by parchment paper. They'll stay fresh for up to one week, though they rarely last that long!
- → Can I freeze these treats for later?
-
Absolutely! Freeze undipped balls for up to 2 months. Thaw in refrigerator overnight before coating and decorating for best texture and appearance.
