 Save
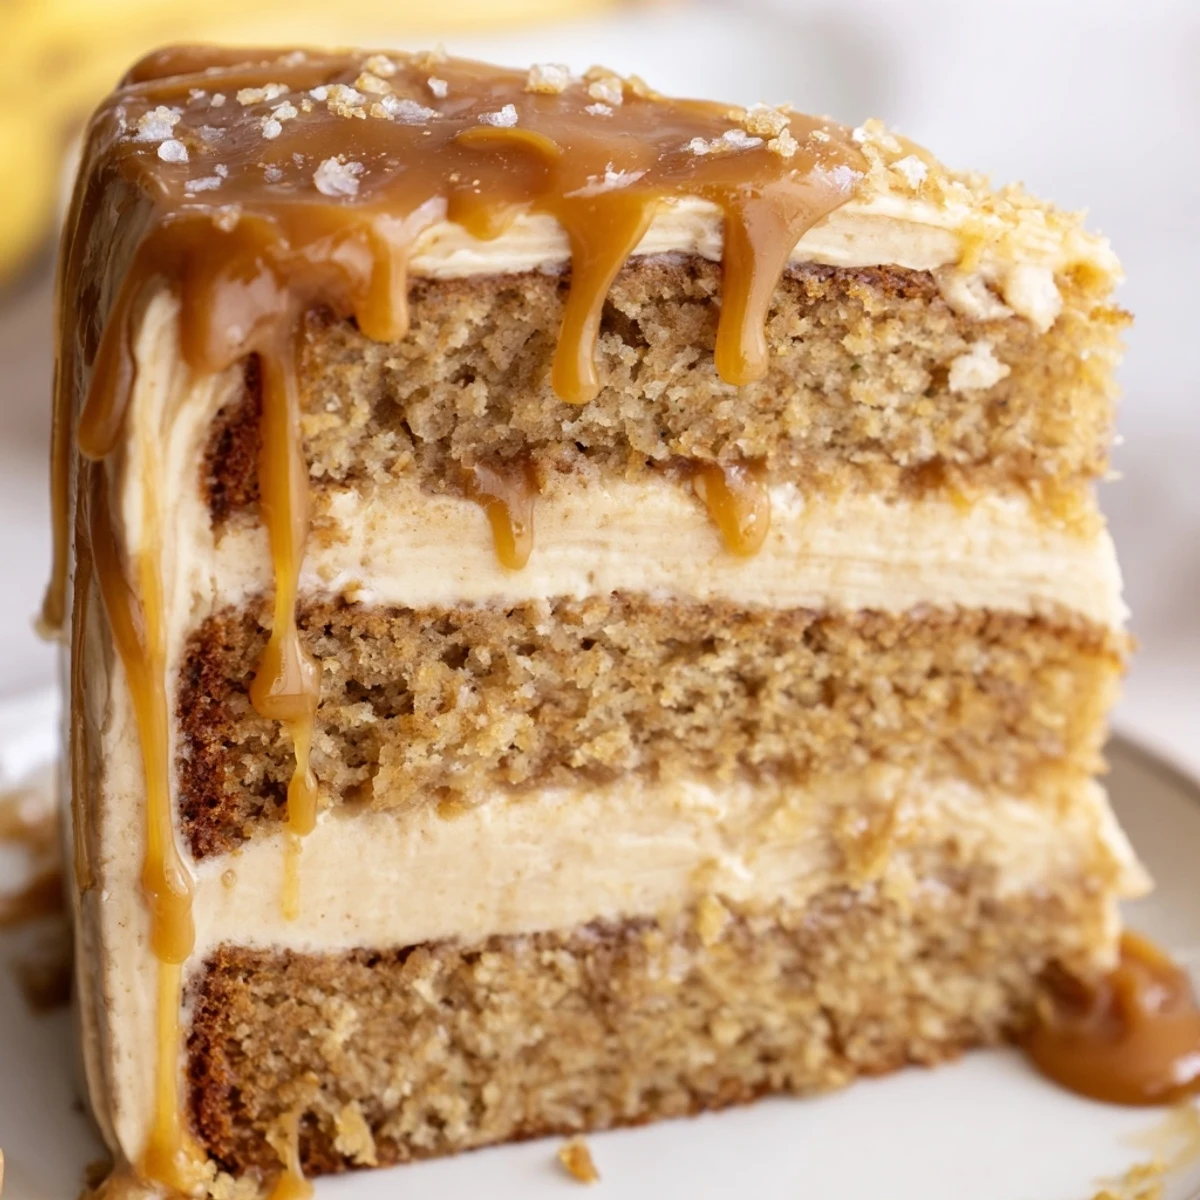
Save Indulge in this stunning banana cake that features three luxurious elements working in perfect harmony. The base is an incredibly moist banana cake enriched with nutty brown butter, which adds incredible depth and sophistication to the classic flavor profile.
What truly sets this creation apart is the generous amount of salted caramel sauce swirled between the layers and incorporated into the silky frosting. The sweet-salty combination creates an addictive balance that keeps everyone coming back for another slice.
While the technique involves making your own caramel sauce and browned butter, the results are absolutely worth the extra effort. Each forkful delivers tender cake, gooey caramel pockets, and buttery frosting that will impress at any gathering.
The smell of brown butter browning in a saucepan is the kind of thing that makes you stop whatever you are doing and just breathe. I discovered this cake during a rainy October weekend when I had six overripe bananas glaring at me from the counter and a craving for something over the top. Browning the butter was a happy accident born from distraction, and it turned an ordinary banana cake into something my friends still text me about months later. This recipe is the result of that beautiful kitchen mistake.
I brought this cake to a friends potluck birthday dinner, fully expecting it to play second fiddle to the professional bakery cake someone else had ordered. By the end of the night, my humble layer cake had been reduced to scattered crumbs while the bakery cake sat mostly untouched. My friend Sarah literally licked the caramel drizzle off her plate and asked if I would make it for her wedding, which honestly felt like the highest compliment a home baker can receive.
Ingredients
- 170 g unsalted butter (for the cake): Browning this transforms it into something almost butterscotch like, so do not skip that step or rush it.
- 300 g all purpose flour: Spoon and level it gently to avoid a dense, heavy crumb.
- 1 tsp baking soda: This leavens the cake and works with the acidity of the buttermilk for a tender rise.
- 1/2 tsp salt: Just enough to balance the sweetness and enhance the caramel notes throughout.
- 3 to 4 ripe bananas, about 1 1/2 cups mashed: The speckled, nearly black ones are exactly what you want for maximum sweetness and moisture.
- 200 g granulated sugar: White sugar keeps the crumb light while contributing clean sweetness.
- 100 g packed brown sugar: Brown sugar adds molasses depth that pairs beautifully with the brown butter.
- 2 large eggs: Room temperature eggs blend more evenly into the batter for a smoother texture.
- 120 ml buttermilk: The tang and fat content here are essential for a moist, tender crumb that lasts for days.
- 2 tsp vanilla extract: A generous pour rounds out all the toasted, caramelized flavors in this cake.
- 200 g granulated sugar (for caramel): This melts into pure liquid gold, the foundation of your salted caramel sauce.
- 60 ml water: Just enough to help the sugar dissolve evenly before it begins caramelizing.
- 115 g unsalted butter, cubed (for caramel): Cubing it ensures it melts quickly and evenly when you add it to the hot sugar.
- 120 ml heavy cream, room temperature (for caramel): Cold cream can cause the caramel to seize, so let it sit out beforehand.
- 1 tsp flaked sea salt (for caramel): Flaked salt dissolves slowly, giving you little bursts of salinity that make the caramel addictive.
- 115 g unsalted butter, softened (for frosting): Truly soft butter is the key to a silky, lump free frosting, so plan ahead.
- 240 g powdered sugar, sifted: Sifting prevents gritty pockets in your finished frosting.
- 4 to 5 tbsp salted caramel sauce (for frosting): Using the homemade sauce in the frosting ties every layer of flavor together beautifully.
- 1 to 2 tbsp milk or cream (for frosting): Add this gradually to reach your ideal spreading consistency.
- Pinch of salt (for frosting): A tiny pinch elevates the caramel flavor and keeps the frosting from tasting one note.
Instructions
- Brown the butter:
- Melt the butter in a light colored saucepan over medium heat, swirling frequently until it turns golden amber and smells like toasted hazelnuts. Pour it into a heatproof bowl immediately because it can go from perfect to burnt in seconds.
- Prep your pans and oven:
- Preheat to 175 degrees Celsius, then grease and flour two 20 cm cake pans, tapping out the excess flour. Line the bottoms with parchment circles for foolproof release later.
- Whisk the dry ingredients:
- In a medium bowl, combine the flour, baking soda, and salt with a whisk until evenly distributed. Set it aside while you work on the wet ingredients.
- Combine the wet team:
- In a large bowl, mash the bananas well, then add both sugars, the eggs, buttermilk, vanilla, and your cooled brown butter. Stir until everything is homogenous and smells incredible.
- Marry wet and dry:
- Gradually fold the flour mixture into the banana mixture with a spatula, stopping as soon as you no longer see dry streaks. Overmixing builds gluten and makes the cake tough, so treat the batter gently.
- Bake until golden:
- Divide the batter evenly between the two pans and bake for 35 to 40 minutes, until a toothpick inserted in the center emerges with just a few moist crumbs. Cool in the pans for 10 minutes before turning out onto wire racks.
- Make the salted caramel:
- Combine sugar and water in a saucepan over medium heat and resist the urge to stir, just swirl the pan gently until the mixture turns a deep amber color. Remove from heat and carefully whisk in the cubed butter, then slowly pour in the cream while stirring vigorously. Stir in the flaked sea salt and let it cool to room temperature.
- Whip up the frosting:
- Beat the softened butter until pale and creamy, then gradually add the sifted powdered sugar and a pinch of salt. Blend in the caramel sauce and enough milk to reach a spreadable, silky consistency.
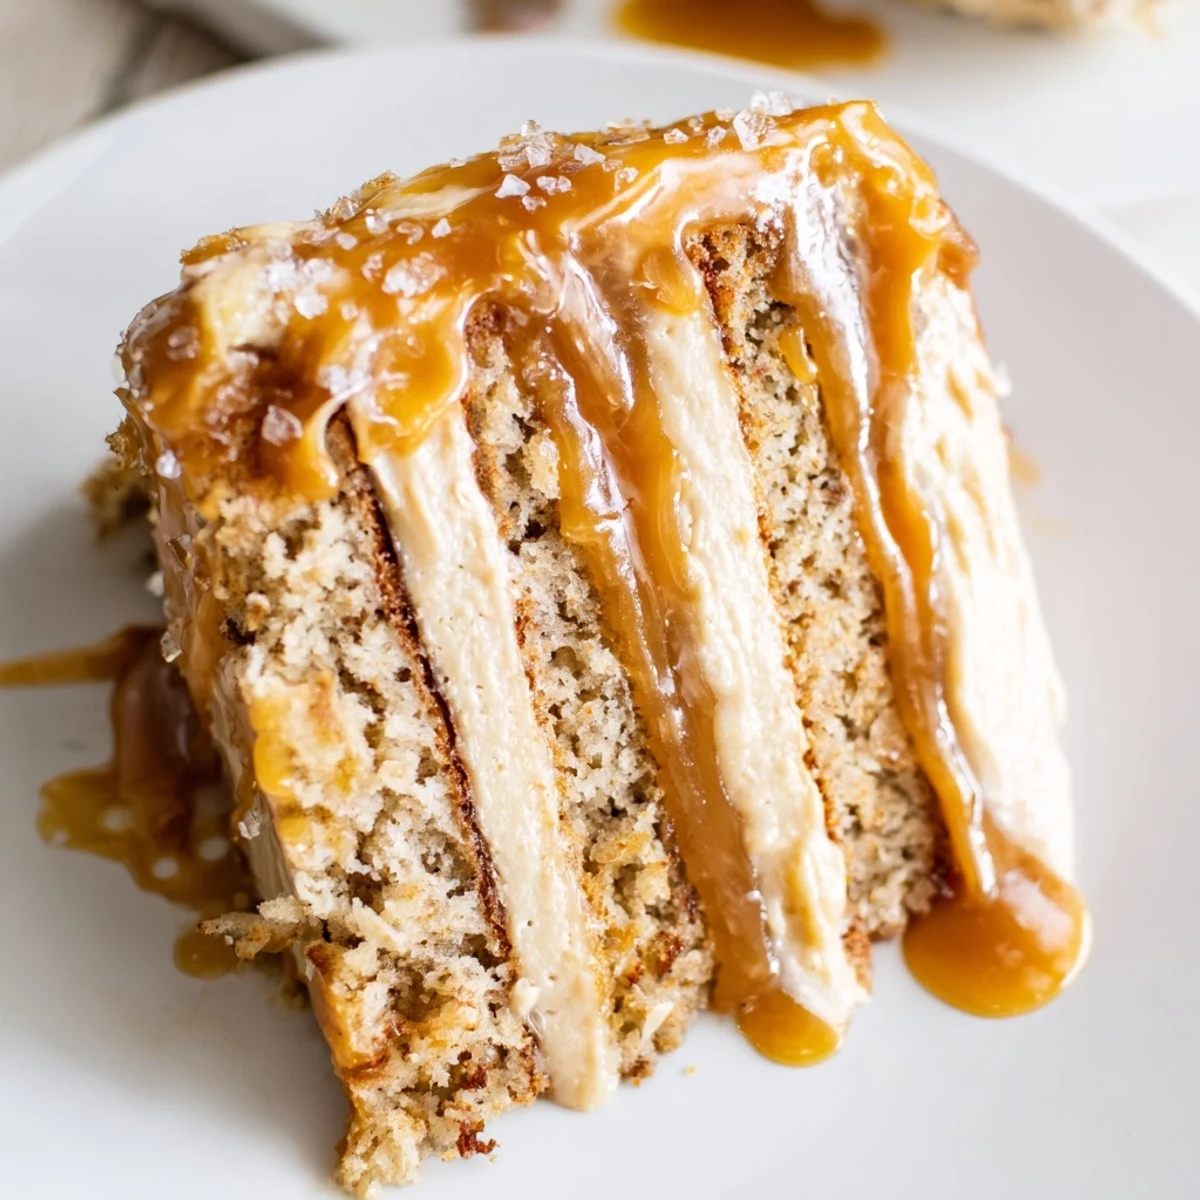
- Assemble the masterpiece:
- Place one cake layer on your serving plate and spread a generous blanket of frosting over the top, then drizzle with caramel sauce. Stack the second layer, frost the entire outside, and finish with more caramel drizzle and a sprinkle of flaky salt if you are feeling fancy.
 Save
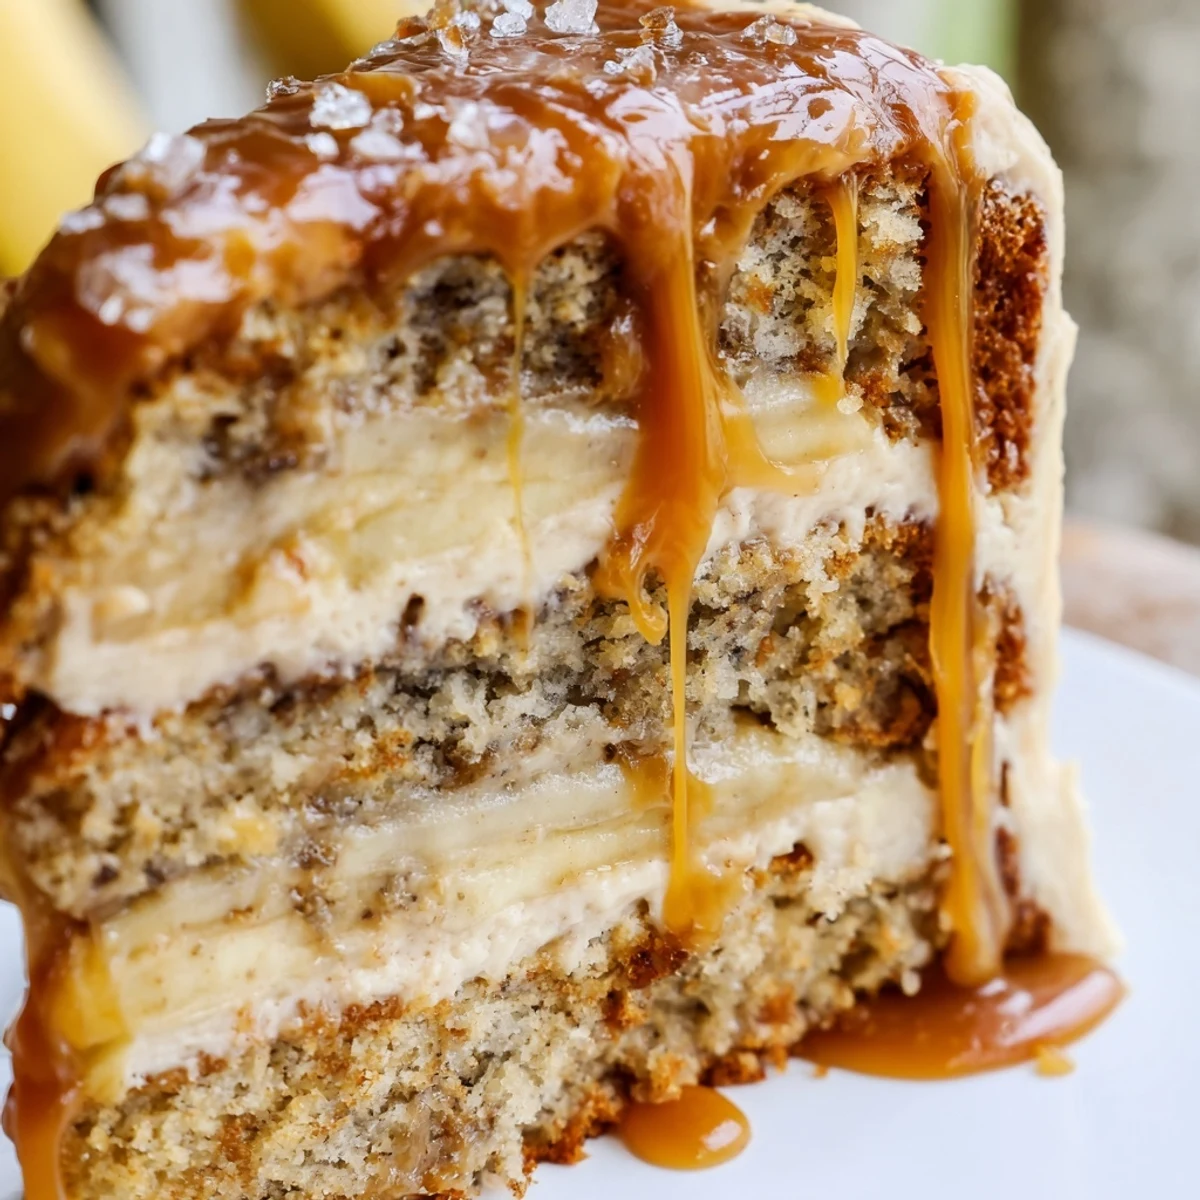
Save The moment I cut into this cake and saw the caramel sauce oozing between the layers while the brown butter aroma filled the room, I knew it had graduated from experiment to tradition. It has since become the thing I am asked to bring to every gathering, and honestly I have stopped trying to make anything else for dessert parties. Some recipes just claim their spot in your life and refuse to let go.
Getting the Cake Layers Right
Even baking comes down to a few simple habits that make a real difference. Make sure your oven is fully preheated before the cakes go in, and rotate the pans halfway through baking if your oven has hot spots. The cakes are done when the tops spring back lightly to the touch and the edges just begin to pull away from the sides of the pans.
Caramel Without the Panic
Making caramel from scratch feels dramatic the first time, but it is really just about patience and having your ingredients measured and ready before you start. Use a medium saucepan with a light colored interior so you can actually see the sugar changing color. If you are nervous, keep a bowl of ice water nearby in case of burns, but honestly the biggest risk is just walking away at the wrong moment.
Storing and Serving Like a Pro
This cake actually improves after a night in the refrigerator as the flavors meld and the frosting sets into something fudge like. Let it sit at room temperature for about 30 minutes before serving so the layers soften to their ideal texture.
- Store leftovers tightly covered in the fridge for up to four days, though it rarely lasts that long.
- Individual slices freeze surprisingly well when wrapped tightly in plastic and then foil.
- Always give the remaining caramel sauce a quick warm in the microwave before drizzling over leftovers.
 Save
Save Every time I make this cake, the kitchen fills with that impossible to resist smell of toasted butter and caramelized sugar, and whoever is nearby inevitably appears at the counter asking when it will be ready. That is the true magic of this recipe, it draws people in before the first bite is ever taken.
Recipe FAQs
- → Can I make the salted caramel sauce ahead of time?
-
Absolutely! The salted caramel sauce can be prepared up to two weeks in advance and stored in an airtight container in the refrigerator. Simply warm it gently before using to achieve a pourable consistency.
- → Why do I need to brown the butter first?
-
Browning the butter transforms it into a golden, nutty elixir that adds incredible depth to the banana cake. The milk solids toast during this process, creating toasted, toffee-like notes that perfectly complement the caramel and banana flavors.
- → What ripeness level should the bananas be?
-
For the best flavor and texture, use bananas that are heavily spotted or completely black. These overripe bananas contain higher sugar content and provide stronger banana flavor, plus they mash easily into the batter for superior moisture.
- → Can I substitute the buttermilk?
-
If you don't have buttermilk, you can create a quick substitute by mixing 120 ml of regular milk with 1 tablespoon of white vinegar or lemon juice. Let it sit for 5 minutes until slightly thickened before adding to your batter.
- → How do I prevent my caramel from seizing?
-
The key is room temperature ingredients—make sure your heavy cream isn't cold when adding it to the hot sugar mixture. Pour slowly while whisking constantly, and don't be alarmed if it bubbles vigorously. Keep whisking until smooth.
- → Can I freeze this cake?
-
Yes! You can freeze the unfrosted cake layers wrapped tightly in plastic wrap and foil for up to 3 months. The caramel sauce also freezes beautifully. Thaw everything overnight in the refrigerator before assembling and frosting.
