 Save
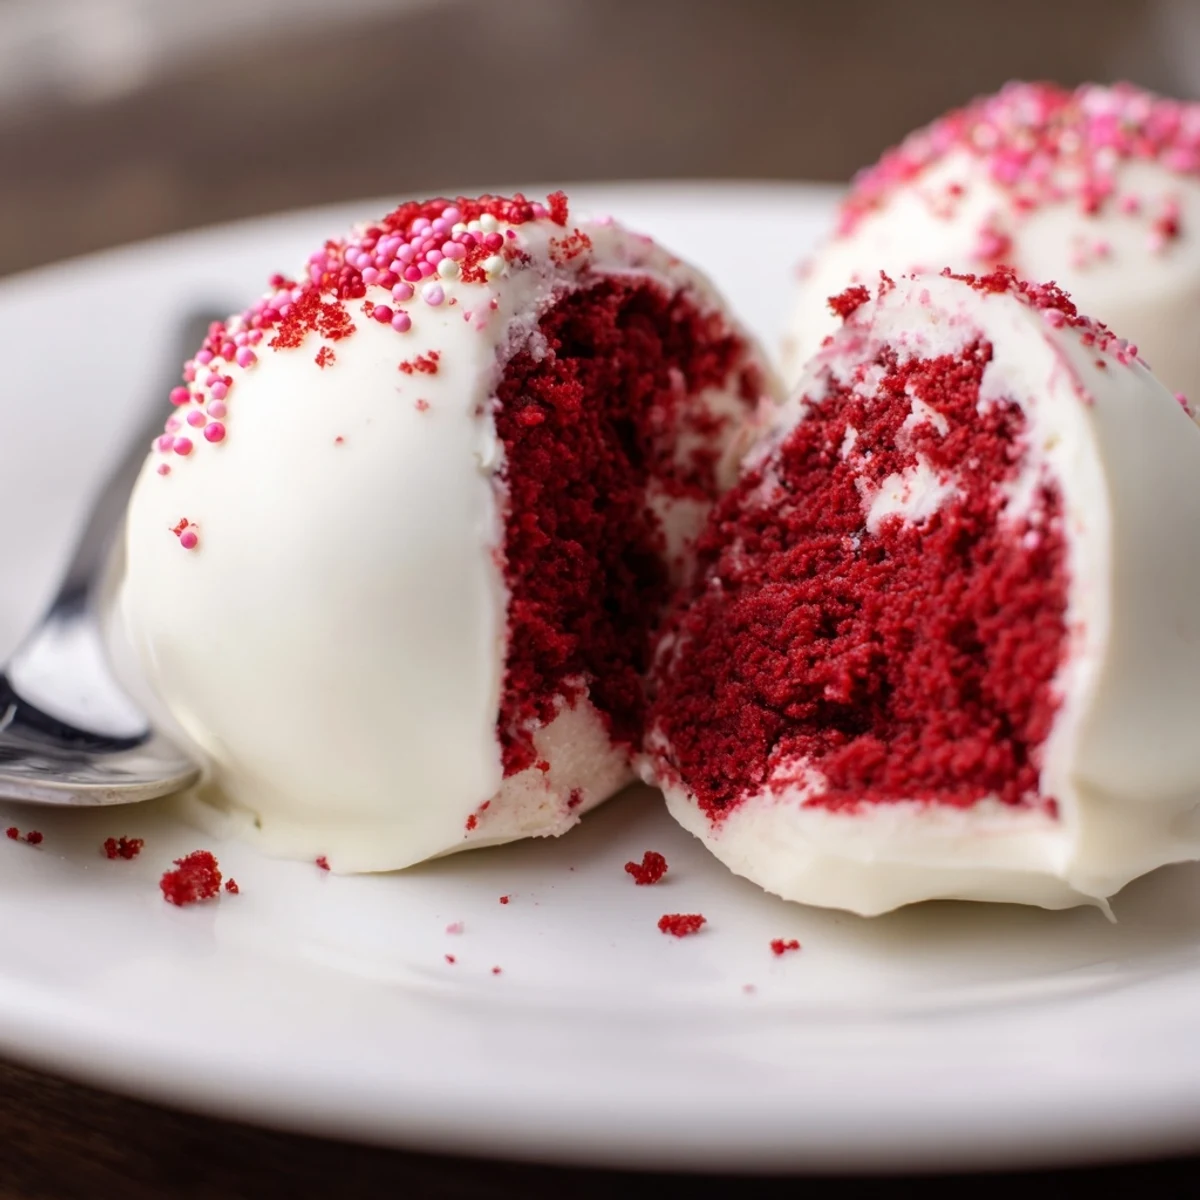
Save Crumble fully cooled red velvet cake and fold it into a smooth cream cheese, powdered sugar and vanilla mixture until a soft, moldable texture forms. Portion into tablespoon-sized balls, chill an hour to firm, then dip in melted chocolate and let set. Swap chocolate types, add nuts or coconut to the filling, and use crumbs or sprinkles for decoration. Store chilled in an airtight container up to five days.
The rain was hammering against my kitchen window the afternoon I stumbled into making these little gems. I had half a red velvet cake sitting on the counter from a failed layer cake experiment and a block of cream cheese that needed using. What started as desperation turned into the most requested party dish I have ever made.
I brought a tray of these to my neighbors holiday potluck last December and watched three people hover protectively over the plate until every last one vanished. My friend David actually hid four of them in his coat pocket, which I consider the highest compliment a dessert can receive.
Ingredients
- Red velvet cake (300 g): Use leftover cake or grab one from the bakery section, just make sure it is fully cooled so the crumbs bind properly.
- Cream cheese (200 g, softened): Let it sit out for at least thirty minutes because cold cream cheese will leave ugly lumps in your filling.
- Powdered sugar (40 g): Just enough to sweeten the filling without making it cloying.
- Vanilla extract (1 tsp): Use real extract here, not imitation, since the flavor carries through the cream cheese prominently.
- White chocolate (250 g): Good quality melting chocolate makes all the difference, as cheap chips contain stabilizers that refuse to melt smoothly.
- Red food coloring (optional): A few drops in the melted coating give a gorgeous blush that ties the whole presentation together.
- Decorations (optional): Extra cake crumbs, sprinkles, or even a dusting of cocoa powder work beautifully for finishing.
Instructions
- Break it down:
- Crumble the red velvet cake into a large bowl using your fingers, working until the pieces are fine and uniform with no large chunks hiding anywhere.
- Whip the filling:
- In a separate bowl, beat the softened cream cheese, powdered sugar, and vanilla together until the mixture is completely smooth and looks like thick frosting.
- Marry them together:
- Pour the cream cheese mixture over the crumbs and stir vigorously with a spatula until everything is evenly combined and holds together like a soft dough when you squeeze it.
- Roll and shape:
- Scoop tablespoon sized portions and roll them between your palms into neat balls, placing each one on a parchment lined tray as you go.
- Chill out:
- Slide the tray into the refrigerator for at least one full hour so the balls firm up enough to handle the dipping without falling apart.
- Melt the chocolate:
- Warm the white chocolate in a microwave safe bowl in short twenty second bursts, stirring between each, until it flows like silk and add red coloring now if you want that pink tint.
- Dip with confidence:
- Drop each chilled ball into the chocolate, roll it gently to coat, then lift it out with a fork letting the extra chocolate drip back into the bowl before returning it to the parchment.
- Finish them off:
- Sprinkle your chosen decorations on top right away before the coating starts to set, because you only get a short window of stickiness to work with.
 Save
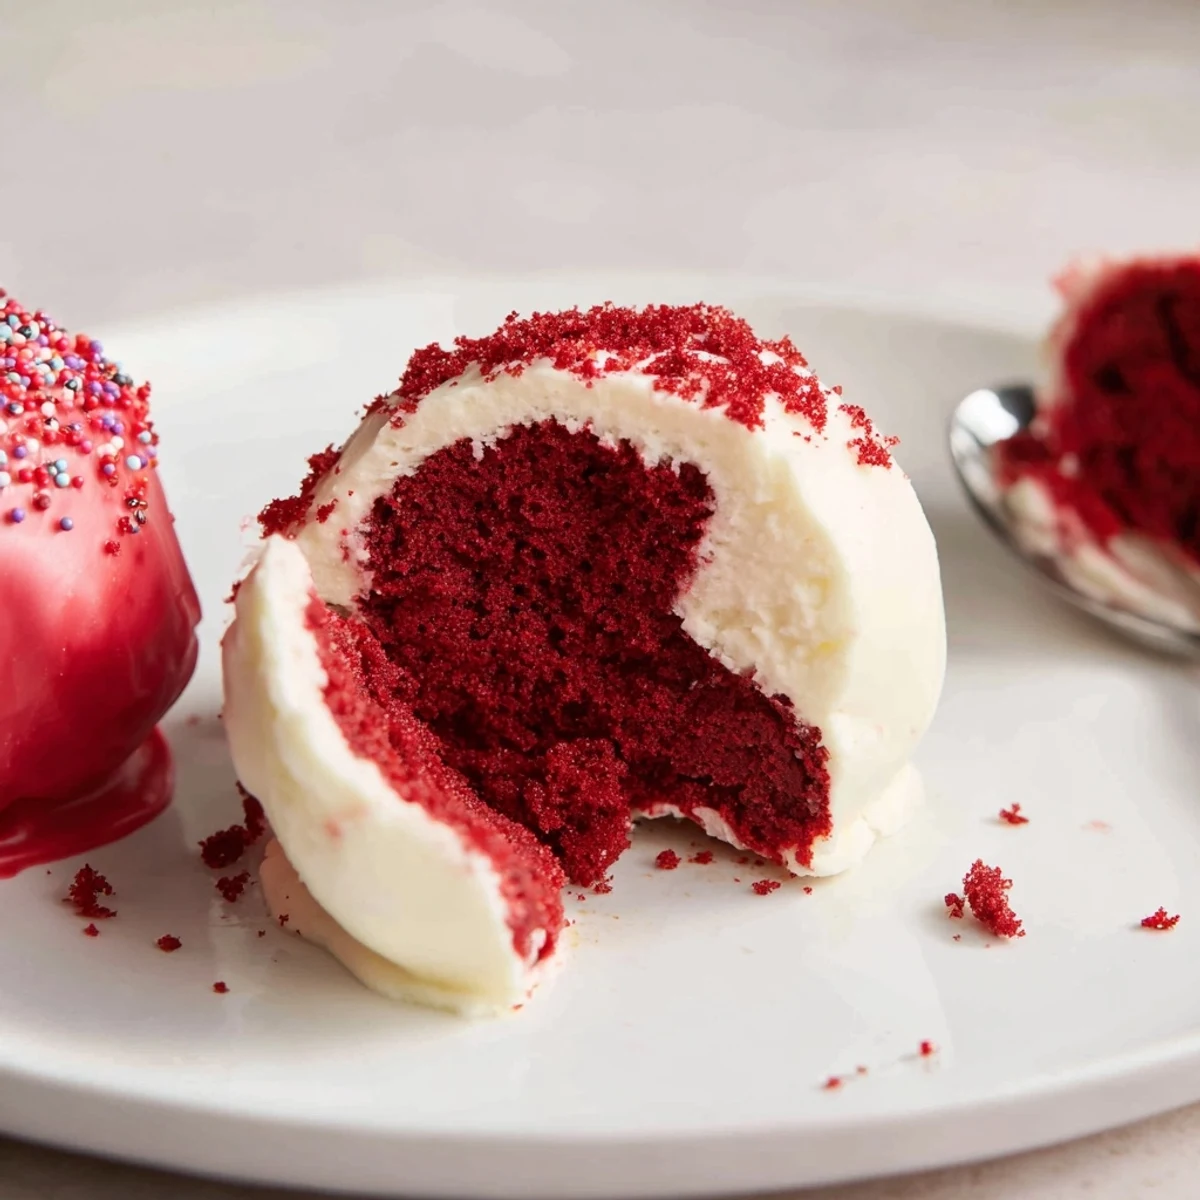
Save There is something deeply satisfying about biting into one of these and hitting that creamy center beneath the chocolate shell. They taste like celebration itself, even if you are just eating them cross legged on your kitchen floor at midnight.
Keeping Them Fresh
Store these in an airtight container in the refrigerator and they stay perfect for up to five days, though they rarely last that long in my house. Let them sit at room temperature for about ten minutes before serving so the chocolate coating softens slightly and the flavors wake up.
Swapping the Chocolate
White chocolate looks stunning but dark or milk chocolate creates a completely different experience that some people actually prefer. I made a batch with dark chocolate and a sprinkle of sea salt once and my sister in law still talks about it two years later.
Mix Ins and Variations
The basic recipe is a blank canvas for whatever you feel like adding to the filling. Fold in crushed pecans, shredded coconut, or even a handful of mini chocolate chips if you want to push these into truly indulgent territory.
- Toasted pecans add a warm nutty crunch that pairs surprisingly well with the tangy cream cheese.
- A tablespoon of espresso powder in the filling deepens the cocoa flavor without making them taste like coffee.
- Always taste your filling mixture before rolling so you can adjust the sweetness or add a pinch of salt to balance everything out.
 Save
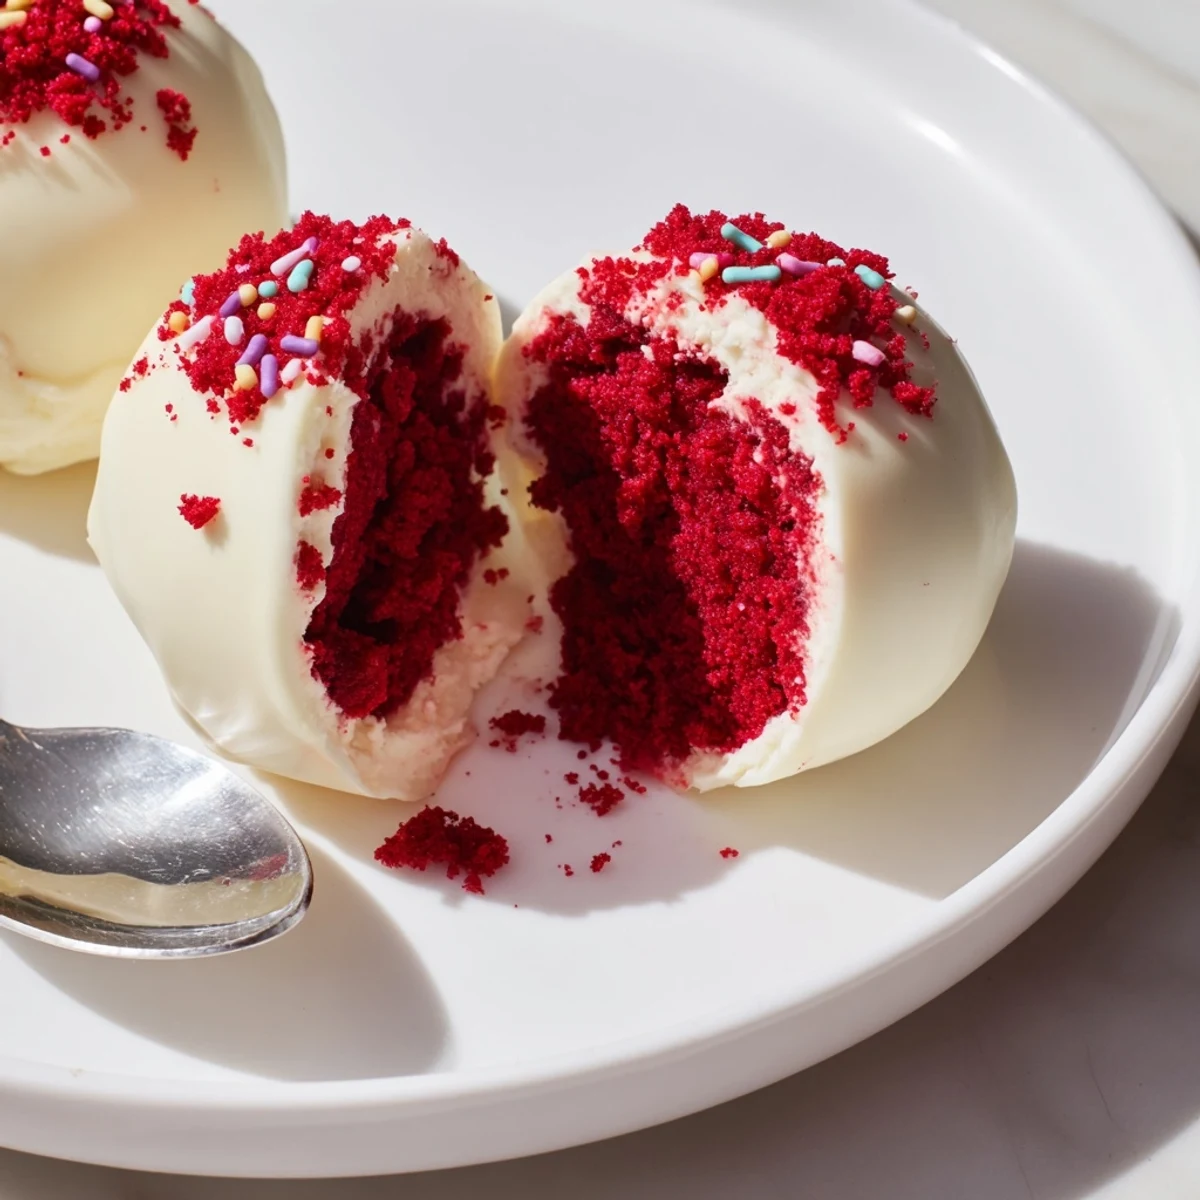
Save These little red velvet bites have a way of making any ordinary afternoon feel like something worth celebrating. Share them generously and watch people light up.
Recipe FAQs
- → Can I use store-bought cake as the base?
-
Yes. A pre-baked red velvet cake yields consistent crumbs — remove frosting and break into fine crumbs before mixing with the cream cheese for easy shaping.
- → Which chocolate works best for coating?
-
White, milk or dark chocolate all work. Tempering gives the best snap, but gently melting with a little neutral oil or shortening helps thin coatings for smooth dipping.
- → How do I avoid cracks or gaps in the chocolate shell?
-
Chill the formed balls thoroughly so they are firm before dipping, and allow excess chocolate to drip off. Avoid very thin coatings and let each layer set at room temperature or briefly chilled.
- → Can these be made ahead and frozen?
-
Yes. Freeze on a tray until solid, then transfer to a sealed container. Thaw in the refrigerator before serving; avoid repeated refreezing to preserve texture.
- → How can I reduce sweetness or adjust flavor?
-
Use less powdered sugar in the filling and choose dark or semisweet chocolate for coating. Add a pinch of salt or a splash of citrus to balance richness.
- → Are there allergen-friendly variations?
-
For dairy-free options, use plant-based cream cheese and dairy-free chocolate. Substitute gluten-free cake to remove gluten concerns, and add toasted nuts for texture if not allergic.
