 Save
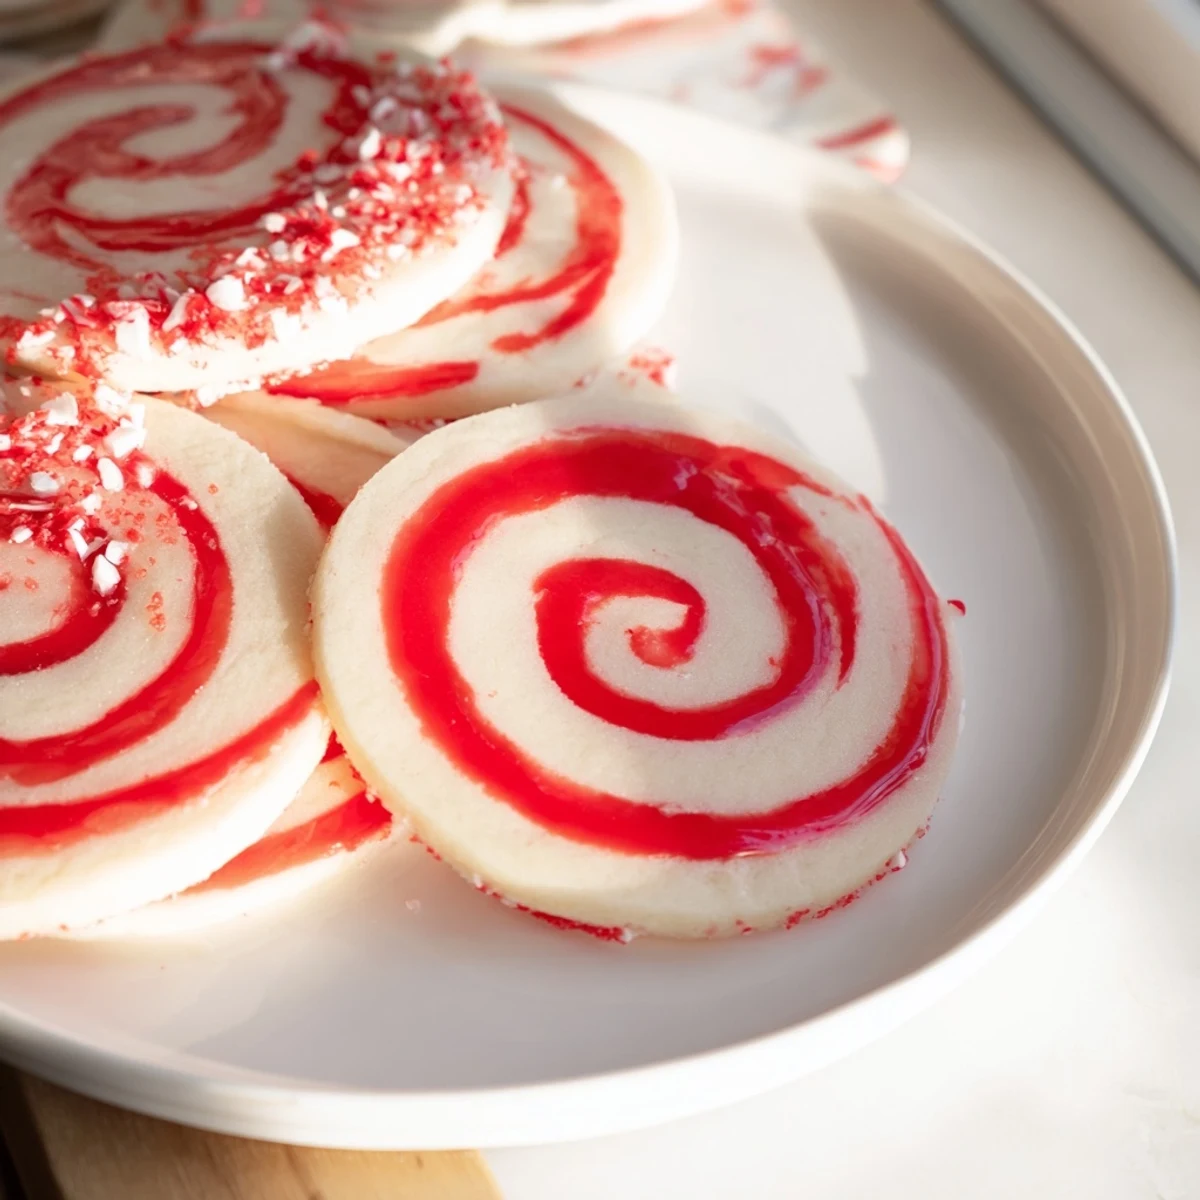
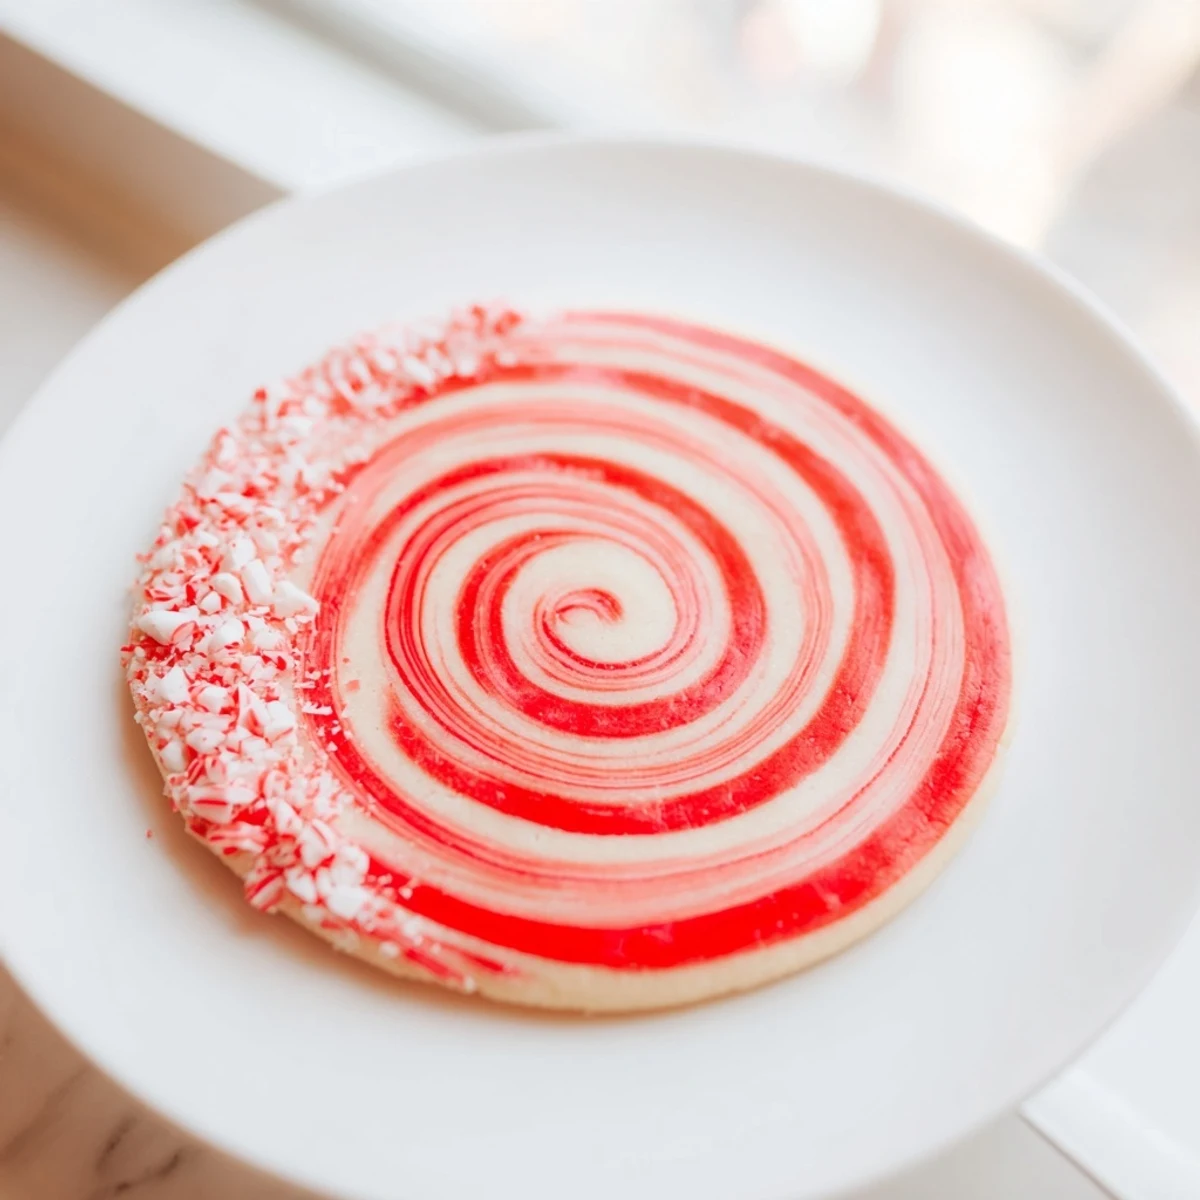
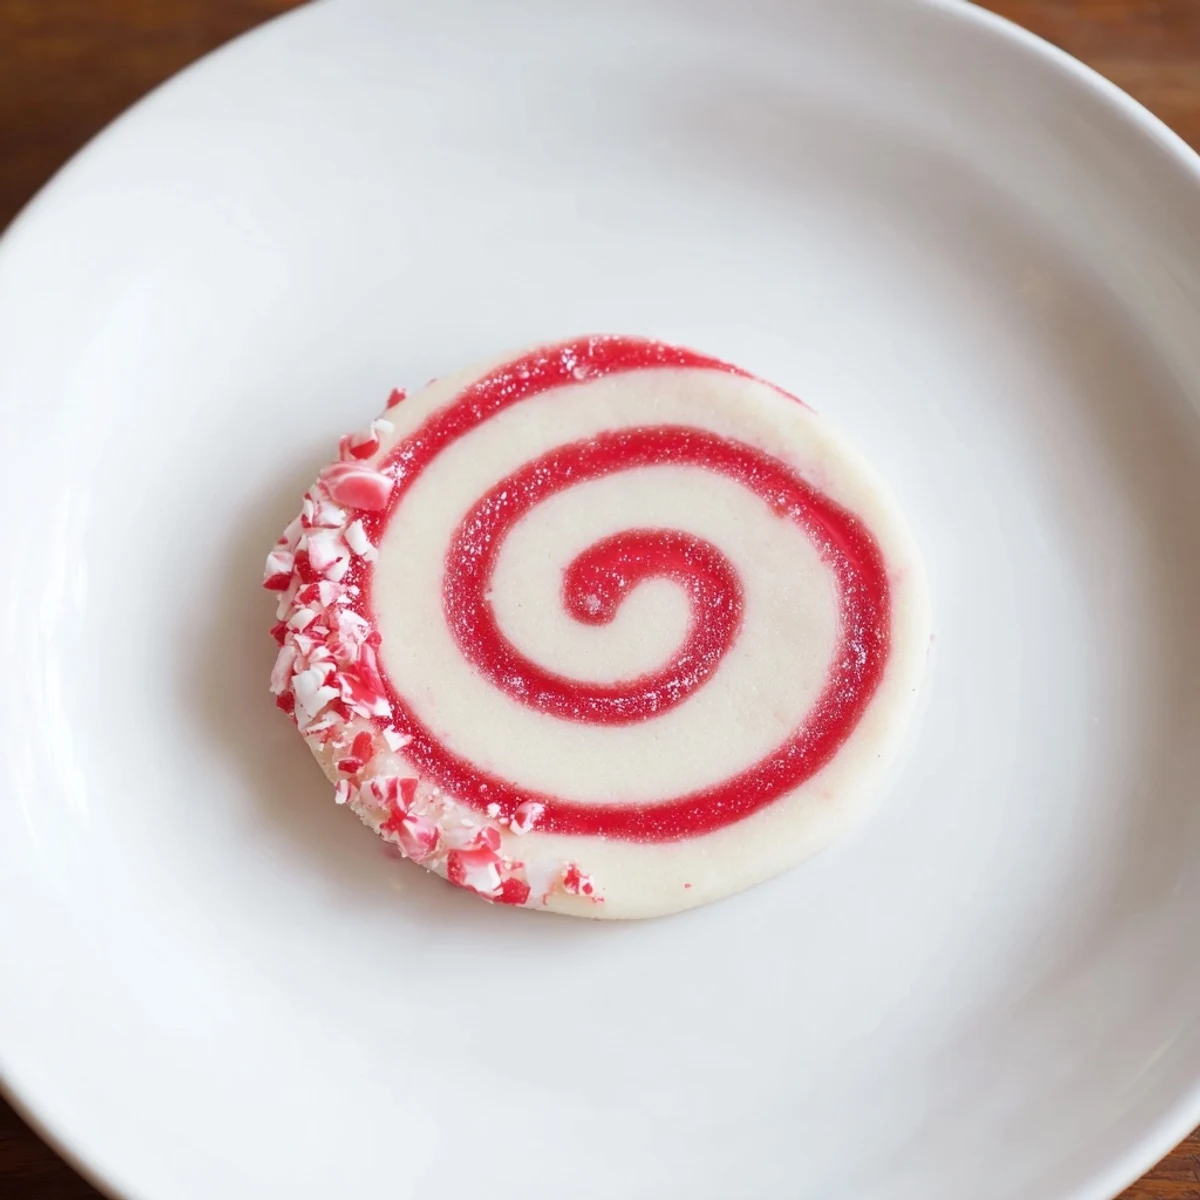
Save These peppermint swirl cookies combine a tender dough with a vibrant red-and-white spiral created by layering colored doughs. The dough is flavored with vanilla and peppermint extracts, chilled for an hour to firm up, then sliced and baked to a soft, flavorful treat. Garnished optionally with crushed peppermint candies, they offer a festive look and refreshing mint taste. Perfect paired with hot chocolate or peppermint tea, these cookies deliver a delightful balance of sweet and minty sensations, ideal for holidays or casual enjoyments.
My sister showed up at my door one December with a tin of swirl peppermint cookies, the kind where you slice through and there's this perfect candy-cane spiral inside. I bit into one and the whole kitchen suddenly smelled like winter—that sharp, cool peppermint mixing with vanilla and butter. I asked for the recipe that night, and she laughed and said she'd been making them for years but never had the guts to roll them tight enough. That became my mission.
I made these for a cookie exchange one year and brought them in a paper-lined box with red ribbon. Someone literally gasped when they saw the cross-section before biting in, and I felt like I'd won the lottery. That moment of someone discovering the swirl inside? That's when I realized these weren't just cookies—they were little edible surprises.
Ingredients
- All-purpose flour: The foundation—measure it right (spoon and level, don't scoop) and your dough won't get tough.
- Baking powder: Just enough to give them a tender crumb, not so much they spread into hockey pucks.
- Unsalted butter: Softened to room temperature is non-negotiable; cold butter won't cream properly and you'll miss that fluffy base.
- Granulated sugar: Beat this with the butter until it looks pale and cloud-like—this is where the texture magic happens.
- Egg and vanilla extract: These two together create the tender richness that makes people reach for seconds.
- Peppermint extract: The soul of the cookie—use pure extract, not imitation, if you can find it; the difference is real.
- Red gel food coloring: Gel works better than liquid because it won't make your dough wet and streaky.
- Crushed peppermint candies: Optional but they catch the light and signal to everyone that something special is happening.
Instructions
- Whisk the dry goods:
- Combine flour, baking powder, and salt in a bowl and set it aside—this sounds simple but it keeps lumps from hiding in your dough later.
- Cream butter and sugar:
- Beat them together for about 2 minutes until the mixture looks pale and fluffy, like clouds. This step isn't just texture; it's where you're incorporating tiny air bubbles that will make the cookies tender.
- Add the eggs and extracts:
- Drop in the egg, vanilla, and peppermint extract, then beat until everything is fully combined and the mixture smells incredible. Don't rush this; let the mixer do the work.
- Bring it together:
- Gradually add your dry ingredients to the wet mixture, stirring until a soft dough forms—don't overmix or you'll develop too much gluten and end up with tough cookies.
- Color one half:
- Split the dough in half and add several drops of red gel coloring to one portion, mixing until the color is even and beautiful. The dough will feel exactly the same; it's just dressed up.
- Roll out both rectangles:
- Place each half between two sheets of parchment and roll to about 1/4-inch thick, roughly 9 by 7 inches. The parchment keeps things from sticking and makes sliding these delicate sheets around so much easier.
- Stack and roll:
- Carefully peel the top parchment off the red dough, then flip it onto the plain dough. Starting from the long edge, roll everything tightly into a log using the parchment as your guide—tight rolls mean beautiful, distinct swirls.
- Chill until firm:
- Wrap the log and refrigerate for at least 1 hour, though overnight works beautifully and makes slicing cleaner. Cold dough holds its shape better and bakes more evenly.
- Bake the cookies:
- After preheating to 350°F, slice the log into 1/4-inch rounds, space them 2 inches apart on parchment-lined sheets, and bake for 9 to 11 minutes until just set—they should look slightly underbaked, almost fragile. They'll continue cooking on the hot baking sheet for those first 5 minutes after you pull them out.
- Cool with intention:
- Leave them on the baking sheet for 5 minutes to firm up, then move them to a wire rack so the bottoms don't get soggy.
 Save
Save There's something deeply satisfying about pulling that first slice off the frozen log and seeing the spiral stare back at you, perfect and confident. I realized then that baking isn't just about feeding people—it's about that tiny moment of triumph when a technique actually works.
The Swirl Is Everything
The beauty of this cookie lives in that red-and-white spiral, so don't treat the rolling casually. Use the parchment paper as your helper—let it do the lifting and guiding so you're not fighting with fragile dough. Think of it like you're wrapping a gift that's also edible.
Storing and Giving
These keep beautifully in an airtight container for up to a week, though they rarely last that long in my house. They also freeze exceptionally well before slicing, so you can make the log weeks ahead and bake fresh cookies on demand, which feels like cheating in the best way.
Pairing and Enjoying
Serve these with hot chocolate or peppermint tea and watch people's faces light up when they bite through and discover that hidden swirl. These cookies taste like December feels—festive and cozy and just a little bit indulgent.
- If you want a bolder swirl, use more red gel food coloring and don't shy away from it.
- Crushed candy canes sprinkled on top add texture and that unmistakable holiday look.
- These pair perfectly with coffee too, if you're thinking of breakfast cookies instead of holiday treats.
 Save
Save These swirl peppermint cookies prove that the most impressive-looking treats are often the most forgiving to make. Once you've rolled that first log and seen the spiral come alive, you'll be making them every holiday season.
Recipe FAQs
- → How do I achieve the red-and-white swirl effect?
-
Divide the dough in half, tint one portion with red gel food coloring, then layer and roll the colored dough over the plain dough before chilling.
- → Can I prepare the dough ahead of time?
-
Yes, the dough log can be wrapped and refrigerated for at least one hour to firm up before slicing and baking.
- → What flavor extracts enhance the dough?
-
A combination of vanilla and peppermint extracts gives the dough a sweet and refreshing flavor.
- → Are crushed peppermint candies necessary?
-
No, they are optional but add extra crunch and festive peppermint flavor as garnish.
- → How should baked cookies be stored?
-
Store cookies in an airtight container for up to one week to maintain freshness.
- → What is the ideal baking temperature and time?
-
Bake at 350°F (175°C) for 9 to 11 minutes until just set but not browned for a soft texture.
