 Save
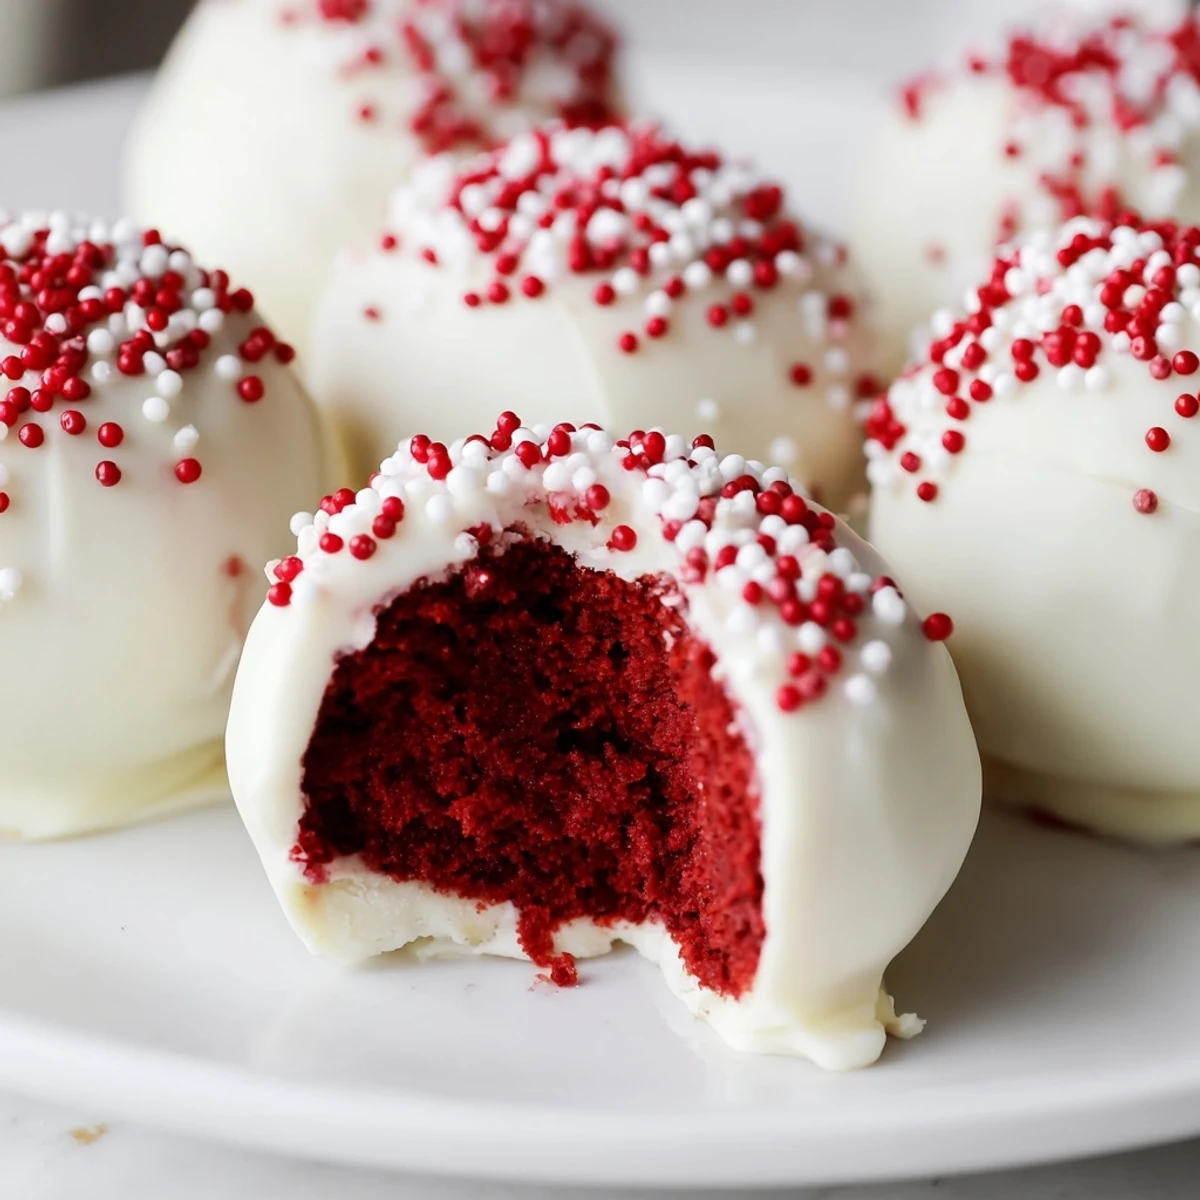
Save These red velvet cake pops feature moist, tender cake pieces blended with creamy frosting, then coated in rich white chocolate for a smooth finish. Ideal as bite-sized indulgences, they combine tangy cream cheese frosting with a delicate cocoa flavor and vibrant red color. Chilled and decorated, they offer a perfect balance of texture and sweetness, great for sharing at gatherings or gifting. The combination makes them an elegant yet approachable treat for any occasion.
The first time I attempted cake pops, I stood in my kitchen surrounded by sprinkles and chocolate streaks like a crime scene. My friend Sarah's wedding shower was the next morning, and I had decided these tiny red velvet bites on sticks would be my contribution. Twelve hours later, after three failed batches and a midnight grocery run for more candy melts, I finally understood the rhythm of these temperamental little treats. Now they are my go-to for celebrations because nothing makes people smile quite like dessert on a stick.
My sister called me at 10pm the night before her daughter's birthday party, sounding slightly panicked about the dessert situation. I told her to grab some vanilla cupcakes from the store and I would handle the transformation. We spent three hours crumbling and dipping and laughing as chocolate dripped everywhere but where it should. The kids at that party grabbed those cake pops faster than anything else on the table, and my sister still talks about how I saved the day.
Ingredients
- 1 1/4 cups (160 g) all-purpose flour: The foundation of that tender red velvet crumb, dont pack it down when measuring
- 1 cup (200 g) granulated sugar: Provides just the right sweetness to balance the tangy cream cheese
- 1/4 cup (22 g) unsweetened cocoa powder: A small amount gives that subtle chocolate depth without overpowering the classic red velvet flavor
- 1/2 tsp baking soda: Helps the cake rise properly for that light fluffy texture we need
- 1/2 tsp salt: Essential for balancing sweetness and bringing all flavors forward
- 1/2 cup (120 ml) buttermilk, room temperature: The secret to tender cake with that characteristic slight tang
- 1/2 cup (120 ml) vegetable oil: Keeps the cake incredibly moist and prevents dry cake pop disasters
- 2 large eggs, room temperature: Room temperature eggs blend more smoothly into the batter for even texture
- 1 tsp vanilla extract: Pure vanilla makes all the difference in the final flavor profile
- 1 tsp distilled white vinegar: Reacts with baking soda for extra lift and enhances the red color development
- 1 tbsp red food coloring: Gel coloring works best for that deep vibrant red without thinning the batter
- 4 oz (115 g) cream cheese, softened: Must be completely soft to avoid lumps in your frosting mixture
- 2 tbsp (30 g) unsalted butter, softened: Adds richness to the frosting and helps it hold shape
- 1 1/2 cups (180 g) powdered sugar: Sift it first to prevent any grainy texture in the final pops
- 1/2 tsp vanilla extract: A second dose for the frosting layer adds aromatic depth
- 12 oz (340 g) white chocolate or white chocolate candy melts: Candy melts are easier for beginners but real white chocolate tastes exceptional if you work quickly
- Sprinkles for decoration: Add these immediately after dipping before the chocolate sets
Instructions
- Preheat your oven:
- Set it to 350°F (175°C) while you grease and line an 8-inch square cake pan with parchment paper for easy removal later
- Whisk the dry ingredients:
- In a large bowl combine flour sugar cocoa powder baking soda and salt until well incorporated and uniform in color
- Mix the wet ingredients:
- In a separate bowl whisk buttermilk oil eggs vanilla vinegar and red food coloring until completely smooth and vibrant red
- Combine the mixtures:
- Gradually pour wet ingredients into dry ingredients mixing gently until just combined
- Bake the cake:
- Pour batter into your prepared pan and bake for 30 to 35 minutes until a toothpick inserted in the center comes out clean
- Prepare the frosting:
- While cake cools beat softened cream cheese and butter until smooth then add powdered sugar and vanilla beating until fluffy
- Crumble and combine:
- Break the completely cooled cake into small crumbs in a large bowl then mix in frosting until texture resembles damp sand and holds together when pressed
- Form the cake balls:
- Scoop tablespoon sized portions and roll into smooth balls placing them on a parchment lined baking sheet as you work
- Chill thoroughly:
- Refrigerate cake balls for 1 hour or freeze for 20 minutes until firm enough to handle without breaking
- Melt the coating:
- Heat white chocolate in a microwave safe bowl in 30 second intervals stirring between each until completely smooth and fluid
- Prepare the sticks:
- Dip the tip of each cake pop stick into melted chocolate then insert halfway into each chilled cake ball letting them set
- Dip and decorate:
- Hold each pop by the stick and dip fully into the melted chocolate letting excess drip off before adding sprinkles immediately
- Set completely:
- Stand cake pops upright in a styrofoam block or stand until the chocolate coating hardens completely before serving
 Save
Save Last Christmas I made five dozen of these for our neighborhood cookie exchange and watched them disappear in minutes while traditional cookies sat mostly untouched. Something about that red and white combination feels festive and special. Now whenever I see someone walking away with a cake pop in hand I know I have made the right choice for the occasion.
Getting the Right Texture
The secret to perfect cake pops lies in the ratio of cake to frosting. Too little frosting and the balls will crumble when you try to dip them. Too much and they become heavy dense and overly sweet. I aim for the consistency of damp sand that holds together when squeezed but still feels light. This takes practice and I still pinch off tiny test bits to check the texture before rolling all the balls.
Temperature Matters
Cold cake balls dip cleanly and hold their shape while warm ones will slide right off the stick into your chocolate coating. After chilling let them sit at room temperature for just a few minutes before dipping to prevent the chocolate from cracking due to extreme temperature differences. This middle ground is where cake pop magic happens and you get that smooth flawless finish.
Mastering the Chocolate Dip
Work quickly once your chocolate is melted because it thickens as it cools and becomes harder to work with. I keep a small bowl of melted chocolate on the side to top up if the main bowl starts getting too thick during the dipping process. Gently tap the stick against the bowl edge to remove excess chocolate and avoid pooling at the base of the pop.
- Reseal any exposed cake with a tiny bit of chocolate if the coating pulls away from the stick
- Have all your sprinkles and decorations ready before you start dipping
- If chocolate becomes too thick stir in a teaspoon of vegetable oil to thin it slightly
 Save
Save These little treats have a way of making any gathering feel more special and celebratory. Whether you are making them for a wedding shower birthday or just because Tuesday needs something sweet they never fail to bring joy.
Recipe FAQs
- → How do I keep the cake pops moist?
-
Ensure the cake is fully cooled before mixing with the frosting to maintain moisture and create the right texture for shaping.
- → What type of chocolate works best for coating?
-
White chocolate or white chocolate candy melts provide a smooth, easy-to-melt coating that hardens nicely and looks elegant.
- → Can I add flavors to the cake mixture?
-
Yes, adding a pinch of cinnamon or orange zest to the batter enhances flavor without overpowering the classic red velvet taste.
- → How long should the cake balls be chilled?
-
Chilling for at least one hour in the refrigerator ensures they firm up properly for coating and handling.
- → What’s the best way to prevent cracking while dipping?
-
Use candy melts for easier coating as they set faster and are less prone to cracking compared to pure white chocolate.
- → How should these treats be stored?
-
Store in an airtight container in the refrigerator and consume within five days to maintain freshness.
