 Save
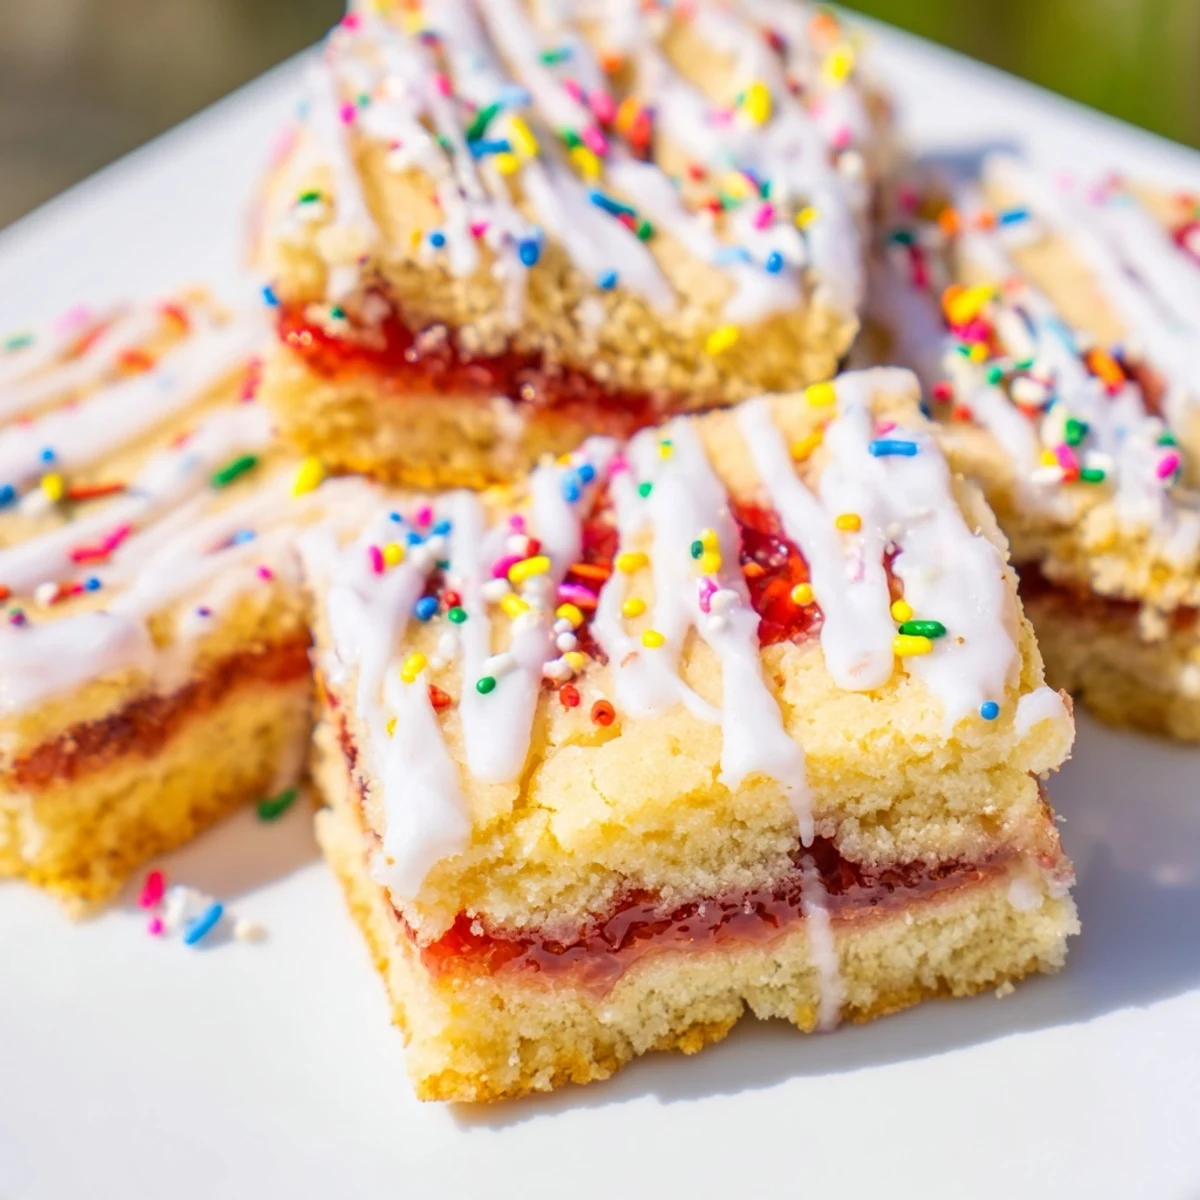
Save These handheld dessert bars combine nostalgic poptart flavors with the comfort of homemade sugar cookies. A buttery vanilla cookie base gets layered with sweet strawberry jam, then topped with crumbled cookie dough and baked until golden edges form. The finishing touch is a drizzle of smooth vanilla glaze and plenty of colorful sprinkles for that classic breakfast treat vibe.
The preparation comes together quickly—cream butter and sugar, add eggs and vanilla, then fold in the dry ingredients. Most of the dough forms the bottom layer while jam gets spread over top, with remaining dough crumbled across the surface. After baking, let the bars cool completely before adding the glaze so it sets properly.
Swap strawberry jam for raspberry, blueberry, or apricot depending on what you have on hand. The bars store well at room temperature for up to three days, making them perfect for bake sales, potlucks, or afternoon snacks alongside coffee or milk.
My college roommate used to keep a box of strawberry pop tarts in our dorm room for emergency breakfasts before 8am lectures. Last month when I was brainstorming treats for my niece's birthday, that memory hit me like a sugar rush and I knew exactly what to make. These bars capture everything we loved about those toaster pastries but with a soft, homemade cookie base that puts the boxed version to shame.
I brought these to a neighborhood block party last summer and watched three different people's eyes light up when they took their first bite. Someone actually asked if I could make them for their daughter's graduation party right there on the spot. Now they're my go to whenever I need to bring something that feels like childhood but looks impressive enough for adults.
Ingredients
- Unsalted butter softened: Room temperature butter creates that tender crumb that makes these bars so irresistible
- Granulated sugar: Cream this thoroughly with the butter to get that signature pop tart sweetness
- Large eggs: Add them one at a time to keep the dough emulsified and smooth
- Vanilla extract: Dont skimp here since vanilla bridges the gap between cookie and jam flavors
- All purpose flour: This structure holds everything together while staying soft
- Baking powder and salt: Just enough to give the bars a little lift without making them cakey
- Strawberry jam: Use your favorite brand or homemade but seedless works best for even spreading
- Powdered sugar: Sift this first to avoid any lumps in your glaze
- Milk: Start with two tablespoons and add more until you reach the perfect drizzling consistency
- Sprinkles: Add these immediately after glazing or they wont stick properly
Instructions
- Preheat and prepare your pan:
- Set your oven to 350F and line a 9x13 inch pan with parchment paper letting the ends hang over for easy lifting later
- Cream the butter and sugar:
- Beat the softened butter and sugar together until the mixture looks pale and fluffy which usually takes about 3 minutes
- Add the eggs and vanilla:
- Drop in the eggs one at a time mixing well after each then pour in the vanilla
- Whisk the dry ingredients:
- In a separate bowl combine the flour baking powder and salt so everything is evenly distributed
- Combine the dough:
- Gradually mix the dry ingredients into the wet ingredients stopping as soon as you no longer see streaks of flour
- Press in the base layer:
- Take about two thirds of your dough and press it firmly into the bottom of your prepared pan creating an even layer
- Spread the jam filling:
- Dollop the strawberry jam over the dough and gently spread it leaving a tiny border around the edges so it doesnt bubble over
- Add the topping:
- Break the remaining dough into small pieces and scatter them over the jam pressing slightly so they adhere
- Bake until golden:
- Slide the pan into the oven for 23 to 27 minutes until the edges turn golden brown and the center feels set
- Cool completely:
- Let the bars cool fully in the pan because warm bars will melt your glaze right off
- Make the glaze:
- Whisk the powdered sugar milk and vanilla until you have a smooth pourable mixture
- Glaze and sprinkle:
- Drizzle the glaze back and forth over the cooled bars and shower them with sprinkles right away
- Set and slice:
- Wait 15 minutes for the glaze to firm up then lift the whole slab out using the parchment and cut into 16 squares
 Save
Save My niece now requests these for every school event and family gathering. Her mom told me they've become a bargaining chip for getting homework done on time which I consider my greatest contribution to education.
Choosing Your Jam Flavor
While strawberry is the classic choice that reminds everyone of those foil wrapped pastries from childhood dont be afraid to experiment. Raspberry brings a brighter tartness that cuts through the sweet glaze beautifully while apricot creates a more sophisticated flavor profile that adults tend to gravitate toward. Ive even used mixed berry jam when I wanted to clear out multiple half empty jars from the fridge and it turned out to be a happy accident.
Getting The Glaze Right
The perfect glaze consistency is somewhere between honey and heavy cream thick enough to hold its shape but fluid enough to drizzle smoothly. If you accidentally make it too thin just sift in another quarter cup of powdered sugar until it thickens back up. Work quickly once you start pouring because glaze begins to set within seconds and you want those sprinkles to adhere while everything is still tacky.
Storage And Make Ahead Tips
These bars actually taste better on day two when the flavors have had time to meld together and the cookie base softens slightly. Store them in an airtight container at room temperature for up to five days though they rarely last that long in my house. If you want to make them ahead for a party bake and glaze them the day before then cut just before serving so the edges stay fresh.
- Place a piece of parchment between layers if you need to stack them
- Freeze unglazed bars for up to three months then thaw and glaze when ready
- The glaze takes about an hour to fully harden so plan accordingly if youre transporting them
 Save
Save These bars have become my signature contribution to every bake sale and potluck because they hit that perfect sweet spot between nostalgic comfort food and something you'd proudly serve at a party. Watch them disappear first from every dessert table.
Recipe FAQs
- → What type of jam works best for the filling?
-
Strawberry jam provides classic poptart flavor, but raspberry, blueberry, apricot, or even grape jam all work beautifully. Choose a smooth jam without large fruit pieces for even spreading across the cookie base.
- → Can I make these bars gluten-free?
-
Yes, substitute the all-purpose flour with a 1:1 gluten-free flour blend designed for baking. The texture remains similar, though the bars may be slightly more tender. Ensure your jam and sprinkles are also certified gluten-free.
- → How should I store these cookie bars?
-
Keep the bars in an airtight container at room temperature for up to 3 days. If your kitchen is warm, refrigerate them to prevent the glaze from becoming too soft. Layer bars between parchment paper to prevent sticking.
- → Why do I need to cool the bars completely before glazing?
-
Warm bars will cause the glaze to melt and run off rather than set properly. Letting them cool completely—about 1 hour—ensures the glaze adheres well and sets into a smooth finish that holds the sprinkles in place.
- → Can I freeze these poptart bars?
-
Freeze the unglazed bars by wrapping them tightly in plastic wrap and foil for up to 2 months. Thaw overnight at room temperature, then add the glaze and sprinkles just before serving. Already glazed bars can be frozen but the sprinkles may bleed slightly.
- → What size pan should I use?
-
A 9x13-inch pan creates bars with ideal thickness—enough cookie base to support the jam layer without becoming too thick to cut cleanly. Using a larger pan will yield thinner bars that may overbake, while smaller pans create thick, doughy bars that need longer baking time.
