 Save
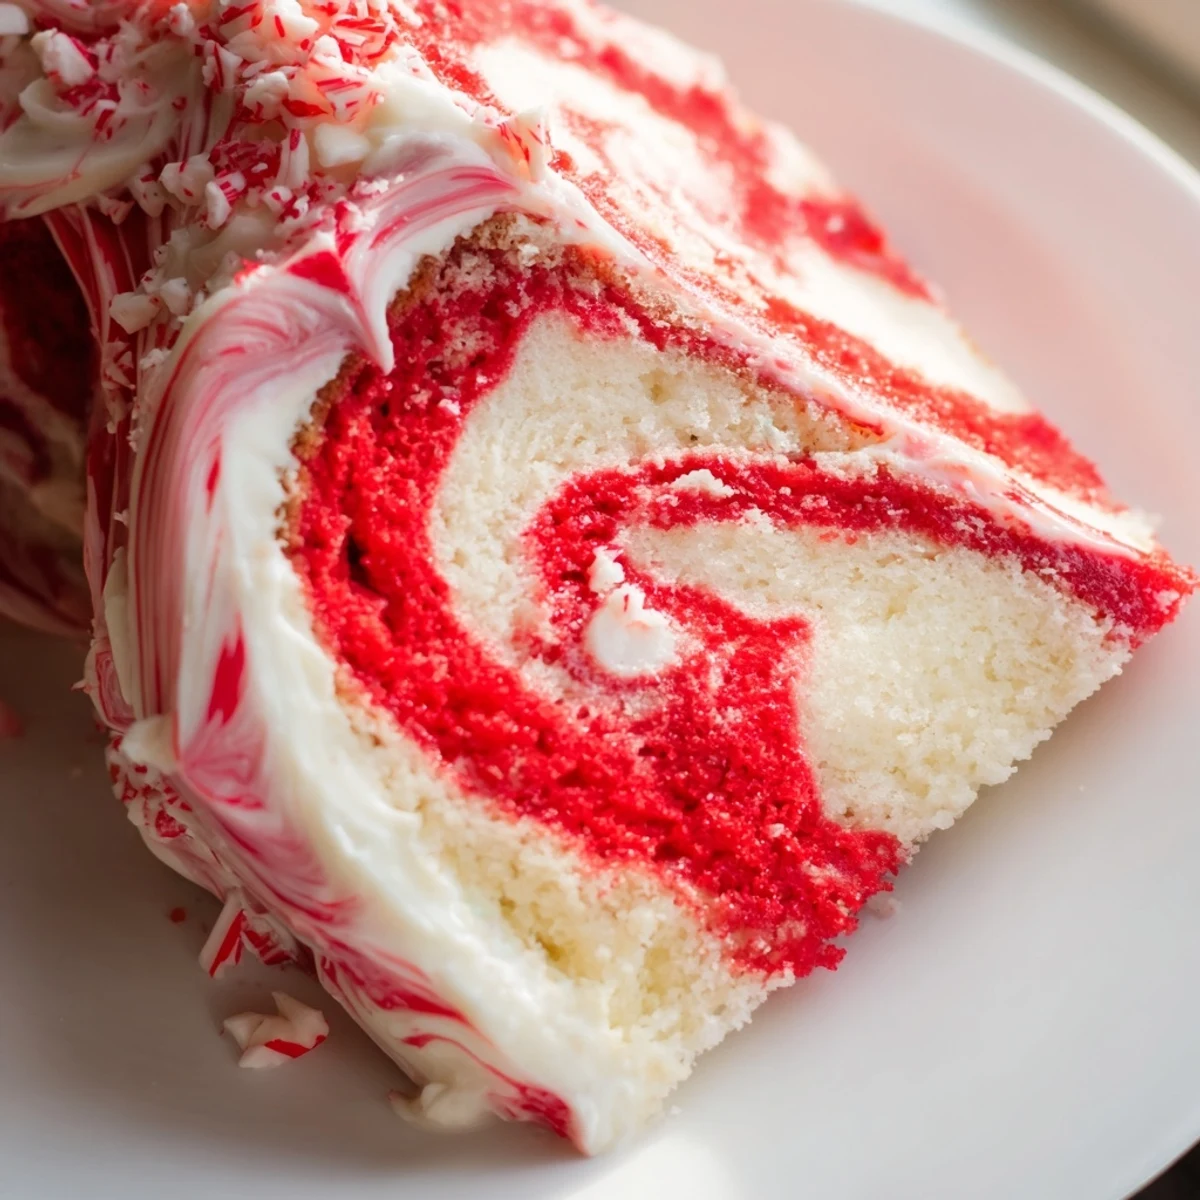
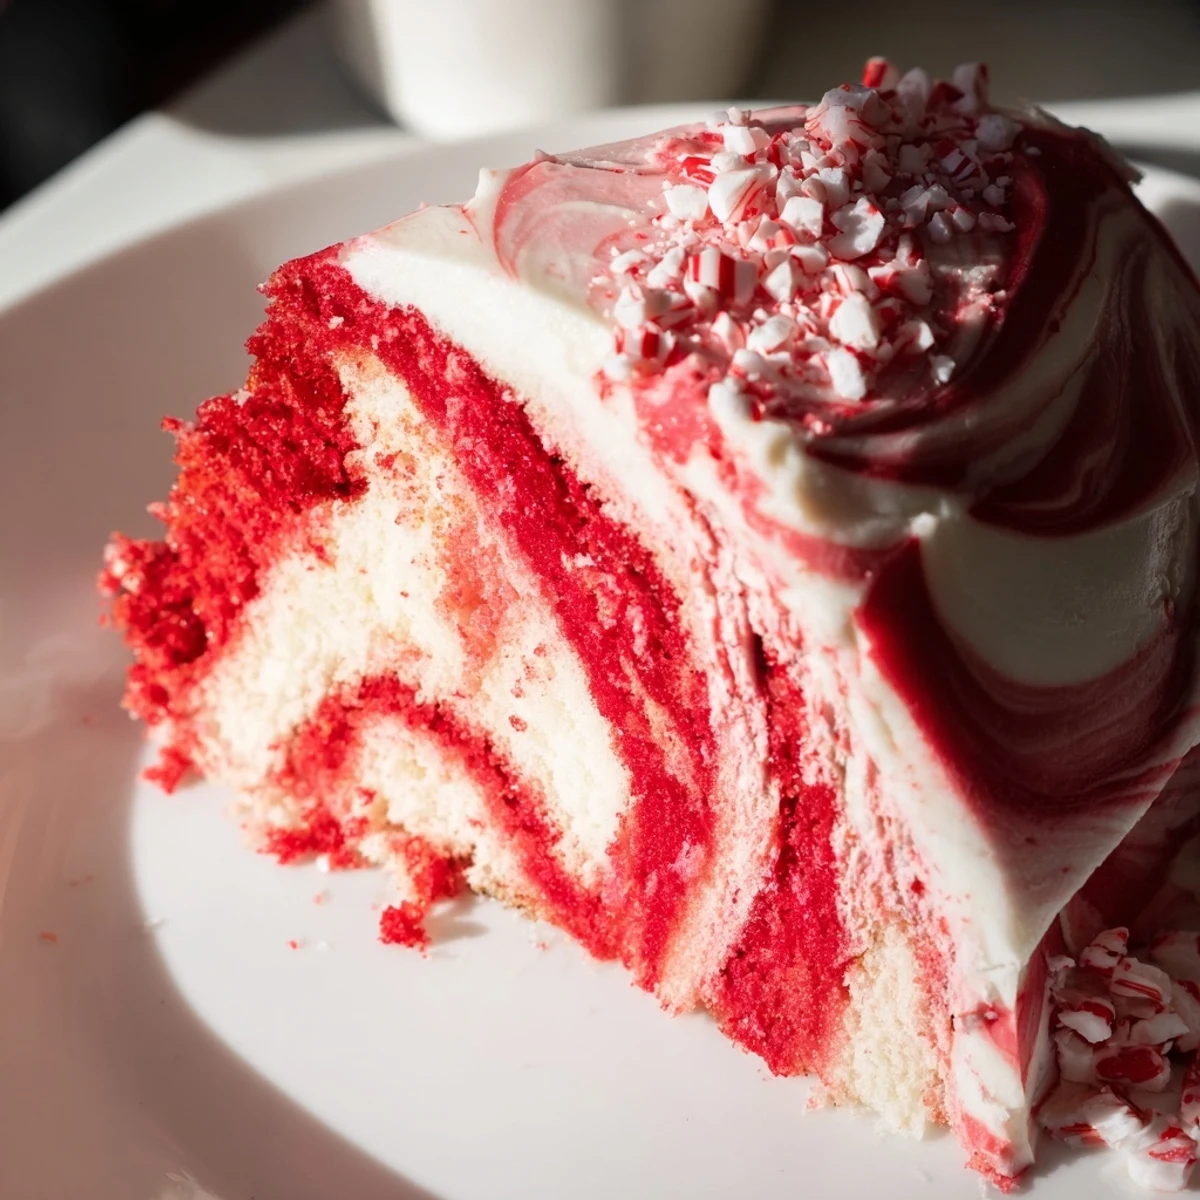
Save This festive cake combines a tender base with striking red swirls created by gently folding red-tinted batter into the original mix. Infused with refreshing peppermint extract, it offers a cool, invigorating flavor balanced by creamy frosting accented with a peppermint twist. The method includes marbling the batter carefully to achieve an eye-catching swirl effect without overmixing, then baking to a light, fluffy texture. Finished with optional crushed candies and a red frosting swirl, it’s an ideal centerpiece for holidays or special celebrations.
The first time I made a peppermint cake was by accident—I'd grabbed peppermint extract instead of almond by mistake, and instead of scrapping the batter, I decided to lean into it. My kitchen smelled like a candy cane shop for hours, and when that cake came out with its accidental red swirl, everyone at the table fell silent for a second before asking for seconds. That mistake taught me that sometimes the best desserts happen when you stop overthinking and just let the flavors guide you.
I've made this cake three times now for different gatherings, and each time someone leans over and says it looks almost too pretty to eat—then they do anyway. There's something about a cake that's both stunning and approachable that makes people relax and enjoy themselves. That's when I realized this recipe isn't just about the cake; it's about creating a moment.
Ingredients
- All-purpose flour (2 1/2 cups): This is your foundation—make sure it's fresh and fluffed before measuring or you might end up with a dense cake.
- Baking powder (2 1/2 tsp): This gives your cake that tender, pillowy crumb that makes it melt on your tongue.
- Salt (1/2 tsp): Don't skip this tiny amount; it amplifies the peppermint flavor and balances the sweetness beautifully.
- Granulated sugar (1 1/2 cups): The sweetness anchor that lets the peppermint shine without competing.
- Unsalted butter (3/4 cup for batter, 1 cup for frosting): Room temperature butter is non-negotiable here—cold butter won't cream properly and you'll lose that fluffy texture.
- Eggs (3 large): These bind everything together and add richness; room temperature eggs integrate much more smoothly.
- Whole milk (1 cup): This keeps the cake moist and tender; don't substitute with non-dairy unless you're comfortable with a slightly different crumb.
- Vanilla extract (1 tsp): A quiet background note that makes the peppermint pop even more.
- Peppermint extract (1 1/2 tsp for batter, 1/2 tsp for frosting): The star of the show—use quality extract because it really does make a difference in the final flavor.
- Red gel food coloring: Gel coloring is thicker and won't thin out your batter the way liquid coloring does, so you get that vibrant red without compromising texture.
- Powdered sugar (4 cups, sifted): Sifting removes lumps and makes your frosting smooth and cloud-like.
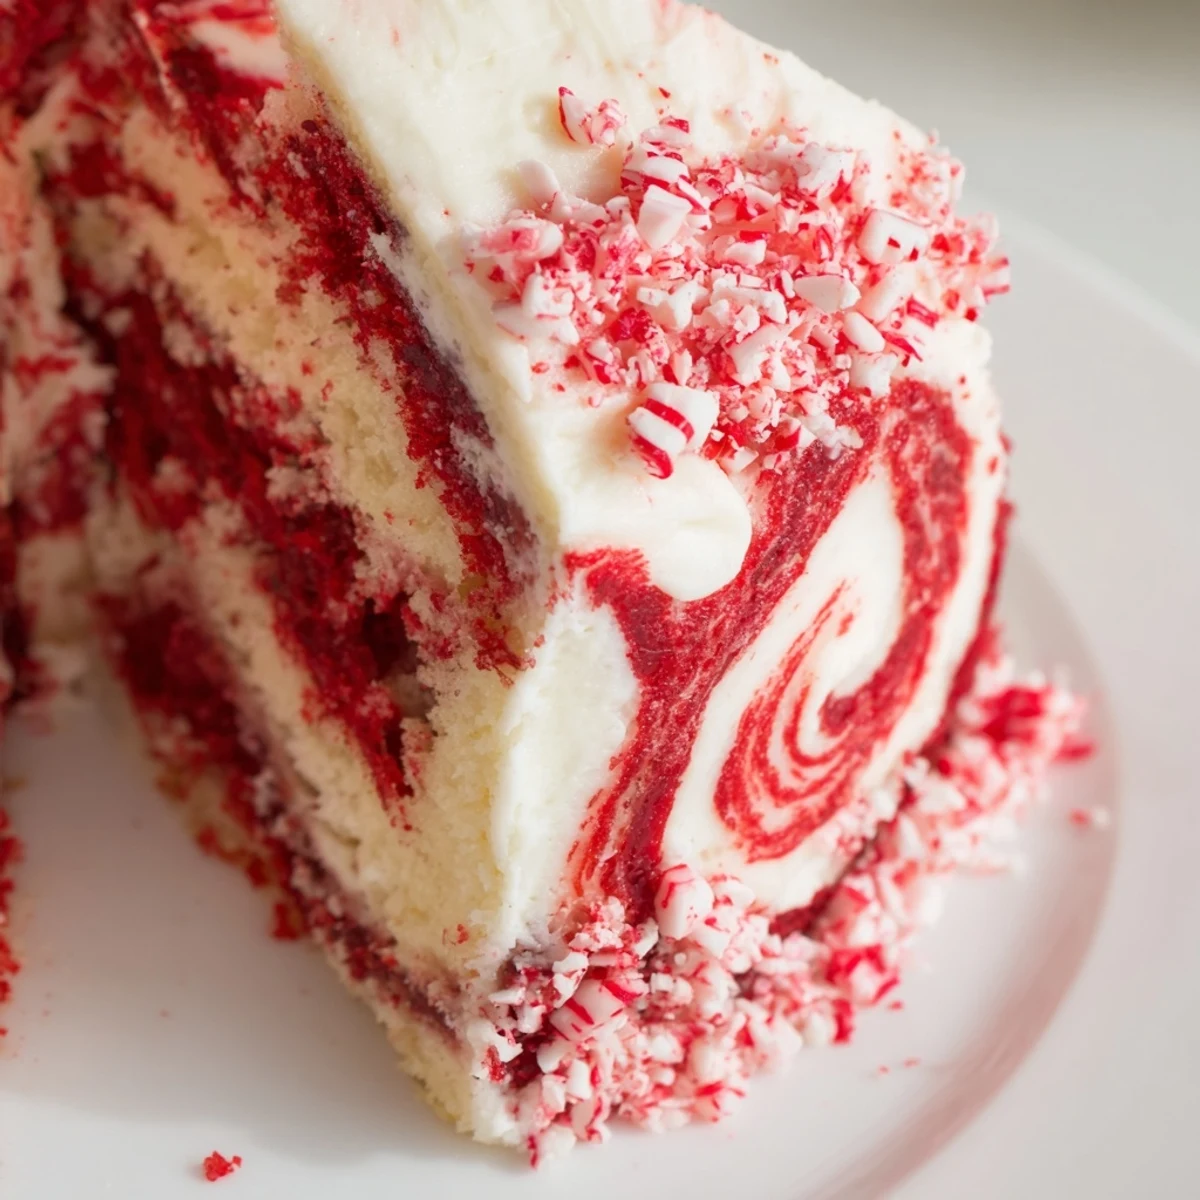
- Crushed peppermint candies (for decoration): A finishing touch that adds crunch and reinforces that festive peppermint moment.
Instructions
- Prep your pan and preheat:
- Set your oven to 350°F and get your 9-inch pan ready with butter and flour or parchment—this ensures even baking and makes removal stress-free. A hot oven waiting for your batter means it rises evenly from the start.
- Dry ingredients come first:
- Whisk flour, baking powder, and salt together in a bowl and set it aside. This distributes the leavening evenly so you don't get dense pockets in your finished cake.
- Cream butter and sugar:
- Beat them together until the mixture looks pale and fluffy, usually about 3 minutes. You're incorporating air here, which is what gives the cake its tender crumb.
- Add eggs one by one:
- After each egg goes in, beat well so it fully incorporates—this creates emulsion and helps everything bind together smoothly.
- Alternate wet and dry ingredients:
- Start and end with flour, adding in three additions each, mixing just until combined. Overmixing develops gluten and toughens the cake, so restraint is your friend here.
- Divide and tint the batter:
- Split the batter in half and stir red gel coloring into one half until it's a vibrant red that makes you smile. The gel won't water down your batter like liquid coloring would.
- Create the swirl:
- Drop alternating dollops of plain and red batter into the pan, then use a skewer or knife to gently swirl them together—think delicate figure-eights, not aggressive mixing. The magic happens when the colors just barely blend.
- Bake until done:
- Bake for 30 to 35 minutes until a toothpick comes out clean and your kitchen smells like a holiday. The cake will be golden and spring back when gently touched.
- Cool with patience:
- Let it cool in the pan for 10 minutes so it sets, then turn it out onto a wire rack to cool completely. Frosting a warm cake is a disaster, so give it time.
- Make the frosting:
- Beat softened butter until creamy, then gradually add sifted powdered sugar, milk, peppermint extract, and a pinch of salt. Beat until it's smooth and fluffy enough to spread in soft swoops.
- Frost with flair:
- If you want a swirl effect, tint a small portion of frosting red and swirl it through the white frosting before spreading it on. It's like painting with butter.
- Finish and serve:
- Top with crushed peppermint candies for crunch and color, slice, and watch people's faces light up.
 Save
Save The moment that really locked this recipe into my heart was watching my neighbor's daughter ask to take the leftover slice home and then text me the next morning to say she'd eaten it for breakfast with coffee. That's when I knew this cake transcends dessert—it's comfort and celebration in one slice.
Why the Red and Peppermint Combo Works
There's something about the combination of vibrant red and refreshing peppermint that instantly reads as festive without being heavy or exhausting. The peppermint extract is bright and cooling, which makes the sweetness feel balanced, and the red swirl gives the cake visual drama that makes people want to photograph it. I've learned that peppermint is actually an underrated flavor in baking—most people think it's only for candy canes, but it makes cakes feel sophisticated when used thoughtfully.
Storage and Make-Ahead Tips
This cake actually improves after a day in the fridge because the flavors deepen and meld together—the peppermint becomes more sophisticated and the cake stays moist. Keep it in an airtight container and it'll stay fresh for up to four days, or you can freeze the unfrosted cake layers for up to a month. If you're making this for a party, bake the cake the day before and frost it the morning of, which takes pressure off your timeline.
Variations and Personal Touches
Once you master this base, you can play with it endlessly—white chocolate peppermint, dark chocolate ganache topping, or even a peppermint buttercream instead of regular frosting. I've also made this in a cupcake format for parties, which is honestly easier because there's no swirling involved and everyone gets their own perfect portion. The beauty of this recipe is that it's flexible enough to adapt to whatever mood or occasion you're celebrating.
- For cupcakes, divide the batter among 18 to 20 liners and bake for 18 to 20 minutes instead of 30 to 35.
- Gel food coloring really is the difference between a vibrant red and a muted pink, so don't compromise on this one ingredient.
- If your peppermint extract seems too strong when you taste the batter, trust that baking mellows it out and the frosting will balance it perfectly.
 Save
Save This cake has become my go-to for celebrating anything that feels special, and I hope it becomes yours too. There's something magical about serving a dessert that tastes as good as it looks.
Recipe FAQs
- → How do I create the red swirls?
-
Divide the batter and tint half with red gel food coloring. Alternate spoonfuls of plain and colored batter into the pan, then gently swirl with a skewer to create a marbled effect.
- → Can I use liquid food coloring instead?
-
Gel food coloring is recommended for vibrant color without watering down the batter, unlike liquid food coloring which may affect texture.
- → What gives the cake its minty flavor?
-
Peppermint extract is added to both the batter and frosting for a refreshing, cool taste that complements the sweetness.
- → How long should the cake cool before frosting?
-
Allow the cake to cool completely on a wire rack, about 30-40 minutes, to ensure frosting applies smoothly without melting.
- → Can this be made into cupcakes?
-
Yes, divide the batter among cupcake liners and bake for 18-20 minutes. The swirling technique can be applied in cupcake cups as well.
- → What tools are needed for swirling?
-
A skewer or a knife works best to gently create the swirl pattern without overmixing the batters.
