 Save
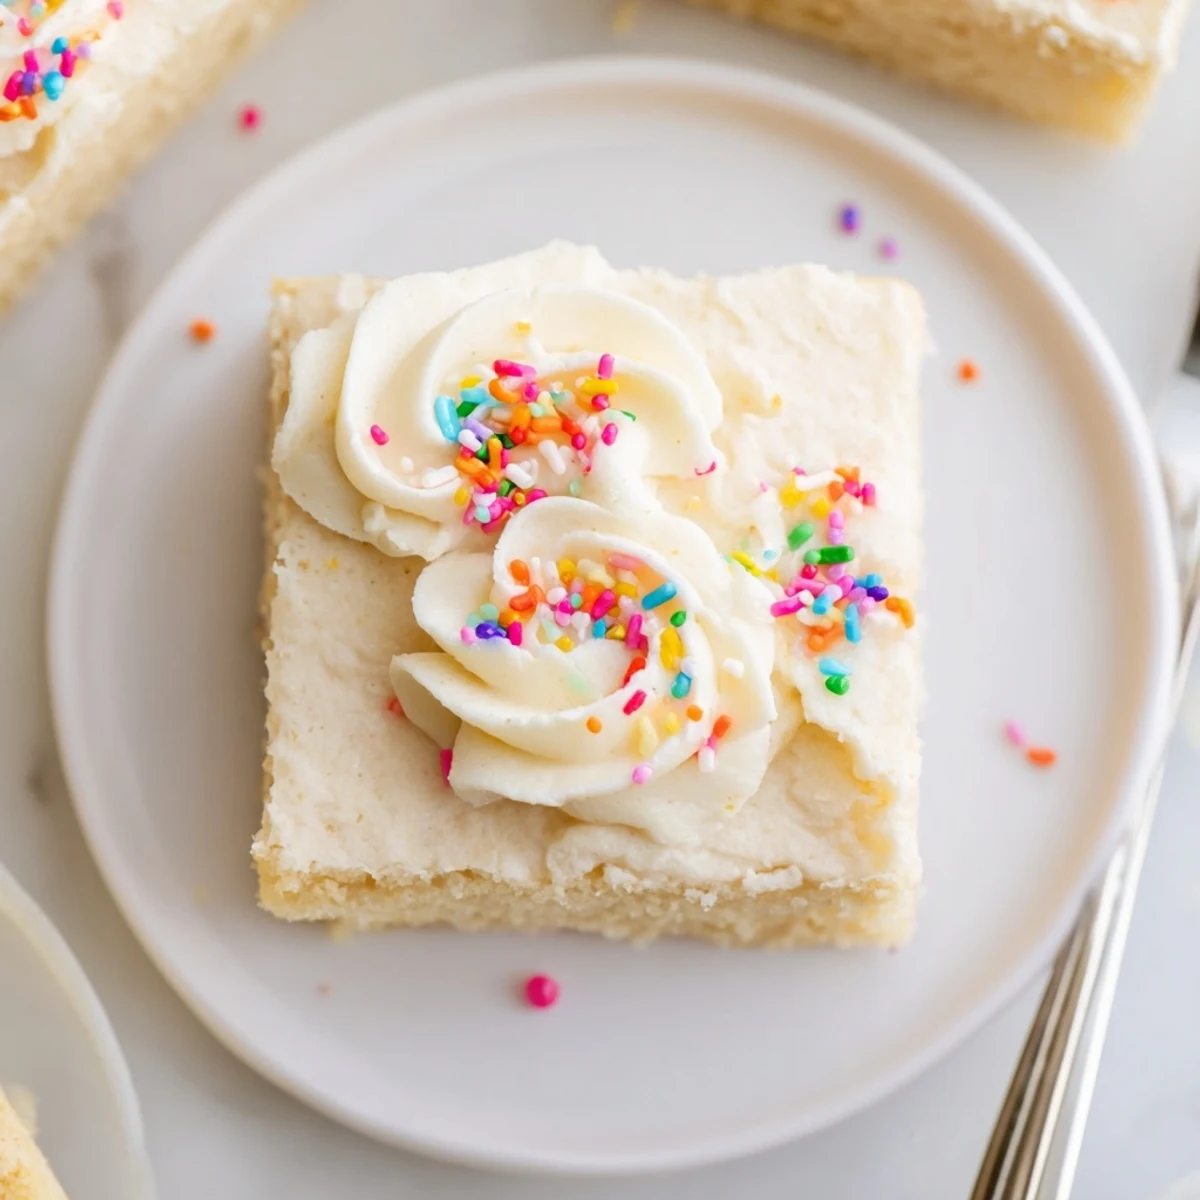
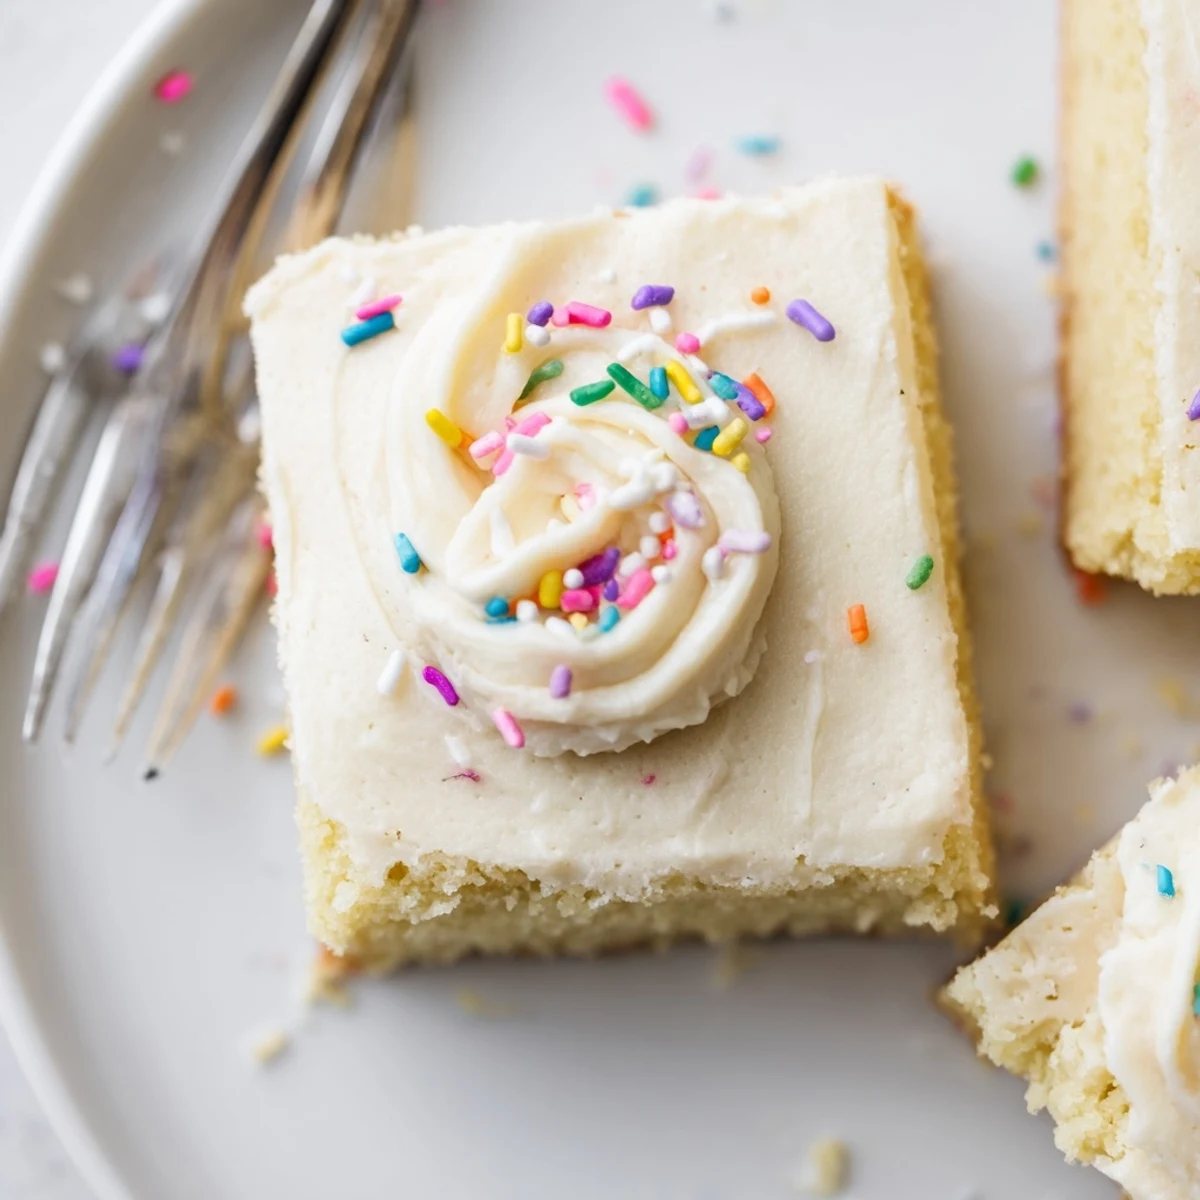
Save These frosted sugar cookie bars bake up soft and buttery in a 9x13-inch pan, yielding about 24 bars. Prep takes roughly 20 minutes and baking 16–18 minutes; cool completely before spreading the creamy vanilla frosting. Avoid overmixing the dough for a tender crumb, press it evenly in the pan, and finish with colored frosting and sprinkles. Store airtight at room temperature up to 3 days or refrigerate to extend freshness.
The smell of butter and sugar creaming together in a bowl is one of those small kitchen magics that can turn an ordinary Tuesday into something worth remembering, and these frosted sugar cookie bars deliver that warmth in every single bite. I stumbled onto the bar version of sugar cookies during a chaotic holiday season when rolling and cutting individual cookies felt impossible, and honestly I never looked back. They have all the soft, tender charm of a classic sugar cookie but require a fraction of the effort. One pan, one bake, and you have a crowd sized dessert that disappears embarrassingly fast.
My niece once declared these better than birthday cake, and she was holding a slice of actual birthday cake when she said it. I had made a tray of these for her school bake sale, fully expecting the brownies next to them to steal the show, but by noon the teacher sent me a photo of an empty pan with a sticky note that read thank you in wobbly handwriting. That moment sealed it. These bars became my go to for every potluck, celebration, and random Friday that called for something sweet.
Ingredients
- 2 1/2 cups (320g) all-purpose flour: The backbone of the cookie base, and measuring by weight rather than cups will save you from dry, crumbly bars every time.
- 1/2 teaspoon baking powder: Just enough lift to keep the bars soft without making them cakey, so resist the urge to add more.
- 1/2 teaspoon salt: This small amount sharpens every flavor and keeps the sweetness from becoming one dimensional.
- 3/4 cup (170g) unsalted butter, softened: Softened butter means you can press a gentle indent into it without resistance, and this texture is what creates that dreamy tender crumb.
- 1 cup (200g) granulated sugar: Standard white sugar gives the cookie its classic clean sweetness and helps achieve those lightly golden edges.
- 1 large egg: Binds everything together and adds richness, and it should be at room temperature so it blends seamlessly into the butter mixture.
- 2 teaspoons pure vanilla extract: Do not skimp here, because good vanilla is the quiet hero that makes these taste homemade rather than store bought.
- 1/4 cup (60ml) whole milk: Loosens the dough just enough so it presses smoothly into the pan without fighting you.
- 1/2 cup (115g) unsalted butter, softened (for frosting): The foundation of a frosting that actually tastes like butter and not like sweetened shortening.
- 2 cups (240g) powdered sugar: Gives the frosting its signature smooth thickness and that slight glossy finish when you spread it.
- 2 tablespoons heavy cream or milk: Adjust the liquid gradually until the frosting reaches a spreadable but not runny consistency.
- 1 teaspoon pure vanilla extract (for frosting): A second hit of vanilla in the frosting doubles down on that warm, familiar flavor.
- Pinch of salt: A tiny pinch in the frosting balances the powdered sugar and makes the flavor surprisingly complex.
- Food coloring (optional): Gel food coloring works best because it gives vivid color without thinning out your frosting.
- Assorted sprinkles: The more the merrier, and rainbow sprinkles make these instantly festive without any extra effort.
Instructions
- Preheat and prepare your pan:
- Set your oven to 350 degrees Fahrenheit and line a 9 by 13 inch baking pan with parchment paper, leaving overhang on the sides so you can lift the whole slab out later. Lightly grease the parchment so nothing sticks.
- Whisk the dry ingredients:
- In a medium bowl, whisk together the flour, baking powder, and salt until evenly distributed. Setting this aside now means you can work quickly once the wet ingredients are ready.
- Cream butter and sugar:
- In a large mixing bowl, beat the softened butter and granulated sugar together with an electric mixer on medium speed until the mixture looks pale, light, and fluffy, which usually takes about 2 to 3 minutes. Scrape down the sides of the bowl once or twice so everything incorporates evenly.
- Add egg and vanilla:
- Beat in the egg and vanilla extract until the mixture is smooth and well combined. You should see a silky, cohesive batter forming at this stage.
- Incorporate milk and dry ingredients:
- Mix in the milk, then gradually add the flour mixture on low speed, mixing only until the last streak of flour disappears. Overmixing is the enemy of tender cookie bars, so stop the mixer the moment everything comes together.
- Press dough into the pan:
- Transfer the soft dough into your prepared pan and use a spatula or lightly greased hands to press it into an even layer reaching all the corners. Take your time here because an uneven layer means uneven baking.
- Bake until just set:
- Bake for 16 to 18 minutes, checking at the 16 minute mark for lightly golden edges and a center that no longer jiggles when you gently shake the pan. These bars will continue to set as they cool, so pulling them out slightly underdone is actually perfect.
- Cool completely:
- Let the cookie base cool entirely in the pan on a wire rack before you even think about frosting. Warm cookie plus buttercream frosting equals a melted mess you do not want to deal with.
- Make the frosting:
- In a large bowl, beat the softened butter until creamy and smooth, then gradually add the powdered sugar, heavy cream, vanilla, and salt. Beat on medium high speed until the frosting is fluffy and spreadable, and add food coloring now if you are using it.
- Frost and decorate:
- Spread the frosting evenly over the completely cooled cookie base using an offset spatula for the smoothest finish. Shower the top generously with sprinkles while the frosting is still soft so they stick, then cut into 24 bars and serve.
 Save
Save The real magic of these bars hit me at a neighborhood block party when a quiet elderly man named Harold walked over for a second piece and told me they tasted exactly like something his mother used to make. He stood there holding the bar with both hands, lost in some private memory, and I realized that sometimes the simplest recipes carry the heaviest emotional weight.
Getting the Cookie Base Right
The dough for these bars is softer and sticker than traditional roll out sugar cookie dough, and that is completely intentional. That extra moisture from the milk is what keeps the baked bars tender rather than stiff. When you press the dough into the pan, dampening your fingers or the back of a spoon with a tiny bit of water prevents sticking without adding extra flour, which would toughen the crumb. Think of it as gently nudging the dough into place rather than packing it down tightly.
Building Better Frosting
Butter temperature is the single most important factor in whether your frosting turns out silky or grainy, and I learned this the hard way after many lumpy batches. If your butter is too cold, the powdered sugar will not blend smoothly and you will feel gritty sugar crystals no matter how long you beat it. If the butter is too warm or melted, the frosting becomes thin and greasy instead of thick and luxurious. The sweet spot is butter that holds its shape when you press it but yields easily under your finger.
Storage and Make Ahead Advice
These bars store beautifully, which makes them an excellent make ahead dessert for busy weeks. Keep them in an airtight container at room temperature for up to three days, or refrigerate them for up to a week, though I recommend letting chilled bars sit out for about twenty minutes before serving so the cookie base softens back up. You can also freeze the unfrosted cookie slab wrapped tightly in plastic wrap for up to two months, then thaw and frost when you are ready.
- If stacking bars in a container, place a sheet of parchment between layers to keep the frosting from smudging.
- For the cleanest cuts, use a sharp knife and wipe it clean between each slice.
- Remember that refrigerated bars will firm up, so always let them come closer to room temperature for the softest, most authentic texture.
 Save
Save Every time I make these bars I think about how the best recipes are not always the fanciest ones, but the ones that disappear fastest from the tray. Frost them generously, scatter sprinkles without restraint, and watch how quickly a simple pan of cookie bars can make a whole room smile.
Recipe FAQs
- → How do I know when the bars are done baking?
-
Look for lightly golden edges and a center that appears set but still slightly soft. The bars will firm as they cool—avoid waiting for a fully browned center to keep them tender.
- → How can I prevent the bars from becoming dry?
-
Do not overbake and mix just until ingredients are combined. Use room-temperature butter and press the dough evenly into the pan to promote even baking and a moist interior.
- → How do I get smooth, spreadable frosting?
-
Beat softened butter until creamy, then add powdered sugar gradually with heavy cream or milk. Adjust cream by a teaspoon at a time until you reach a spreadable consistency; chill briefly if it becomes too loose.
- → Can these bars be frozen?
-
Yes. Freeze uncut, unfrosted bars wrapped tightly in plastic and foil for up to 2 months. Thaw completely, then frost and decorate before serving for best texture.
- → What substitutions work for dietary needs?
-
Swap a gluten-free flour blend cup-for-cup for all-purpose flour for a gluten-free variation. Use dairy-free butter and plant milk in the frosting to make them dairy-free.
- → How can I cut neat bars after frosting?
-
Chill the frosted pan briefly to firm the frosting, then use a sharp knife wiped clean between cuts. For cleaner edges, score lines first and cut with a single smooth motion.
